
Homemade Angel Food Cake Recipe: How I Finally Got That Light, Fluffy Texture

Homemade Angel Food Cake Recipe: How I Finally Got That Light, Fluffy Texture

The first time I tried baking angel food cake from scratch, I thought it would be pretty simple. I mean, the ingredient list looked short and harmless. Egg whites, sugar, flour… how hard could it be?

Well, let’s just say my first attempt came out looking more like a sad sponge than a cloud-like cake. It tasted okay, but it was dense and kind of rubbery. Definitely not the tall, airy angel food cake I was hoping for.

After a few more tries—and a couple mistakes that were honestly pretty avoidable—I finally figured out the tricks that make homemade angel food cake work. Once the method clicked, the results were amazing: tall, soft cake with that delicate texture that practically melts in your mouth.

So if you’ve ever been curious about making angel food cake at home, let me walk you through the recipe and a few lessons I learned along the way.

What Makes Angel Food Cake Unique?

Angel food cake is very different from most cakes.

Unlike butter cakes or sponge cakes, it contains no butter, no oil, and no egg yolks.

Instead, the structure comes almost entirely from whipped egg whites.

Because of that, the cake becomes:

Extremely light
Soft and airy
Low in fat

The texture should feel almost like a fluffy cloud.

That’s actually where the name “angel food cake” supposedly comes from—it’s light enough for angels.

Ingredients for Homemade Angel Food Cake

The ingredient list is simple, but the technique matters a lot.

Main Ingredients

1 cup cake flour
1 ½ cups granulated sugar
12 large egg whites (room temperature)
1 teaspoon cream of tartar
1 teaspoon vanilla extract
¼ teaspoon salt

That’s it.

But each ingredient plays a specific role in creating the cake’s airy structure.

Why Cake Flour Matters

Cake flour is lighter and finer than all-purpose flour.

This helps keep the cake soft and delicate.

I once tried making angel food cake with regular flour, and the texture turned out heavier than it should have been.

Cake flour really does make a difference.

Step 1: Prepare the Oven and Pan

Preheat the oven to 325°F (163°C).

Use a tube pan, also called an angel food cake pan.

Important note: do NOT grease the pan.

That might sound strange, but the batter needs to cling to the sides of the pan in order to rise properly.

The first time I made this cake, I greased the pan out of habit… and the cake collapsed. Lesson learned.

Step 2: Sift the Flour and Sugar

In a bowl, sift together:

Cake flour
Half of the sugar (¾ cup)

Sifting helps remove lumps and keeps the cake light.

Angel food cake batter is very delicate, so even small lumps can affect the final texture.

Step 3: Beat the Egg Whites

Place the egg whites in a large mixing bowl.

Make sure the bowl is completely clean and free of grease.

Even a small amount of fat can prevent the egg whites from whipping properly.

Start beating the egg whites on medium speed until they become foamy.

Step 4: Add Cream of Tartar

Once the egg whites are foamy, add the cream of tartar.

This ingredient helps stabilize the egg whites and keeps them from collapsing.

Continue beating until soft peaks form.

The first time I made angel food cake, I skipped cream of tartar because I didn’t have it. Big mistake. The structure just wasn’t the same.

Step 5: Gradually Add Sugar

Slowly add the remaining sugar while beating the egg whites.

Add it about one tablespoon at a time.

Keep beating until stiff, glossy peaks form.

This step takes a little patience, but it’s worth it.

The egg whites should look thick and shiny, almost like marshmallow fluff.

Step 6: Add Vanilla and Salt

Gently mix in:

Vanilla extract
Salt

At this stage, the mixture should still be fluffy and smooth.

Try not to overmix.

Step 7: Fold in the Flour Mixture

Now comes the most delicate step.

Gradually sift the flour mixture over the whipped egg whites.

Then gently fold it in using a spatula.

Do this slowly and carefully.

If the batter is stirred too aggressively, the air in the egg whites will collapse.

And trust me, once that air is gone… the cake won’t rise properly.

Step 8: Transfer the Batter to the Pan

Pour the batter into the ungreased tube pan.

Use a spatula to smooth the top gently.

Sometimes I tap the pan lightly on the counter to remove large air pockets.

But be gentle—this batter is fragile.

Step 9: Bake the Cake

Place the pan in the oven and bake for 35 to 40 minutes.

The cake should turn golden brown and spring back when lightly touched.

Another good sign is when cracks appear on the top surface.

The smell during this stage is amazing—sweet, vanilla, slightly toasted.

Step 10: Cool the Cake Upside Down

This step is very important.

Immediately after removing the cake from the oven, turn the pan upside down.

Many tube pans have small feet designed for this.

Cooling upside down prevents the cake from collapsing under its own weight.

The first time I skipped this step, my cake sank almost instantly. It was sad to watch.

Removing the Cake from the Pan

Once the cake is completely cool, run a thin knife around the edges of the pan.

Gently loosen the cake and remove it.

Angel food cake is soft and delicate, so take your time here.

Sometimes a few crumbs break off, which is totally normal.

How Angel Food Cake Should Taste

A properly baked angel food cake should be:

Light and airy
Soft and slightly springy
Mildly sweet with vanilla flavor

The texture should feel almost fluffy.

Not dense, not heavy, and definitely not rubbery.

Ways to Serve Angel Food Cake

Angel food cake is delicious on its own, but it pairs well with many toppings.

Fresh Berries

Strawberries, blueberries, or raspberries add freshness and color.

Whipped Cream

Light whipped cream complements the airy texture of the cake.

Lemon Glaze

A simple lemon glaze adds a bright citrus flavor.

Common Angel Food Cake Mistakes

Angel food cake can be a little tricky if you’re new to it.

Here are a few mistakes I’ve made before.

Greasing the Pan

This prevents the batter from climbing the sides.

The cake needs grip to rise.

Using Cold Egg Whites

Room temperature egg whites whip more easily.

They also create more volume.

Overmixing the Batter

Folding the flour too aggressively deflates the egg whites.

Gentle folding is key.

Tips That Helped Me Improve This Cake

After baking angel food cake several times, a few tricks made the process easier.

Separate Eggs Carefully

Even a small drop of yolk can prevent egg whites from whipping properly.

Use a Clean Mixing Bowl

Grease or oil residue can ruin whipped egg whites.

Glass or metal bowls work best.

Be Patient While Whipping Egg Whites

Rushing this step can affect the cake’s texture.

Properly whipped egg whites create the cake’s structure.

Final Thoughts on Homemade Angel Food Cake

Angel food cake might seem intimidating at first, but once you understand how the egg whites create the structure, the recipe becomes much easier.

The key lessons I learned were:

Whip egg whites properly
Fold ingredients gently
Cool the cake upside down

Once those steps are followed, the result is a beautiful, airy cake that feels incredibly light.

And honestly, when you slice into a homemade angel food cake and see that fluffy interior… it’s pretty satisfying knowing you made it from scratch.

A one-bowl almond cake recipe that’s nutty and not too sweet

A one-bowl almond cake recipe that’s nutty and not too sweet

Almond Cake

Active time:15 mins

Total time:1 hour 10 mins

Servings:10 to 12 (makes one 9- or 10-inch cake)

Active time:15 mins

Total time:1 hour 10 mins

Servings:10 to 12 (makes one 9- or 10-inch cake)

This recipe comes from the Eat Voraciously newsletter. Sign up here to get one weeknight dinner recipe, tips for substitutions, techniques and more in your inbox Monday through Thursday.

I rarely mention sweets in this column because it’s primarily about interesting, adaptable and relatively easy dinner-appropriate recipes. But this week we’ve gone off script in honor of my one true love, pastry. To celebrate eating voraciously and as a special treat, I’m sharing one of my favorite cake recipes ever. It’s a one-bowl almond cake that comes together quickly, requires fewer than 10 ingredients and takes less than an hour to bake.

It’s a recipe I learned when I worked in restaurant kitchens in college, and I have since adapted it to be buttery and nutty but not too sweet. I make it often, for fancy dinner parties or weekend snacking, birthdays or brunches. I was reminded of it earlier this year when I tasted a similar cake at the Duck and the Peach in D.C.’s Capitol Hill neighborhood. That night, my friend and I went all in on pastry chef Rochelle Cooper’s desserts.

This is a longtime habit of mine. Whenever I go out to dinner, there’s a good chance I’ll ask my dining companion to linger a little longer at the table with me so I can order the entire dessert menu. Sometimes I’ll do it when I’m dining alone, but it’s more fun to share. I love the drama of it, the glee, the way the server at first thinks I’m joking, the way a procession of plated desserts through a dining room causes other diners to turn their heads, the way the table looks when it’s covered in cakes, tarts, custards and all sorts of sweet pastry.

This habit started in high school, continued through college and then cemented itself in my life when I went to pastry school and began working as a pastry chef in New York. My first pastry assistant job was at a Midtown restaurant that was known for its desserts. The chef and owner paid close attention to the pastry department. He (rightly!) believed that last impressions were important. When a table of his friends or investors or some other Very Important People came in to dine, he’d make sure they finished their meal with what he called a “Dessert Storm” — he would tell the server to order all of the desserts on the menu for that table and then, as the pastry department scrambled to plate everything, he’d flicker the lights in the kitchen on and off, mimicking a thunderstorm’s lightning.

On an adrenaline high, I loved the rush of sending out so much dessert, loved peeking into the dining room to see the diners murmur and gush with delight as the plates landed on the table, loved watching their lips curl into smiles as they took a bite.

At the next restaurant I worked at, the chef didn’t pay as much attention to dessert. He didn’t ask to taste our latest experiments or order rounds of dessert for his favorite tables. The servers preferred to sell cocktails and wine; dessert was an afterthought. What bummed me out the most was when I would be standing in front of my station, ready to plate dessert for the last few tables around midnight or 1 a.m., and a server would come into the kitchen to say the diners were too full for dessert. Crushed, I’d (often) have to toss all of my prep — the unbaked souffles, the freshly made pastry shells, the delicate cakes and cookies, the sauces, the ice cream and sorbet.

That’s when I realized that ordering the whole dessert menu wasn’t just fun for me and my friends. It was also a way to support pastry chefs, their creativity and their labor. So, when you’re out to dinner, especially if it’s a special occasion, if you’re physically and financially able, don’t skip dessert. There’s probably a pastry cook in the back of the kitchen hoping against hope that you’ve saved some room.

And the next time you’re in the mood for cake at home, give this almond cake recipe a try. Everyone I’ve ever made it for has loved it. Unlike a lot of almond cakes, it doesn’t sink in the center but stays evenly aloft after it cools. It needs no frosting, though you could turn it into a layer cake with vanilla buttercream and strawberry or peach jam filling. Its adaptability and plush density make it easy to love — and ensure it keeps well on your counter for a few days. A dollop of crème fraîche or whipped cream is nice on the side, though it’s not necessary. I love serving it simply with fresh, roasted, macerated or sauteed seasonal fruit.

  • This recipe will work with vegan butter, but I have not tested it with a vegan egg substitute.
  • If you can’t find almond paste >> you can make it.
  • I love this cake with fruit in every season: fresh citrus in the winter, lightly sugared berries in the spring, fresh or roasted stone fruit in the summer, and sauteed apples or pears in the fall.

Want to save this recipe? Click the bookmark icon at the top of this page, then go to Saved Stories in My Post.

Scale this recipe and get a printer-friendly, desktop version here.

  • 16 tablespoons (2 sticks/226 grams) unsalted butter, at room temperature, plus more for greasing the pan
  • 7 ounces (198 grams) almond paste, at room temperature
  • 3/4 cup plus 2 tablespoons (175 grams) granulated sugar
  • 1 teaspoon baking powder
  • 1/2 teaspoon almond extract
  • 1/4 teaspoon fine salt
  • 6 large eggs, at room temperature
  • 1 1/4 cups (155 grams) all-purpose flour, sifted
  • Powdered sugar, for serving (optional)
  • Fresh or cooked fruit, for serving (optional)

Position a rack in the middle of the oven and preheat to 325 degrees. Lightly grease a 9- or 10-inch cake pan, line the bottom with parchment and lightly grease the parchment.

In a stand mixer fitted with the paddle attachment, or using a large bowl and a handheld mixer, beat the butter, almond paste, sugar, baking powder, almond extract and salt on medium speed until well combined and smooth, about 5 minutes.

Add the eggs one at a time, beating well after each addition. Stop to scrape down the bowl a few times to ensure the batter is well combined. After you’ve added the last egg, scrape down the bowl again and beat the batter on medium speed for about 30 seconds. It will look slightly separated at this point, and that’s normal.

If using a stand mixer, unlock the bowl. Using a silicone spatula, partially fold in the flour. Relock the bowl and mix on low speed just until the batter looks smooth, about 30 seconds.

Transfer the batter to the prepared pan and, using a small offset spatula or butter knife, smooth the top. Bake for 40 to 55 minutes, or until the cake springs back when lightly pressed in the center and the top is deep golden brown. (It will take longer to bake if you use a 9-inch pan and less time in a 10-inch pan.)

Cool in the pan on a wire rack for 30 minutes, then invert the cake onto the rack, remove the parchment paper and turn right side up. Allow to cool about 20 more minutes, or until slightly warm. Serve immediately or at room temperature with powdered sugar and fresh or cooked fruit on top or on the side, if desired.

Per serving (1 slice), based on 12

Calories: 350; Total Fat: 22 g; Saturated Fat: 11 g; Cholesterol: 134 mg; Sodium: 119 mg; Carbohydrates: 33 g; Dietary Fiber: 1 g; Sugar: 21 g; Protein: 6 g.

This analysis is an estimate based on available ingredients and this preparation. It should not substitute for a dietitian’s or nutritionist’s advice.

From staff writer G. Daniela Galarza.

Tested by G. Daniela Galarza; email questions to voraciously@washpost.com.

Scale this recipe and get a printer-friendly, desktop version here.

Browse our Recipe Finder for more than 10,000 Post-tested recipes.

Did you make this recipe? Take a photo and tag us on Instagram with #eatvoraciously.

Catch up on this week’s Eat Voraciously recipes:

Monday: One-Bowl Cheesy Jumbo Muffins With Prosciutto and Chives

Tuesday: Spring Onion and Ham Tart

Wednesday: Sourdough Gruyere Popovers

More recipes from Eat Voraciously

Better Than Sex Cake (Easy Recipe)

Better Than Sex Cake (Easy Recipe)

With a combination of chocolate, caramel, and toffee, the Better Than Sex cake is as tantalizing as advertised.

One bite will have you weak in the knees.

Want to save this recipe? Enter your email below and we’ll send the recipe straight to your inbox!

Rich and Indulgent Better Than Sex Cake with Nuts

Featuring moist chocolate cake laced with luscious caramel and covered with whipped cream, it’s about as dreamy as dessert gets. 

It’s also finished with bits of crunchy chocolate-covered toffee, making it incredibly decadent.

Rich, indulgent, and absolutely divine, this Better Than Sex cake is even better than you can imagine.

Better Than Sex Chocolate Cake Recipe

This bad boy starts off with Devil’s Food cake. So already you know it’s gonna be insanely good!

But it’s not just a chocolate cake. It’s a chocolate poke cake filled with caramel that seeps into every nook and cranny.

Top it off with whipped cream and chopped toffee bits, and it’s impossible to resist.

And if you’re serving kids, feel free to call it by another name.

“Better Than Best cake”, “Better Than Anything cake”, or “Robert Redford cake” are some of the most popular alternatives.

What’s a Poke Cake?

A poke cake is a baked sponge cake with holes poked all over the top with a wooden spoon or skewer. Also known as a “poke-and-pour” cake, some kind of liquid or filling is then poured/spread over the top, such as caramel or pudding. It seeps into the holes, making it flavorful and super moist.

In some cases, you’ll see pockets of the filling, and in other recipes, the liquid is so thin, it soaks into the sponge.

Either way, it’s a terrific way to enhance and sponge or fix a dry cake.

Better Than Sex Cake Ingredients - Cake Mix, Eggs, Water, Oil, Sweetened Condensed Milk, Caramel, Whipped Topping and Toffee Bits

Ingredients 

This recipe is super straightforward and served right in the baking dish. So, like a good sheet cake, it needs minimal decorating.

Want to save this recipe? Enter your email below and we’ll send the recipe straight to your inbox!

Here’s what you’ll need:

  • Cake Mix – this recipe calls for Devil’s Food cake mix for the best, most chocolatey taste. Of course, you can use any cake mix you like (so long as it pairs well with caramel).
  • Eggs, Water, Oil – follow the instructions on the box to bake the cake.
  • Sweetened Condensed Milk + Caramel Sauce – they form the thick sauce that you’ll drizzle all over the cake, making it extra moist, rich, and decadent.
  • Whipped Topping – while you can also use freshly whipped cream, Cool Whip is more stable and won’t melt into the cake.
  • Toffee Bits – for a sweet and crunchy finish.

How to Make Better Than Sex Cake 

Since you’ll use a cake mix, this recipe couldn’t be easier. Just mix, bake, poke, pour, and serve!

1. Preheat the oven and gather the ingredients.

Preheat the oven to 350 degrees Fahrenheit (175°C) and lightly grease a 9×13-inch glass or white ceramic baking dish.

2. Make the cake per the instructions on the box.

Most box mixes use the same quantities and methods. But be sure to double-check the box and follow the instructions for the best results.

In most cases, you’ll whisk the eggs, oil, and water, then stir in the cake mix.

Bake the cake for the suggested amount of time, then let it cool for about 5 minutes before moving on to the “poke” step.

3. Make the filling.

While the cake is baking/cooling, combine the sweetened condensed milk and caramel in a saucepan over medium heat.

Stir until smooth, then set aside.

Feel free to add sea salt if you want a salted caramel flavor.

4. Poke holes over the cake and add the sauce.

As mentioned, you’ll need to let the cake cool for about five minutes before poking the holes.

But don’t let it go cold! You want the cake warm.

Use the top of a wooden spoon, skewers, chopsticks, or anything else with a round end to make the holes.

Poke all over the cake, but be sure to not go all the way through. Instead, only poke the holes about halfway down the sponge with an inch between each hole.

Then, pour the warm sauce all over the top and spread it out with a spatula.

5. Let the cake cool, then add the toppings.

Let the cake cool completely, then refrigerate it for at least 2 hours.

When you’re ready to serve, top it with whipped topping, toffee bits, and more caramel.

Serve as-is or with vanilla ice cream on top. Enjoy!

Better Than Sex Chocolate Cake with Toffee Bits and Whipped Cream

Recipe Tips

This is one of my absolute favorite dessert recipes because it’s impossible to mess up. That said, I have a few tips to guaranteed success:

  • Poke the cake while it’s warm. Sponge develops a slight crust on top as it cools, which can crack if you poke it.
  • Don’t poke the cake all the way through to the bottom. If you touch the baking dish on every poke, the sauce will seep out and under the sponge, making a tasty-gooey mess on the bottom.
  • Poke the holes evenly, about 1 inch apart. If the holes are too close to each other, the cake will turn out wet. If they’re too far apart, the filling won’t spread enough.
  • Leave the cake in the fridge for at least 2 hours before serving. This’ll give the cake time to absorb the filling, making it exceptionally rich and moist.
  • Use Cool Whip if you plan to make it ahead. It’s more stable than whipped cream. But if you plan to serve it right away, use whichever you prefer.

Variations

The thing I love about poke cakes is how customizable they are! 

This recipe makes a phenomenal cake, but you can also make a few swaps here and there to make an entirely different but equally delectable dessert. 

If you’re looking for inspiration, check out these suggestions:

  • Different Cake Flavors: change up the flavor with white, yellow, or even spiced cake mix.
  • Candy Toppings: if you’re not a toffee fan or can’t find Heath anywhere, use whatever candy bar you like. I love chopped Reese’s cups or M&Ms.
  • Chopped Cookies: decorate the cake with chopped Oreos, chocolate chip, or toffee cookies for a decadent finish. 
  • Mini Chocolate Chips: white, milk, dark, a combination of all three – go for whatever your taste buds tell you. 
  • Different Sauces: swap out the caramel for cream, hot fudge, or chocolate syrup.  
Slice of Homemade Better Than Sex Cake with Toffee Bits

Storage 

In case there are any leftovers, which is highly unlikely, cover the baking dish with plastic wrap and refrigerate the cake for up to 3 days.

Keep in mind, this will only work if you use Cool Whip or if you don’t add the whipped topping (like when making it ahead).

If you try to refrigerate whipped cream, it’ll start to go watery after a day or so.

So if you plan to make it ahead, just make and bake the cake, then add the caramel.

Cover and refrigerate the cake for up to 2 days, then add the topping and serve.

To Freeze

Want to keep it around for longer? Freeze it!

This method will only work for the baked and poked caked – not the finished cake with creamy topping.

To freeze, cover the pan with plastic wrap and aluminum foil, label accordingly, and freeze for up to 3 months.

Let the cake thaw in the fridge before serving.

More Cake Recipes You’ll Love

Too Much Chocolate Cake
Portillo’s Chocolate Cake
Death by Chocolate
One-Bowl Chocolate Cake
Chocolate Lava Mug Cake

Better Than Sex Cake

This recipe for coconut meringue cake may really be the ‘world’s best’

This recipe for coconut meringue cake may really be the ‘world’s best’

Coconut Meringue Layer Cake

Active time:1 hour

Total time:3 hours, plus chilling time

Servings:8-10

Active time:1 hour

Total time:3 hours, plus chilling time

Servings:8-10

Comment

I first stumbled upon an old-fashioned blitz torte, a German layer cake traditionally filled with custard and topped with meringue, when researching recipes for my second cookbook, “The Vintage Baker.”

It’s the kind of cake alchemy of my dreams: A glossy, sweet meringue spread over cake batter and baked together until the meringue is bronzed and crisp while the cake reaches optimum moistness and fluffiness. Then it’s finished with a creamy, cool layer of custard, pastry or whipped cream sandwiched between the layers, taking this cake to the realm of otherworldly.

It’s no surprise that the cake is known as “Verdens beste,” or the “world’s best.” It’s officially called Kvaefjordkake, named after the Norwegian municipality of Kvaefjord, and is considered Norway’s national cake.

Lucky Norway. But also, lucky you.

The blitz torte is not difficult to assemble, and I’ve made it even easier. This version is assembled in a bowl with a whisk (no heavy equipment needed), and the filling is a simple whipped cream — no need to cook a custard or assemble a pastry cream. Plus, I have a few tips, tricks and substitutions for making this your best-ever cake, too.

Why coconut oil? Traditionally, a blitz torte’s batter is assembled in a stand mixer with softened butter. To streamline the process, this version calls for melted coconut oil. A liquid fat such as this one makes prep a breeze, as all you need is a bowl and a whisk to incorporate a liquid fat into your other ingredients. Unrefined coconut oil has a stronger coconut flavor than refined and is recommended here.

How do I melt coconut oil? Coconut oil is a solid fat at room temperature and is usually packaged in a glass container. To melt the oil, place the uncovered glass container in the microwave and cook on high power in 30-second bursts, stirring after each. Alternatively, you can place the uncovered jar in a small pot with about an inch of water and simmer the water over low heat until the oil melts. (The remaining coconut oil will resolidify as it returns to room temperature.)

Swirled brownies make a simple dessert even better

What can substitute for coconut oil? If you don’t have coconut oil in the pantry and don’t want to buy it, you can make this cake with vegetable oil or melted butter.

Double down on coconut: A blitz torte traditionally calls for whole milk, but full-fat coconut milk works beautifully in this coconut version. Be sure to stir the coconut milk solids into the liquid before measuring and adding to the batter.

What can substitute for coconut milk? If you don’t have coconut milk in the pantry and don’t want to buy it, you can substitute whole milk, perhaps with 3/4 teaspoon or so of coconut extract.

More coconut! Shredded and flaked: Two kinds of dried coconut make an appearance in this torte, each playing a different role. Sweetened shredded adds moisture, texture and coconut flavor to the layers, whereas the toasted and flaked, sprinkled atop the cake, contributes to the cake’s good looks and hides any meringue imperfections. If you don’t want to buy two different kinds of coconut, use shredded in the layers, then toast some and sprinkle it over the top of the cake as well.

A surprisingly unfussy addition to this cake, the meringue layers pack both a textural and visual punch. Whisking the whites just until they reach soft peaks will guarantee a meringue with enough volume to create a chewy, yet soft texture once baked.

What are soft peaks? A soft peak is reached when the meringue gently flops over at its tippity-top, creating a little downward, pointed curve. You can check this by stopping the mixer, detaching the whisk attachment or beater and turning it upside down: If the meringue droops down just at the top, you’re good to go.

Pastry cream or custard is traditional in a blitz torte, but whipped cream is a simpler, lighter alternative, making it a wonderful contrast to the rich, yolk-filled cake and sweet meringue. The coconut extract in the cream further pops the cake’s coconut flavor, but vanilla extract would also work, as would almond extract (which can be surprisingly neutral in flavor when added in small amounts, providing more of a nostalgic flavor than anything truly nutty). If using almond, reduce the extract to 1/2 teaspoon.

How to test for doneness: When testing the cake for doneness, you’ll need to poke a tester (preferably a long wooden skewer, as its rough edges will easily grab batter and/or crumbs) into the cake somewhat aggressively. Because you need to poke through the meringue layer to get to the cake, don’t be afraid to twist the tester a bit in the cake, to make sure you get an accurate sense of whether it is fully baked (a moist crumb or two on the tester indicates it’s ready).

Chocolate pretzel peanut ice cream bars reimagine a childhood favorite

How to remove the cake from the pan: Wait 20 minutes before removing the cake layers from their pans. If you try to remove them too soon, the meringue topping will stick when you invert them (been there, done that). If the meringue sticks despite your best efforts — perhaps because of humidity — attempt to remove the layers from the pan with two large spatulas. And if you do end up with any imperfections on the surface of the cake, they’re easy enough to hide. Just toast a little coconut — either flaked or shredded — and sprinkle it over the top layer of the cake. In addition to hiding any minor flaws, it adds a little toasty color that works beautifully with the oven-baked meringue, adding nice texture.

Despite the meringue bells and whipped cream whistles of a blitz torte, it’s a surprisingly easy cake to assemble and one that’s as much fun to make as it is to eat.

Coconut Meringue Layer Cake

If you prefer a more neutral flavor in the cake, use refined coconut oil, and for a more pronounced vibe — unrefined.

To toast the coconut, spread it on a baking sheet and place it in a 350-degree oven for 5 minutes after the cake layers are removed. Or, heat a medium skillet over medium heat and add the coconut. Toast it, stirring frequently, until it is light brown and crisp. Transfer to a plate to cool.

If you do not want to make your own sling, you can buy parchment rounds with tabs that hang over the sides of the pan for easy lifting.

Storage: The cake is best the day it’s made but can be lightly wrapped and refrigerated for up to 3 days. Remove leftovers about 30 minutes before serving.

Want to save this recipe? Click the bookmark icon at the top of this page, then go to Saved Stories in My Post.

Scale this recipe and get a printer-friendly, desktop version here.

  • Nonstick cooking spray
  • 1/2 cup plus 2 tablespoons (131 grams) coconut oil, melted (see note above)
  • 1 cup (200 grams) granulated sugar
  • 2 teaspoons vanilla extract
  • 4 large egg yolks, at room temperature
  • 2/3 cup (161 grams) unsweetened full-fat coconut milk, at room temperature
  • 1 1/2 teaspoons baking powder
  • 3/4 teaspoon fine salt
  • 1 1/2 cups (187 grams) all-purpose flour
  • 2/3 cup (57 grams) shredded sweetened coconut (optional)
  • 4 large egg whites, at room temperature
  • 1/4 teaspoon cream of tartar
  • 1/8 teaspoon fine salt
  • 3/4 cup (150 grams) granulated sugar
  • 1 1/4 cups (284 grams) heavy cream
  • 3 tablespoons confectioners’ sugar
  • 1 teaspoon coconut extract (optional)
  • 1 cup (170 grams) mixed berries, for serving (optional)
  • Toasted flaked coconut, for sprinkling (optional; see note above)

Make the cake batter: Position a rack in the middle of the oven and remove the racks above it; preheat to 350 degrees. Generously grease the sides and bottoms of two 8-inch cake pans with the cooking spray. Line the bottoms with parchment paper.

In a large bowl, whisk together the oil, sugar and vanilla until combined. Whisk in the egg yolks until the mixture looks thick, yellow and well-combined. Whisk in the coconut milk. Sprinkle the baking powder and salt over the bowl one at a time, whisking vigorously after each. Fold in the flour and shredded coconut, if using, just until the last streaks of flour disappear. Evenly divide the batter between the two pans — each pan should get about 360 grams of batter. Using a small offset spatula or a butter knife, smooth out the tops.

Make the meringue: In the bowl of a stand mixer fitted with the whisk attachment, or using a large bowl and a handheld mixer, beat together on medium speed the egg whites, cream of tartar and salt until frothy. Slowly pour in the sugar, increase the mixer speed to medium-high and beat until soft, thick, glossy peaks form (the peaks should bend a little at the top), 5 to 8 minutes. Divide the meringue between the two cake pans and, using a small offset spatula or butter knife, smooth it out over the batter.

Bake for about 30 minutes, or until the meringue has risen considerably (it will deflate, don’t worry) and is lightly browned, and a cake tester inserted into the cake comes out with a few moist crumbs. Testing the cake underneath the meringue is a little tricky, but you can be aggressive in searching for a few moist crumbs with at least one of the cakes, as it will be topped with the other.

As soon as the cakes are pulled from the oven, run a butter knife or a small offset spatula around the edges of the pans to release the meringue before it hardens and sticks.

Let the cakes cool in the pans on a wire rack for 20 minutes, before inverting them and then turning them right side up and letting them cool completely. If it’s humid, the meringue may stick a bit when you flip the cakes upside down — just sprinkle whichever layer becomes the top of the cake with toasted flaked coconut, and no one will be the wiser.

Make the whipped cream: In the bowl of a stand mixer fitted with the whisk attachment, or using a large bowl and a handheld mixer, beat the cream, confectioners’ sugar and coconut extract on medium-high speed until medium peaks form, about 5 minutes.

Spread the whipped cream over the meringue on the less-attractive layer (we know you love them both, but just pick one), sprinkle with the berries, if using, and top with the second layer. The meringue should be on top.

Press down very lightly on the top of the cake and sprinkle with toasted coconut to cover any meringue imperfections. Slice with a large serrated knife, wiping the blade between slices, and serve.

Calories: 492; Total Fat: 30 g; Saturated Fat: 22 g; Cholesterol: 115 mg; Sodium: 300 mg; Carbohydrates: 54 g; Dietary Fiber: 1 g; Sugar: 38 g; Protein: 5 g

This analysis is an estimate based on available ingredients and this preparation. It should not substitute for a dietitian’s or nutritionist’s advice.

From cookbook author Jessie Sheehan.

Tested by Suzy Leonard and Ann Maloney; email questions to voraciously@washpost.com.

Scale this recipe and get a printer-friendly, desktop version here.

Browse our Recipe Finder for more than 10,000 Post-tested recipes.

Did you make this recipe? Take a photo and tag us on Instagram with #eatvoraciously.

How To Make Boxed Cake Mix Taste Homemade

How To Make Boxed Cake Mix Taste Homemade

Though baking a cake from scratch will make delectable results, it’s not the only solution for earning dessert. Cake mixes are ideal if you’re shorter on time, lacking selected elements for a recipe, or simply just want an a lot easier method for baking a cake. The only difficulty? Cake mixes typically have a quite distinct flavor to them.


How do you spruce up a cake mix to make it style do-it-yourself? There are various methods to swap components, add combine-ins, or change up its composition to make your dessert that a lot superior. Consider just one swap or include multiple tips for the ideal tasting cake.


1. Swap Oil for Melted Butter

Most boxed cake mixes call for an ingredients checklist of eggs, oil, and drinking water. Several do-it-yourself cakes, even so, are designed with butter. Melted butter will boost the flavor of your cake, while delivering a moist, tender crumb. Swap the amount of money termed for on the cake mix box with the exact same volume of melted unsalted butter.


2. Exchange Water for Dairy

Cake mixes are developed for rapid and straightforward baking. Calling for h2o on the elements listing will make them practical and approachable. Including a liquid with a greater extra fat written content while will make your blend flavor just like it was produced from scratch. Use the exact same volume of milk in position for h2o, or test buttermilk to insert a contact of tang and create a fluffy crumb.


3 Increase With Extracts

Cake mixes generally incorporate synthetic flavorings, which participate in a function in that unique cake mix style. Increase a single to two teaspoons of a pure extract to make it taste like a from-scratch cake. Pure vanilla extract and pure almond extract are great choices, but you could also try lemon extract or orange extract paired with fresh citrus zest.


4. Incorporate Sour Product or Mayo

Want a splendidly moist, tender cake? Cake mixes really do not generally provide that texture on their personal. When you are adding the moist ingredients to the dry, combine in two tablespoons of sour product or mayonnaise.


5. Incorporate in Nuts      

Hoping for something extra than a basic cake? Your preferred carrot or hummingbird cake generally has nuts blended into the batter. Increase in 1 cup of chopped pecans or walnuts prior to transferring the batter to your geared up cake pan. This is an outstanding pairing for a white, yellow, or spice cake blend.


6. Make Homemade Frosting

Although it in some cases necessitates a lengthy record of ingredients to bake a cake from scratch, making handmade frosting necessitates significantly less. Instead of achieving for canned frosting, blend up your personal buttercream or product cheese frosting to elevate the flavor of your cake.


7. Layer With Fillings

Hoping to provide an elaborate dessert for your company viewing? Use a box mix as the base. Bake two or 3 8-inch cake rounds, and prep a do-it-yourself filling and frosting to set it all alongside one another! Homemade lemon curd or a whipped ganache filling is guaranteed to impress.


8. Transform it into a Poke Cake

Did you improve up with poke cakes served following dinner? Dish up this common, but use your cake combine as the base. Bake the cake and permit it cool. Then, use a wood decide to poke holes all in excess of the top rated. Blend your favourite pudding, pour it about the cake, and then insert handmade frosting. It will improve the taste tenfold and deliver again nostalgic recollections!

This Haroset Cake Recipe Is the Answer to Your Passover Dessert Blues

This Haroset Cake Recipe Is the Answer to Your Passover Dessert Blues

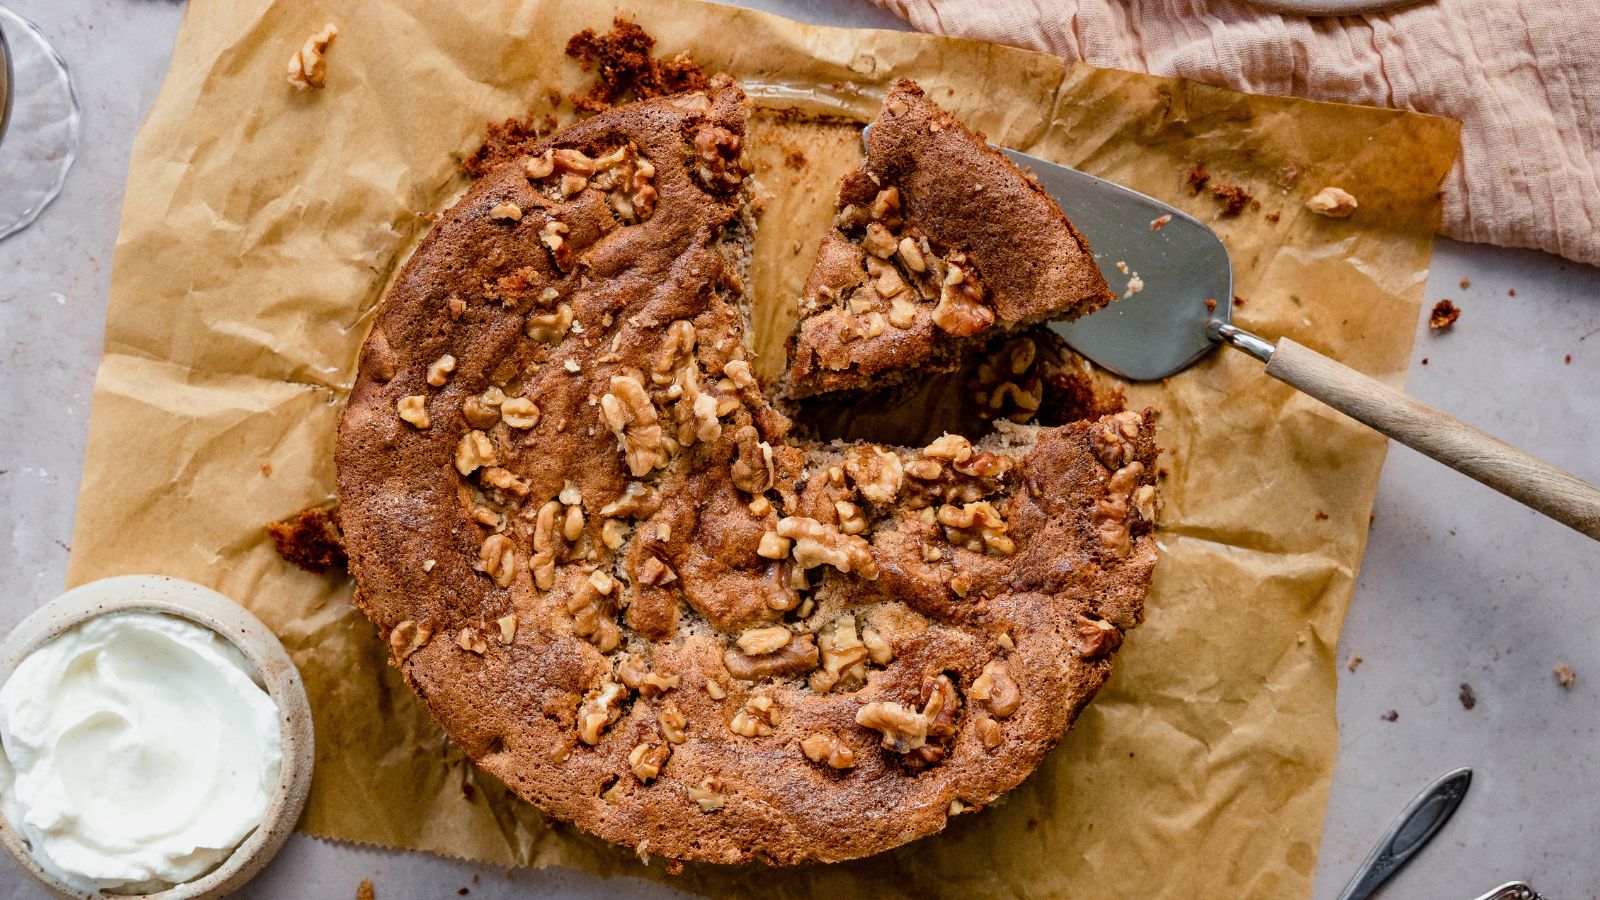
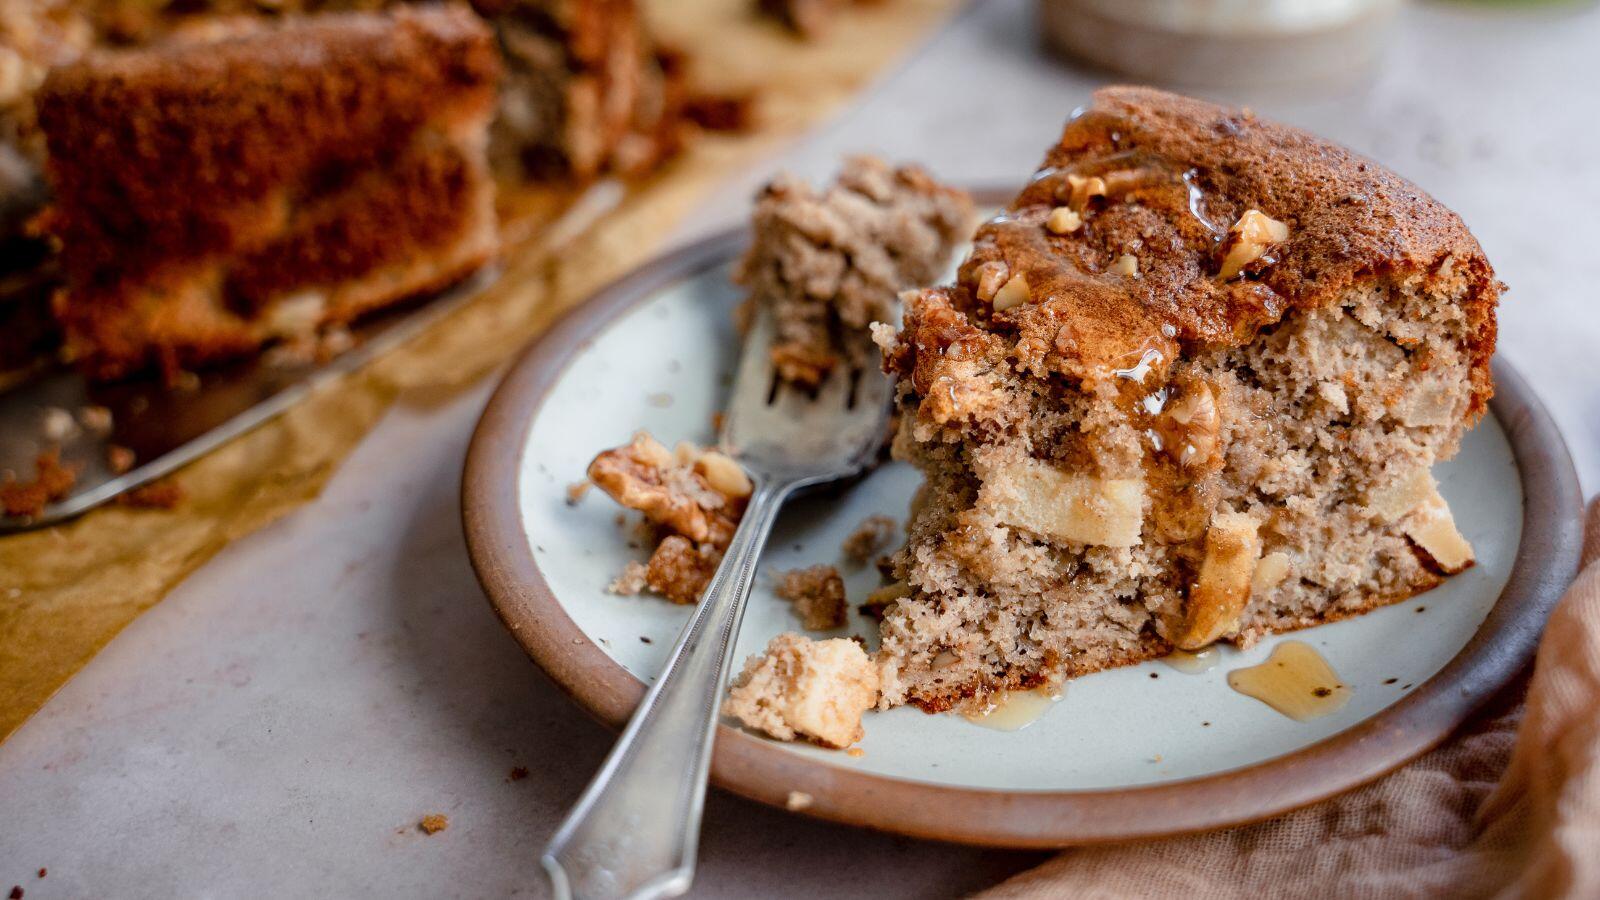
Haroset (AKA charoset or halek/halaq) is a staple Passover spread or paste made with a mixture of fruit, nuts, honey, wine and spices, to symbolize the mortar that was used by Jewish slaves to make bricks in Egypt. While haroset is typically only seen on the Passover seder plate, I’ve used the flavors of my childhood haroset to inspire this cake. My haroset cake is packed with apples, honey, cinnamon, sweet kosher wine and chopped walnuts. But feel free to make this recipe your own; try substituting chopped pears for the apples, or use pecans in place of walnuts.

This gluten-free (and dairy-free!) cake is a far cry from the dry, mealy cakes of Passover’s past. I ditch dense matzah meal for rich, nutty almond flour, and keep it moist with juicy apples and a splash of kosher wine. Thanks to whipped egg whites folded into the batter, the cake stays light and fluffy. Serve with freshly whipped cream or ice cream to end your Passover seder. (It would also work well at Rosh Hashanah, particularly for those with a gluten-free diet.)

Photo credit Micah Siva

Ingredients

  • 6 large eggs, separated 
  • 2 cups superfine almond flour, sifted 
  • ¼ cup sweet kosher wine
  • 1 Tbsp baking powder, kosher for Passover
  • 2 tsp cinnamon
  • ¼ tsp kosher salt
  • ½ cup walnuts, chopped
  • 2 medium Granny Smith apples, peeled and diced into ¼-inch pieces
  • ½ cup granulated sugar
  • 2 Tbsp honey, to glaze

Directions

  1. Preheat the oven to 325°F. Grease and line an 8-inch springform pan with parchment paper.
  2. In a large bowl, combine the egg yolks, almond flour, wine, baking powder, cinnamon and kosher salt. 
  3. Add the walnuts and chopped apples to the almond flour mixture, folding with a rubber spatula to combine. Set aside.
  4. In a large bowl, combine the egg whites and sugar. Using a hand mixer or stand mixer, whisk the egg whites until soft peaks form, about 5-7 minutes.
  5. Gently fold the egg whites into the almond flour mixture, ½ cup at a time, folding between each addition until fully incorporated.
  6. Transfer to the springform pan and bake for 45-50 minutes, or until a toothpick comes out clean.
  7. Remove from the oven, and use a pastry brush to brush the honey on top.
  8. Let cool in the pan, and slice to serve.