

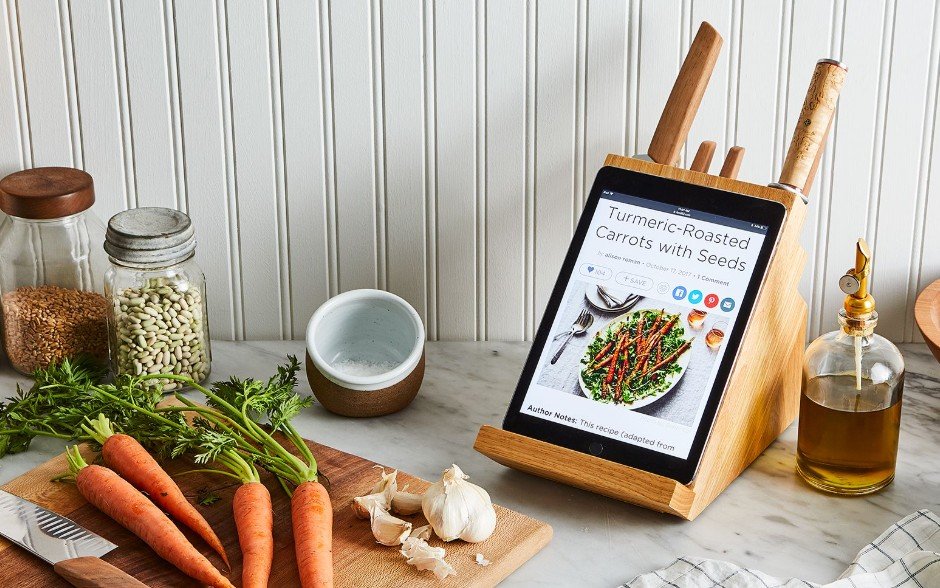
From Kitchen Notes to a Recipe Blog Readers Can Trust

From Kitchen Notes to a Recipe Blog Readers Can Trust

A recipe often begins as a scribble on a flour-dusted page: a handful of herbs, an oven temperature, or a note to add more lemon next time. Turning that idea into a recipe other people can cook takes a little more care. Clear measurements, repeatable testing, and honest descriptions help readers get good results—and make a personal collection of favorite dishes useful well beyond your own kitchen.

Start With a Dish You Know Well

The best first recipe to write down is one you have cooked more than once. Familiarity helps you notice what matters: how finely the onion should be chopped, what the mixture looks like before it goes into the oven, and which steps can happen while something else cooks. A dish you know also gives you a reliable starting point for testing changes.

Write down the ingredients as you use them, not from memory afterward. Include quantities, preparation details, and the order in which they go into the pan. “One onion” may be enough for your household, but a more useful note might specify a medium onion, finely diced. Record the pan size and heat level, too. These small details can make a recipe easier to repeat.

Test Before You Publish

A recipe that tastes good once may still need refining. Cook it again, following your written directions as if you were a new reader. If you find yourself relying on an unrecorded instinct—adding water until the sauce looks right, for example—note what that looks like or give a range to guide others.

Change only one or two things at a time when testing. If a loaf is dense, adjusting the flour and the liquid together makes it harder to know what helped. Keep a simple kitchen log with the date, ingredient amounts, cooking time, and result. The next attempt can then build on useful information rather than guesswork.

Pay attention to the difference between a precise instruction and a helpful cue. “Bake for 25 minutes” is a starting point; “bake until the edges are golden and a toothpick comes out with a few moist crumbs” gives readers a way to judge doneness in ovens that run differently.

Write Steps That Reduce Guesswork

Put the ingredients in the order they are used, and group them when a recipe has distinct parts, such as a sauce and a filling. Use familiar measurements and state whether ingredients are packed, sifted, drained, or at room temperature when that detail affects the outcome. For foods that need safe handling, include practical guidance such as cooking poultry to a safe internal temperature and refrigerating leftovers promptly.

Keep each instruction focused on one action where possible. “Warm the oil, add the garlic, and cook until fragrant” is clearer than a paragraph that combines chopping, frying, seasoning, and simmering. Mention visual and sensory cues alongside times, since ingredient size, cookware, and appliances can all affect cooking speed.

  • Give a yield: State how many servings the dish makes, or how many portions it produces.
  • Explain preparation: Clarify whether vegetables are peeled, chopped, or measured after cooking.
  • Offer substitutions carefully: Note changes that you have tested, and explain when they may affect texture or flavor.
  • Include storage advice: Say how to refrigerate or freeze leftovers and how to reheat them.

Make the Recipe Easy to Find and Use

A useful recipe page answers readers’ questions without making them search through a long story. A short introduction can explain what the dish tastes like, when you serve it, or what makes the method distinctive. Then make the recipe details easy to scan, with clear headings for ingredients, preparation, cooking time, and serving suggestions.

If you publish recipes online, basic search guidance can help the right readers discover them. The iCopify blog covers topics such as SEO and publishing, which can help food writers understand how online content is found. Apply that knowledge without letting keywords take over: an accurate title, a direct description, and useful answers to common cooking questions are better for readers than repeated search phrases.

Use Photos to Clarify, Not Just Decorate

A photograph can show the texture of a finished dish, the color of a properly browned crust, or how a serving should look. Natural light near a window often gives food a clear, appealing appearance. Keep the setting simple enough that the dish remains the focus, and consider adding a process photo when a visual step—such as shaping dough—is difficult to describe.

Good photos take practice, but food creators do not have to handle every task alone. A freelance marketplace such as Osdire spans services including food photography, graphic design, and writing. If you hire help, agree on the deliverables and style in advance, and make sure the final images accurately represent the recipe readers will make.

Keep Improving the Collection

After publishing, pay attention to the questions people ask and the points where they get stuck. If several readers wonder whether a sauce can be made ahead, add a tested answer. If a substitution changes the result, explain that clearly. Updating a recipe with better instructions is part of caring for it, just as adjusting seasoning is part of cooking.

A trustworthy recipe is not simply a list of ingredients. It is a record of a dish that has been tested, explained, and made easier for someone else to enjoy. Whether you are preserving family favorites or sharing new experiments, careful notes and reader-focused directions turn kitchen knowledge into something people can return to—and cook with confidence.
The Top 5 Best Cantinas in Miami for a Heavyweight Feast

The Top 5 Best Cantinas in Miami for a Heavyweight Feast

Miami has no shortage of lively spots calling themselves a cantina, but only a handful actually deliver on the promise of a real, sit-down feast. From fast-casual counters in vibrant neighborhoods to upscale dining rooms with mariachi bands, the options can feel overwhelming when you are looking for a genuine culinary destination.

To help you navigate the city’s rich Mexican dining scene, we set out to find the best cantinas in Miami by looking closely at generous portion sizes, the absolute freshness of preparation, and an authentic overall atmosphere that holds up well beyond the standard happy-hour crowd.

What Makes a Cantina Worth the Trip?

The word “cantina” gets used loosely across South Florida, covering everything from a quick taco counter to a full bar-and-restaurant with live music. That wide range makes comparison tricky, since a spot built around craft cocktails and small bites solves a completely different need than one built around a hearty, comforting meal.

To keep this list fair and useful, each location was judged on its own terms first: how well it executes the specific experience it promises. Then three shared criteria were evaluated regardless of format: how strictly the food is prepared made-to-order rather than pre-cooked, how the portions compare to the price point, and whether the overall atmosphere feels genuinely inviting for diners seeking real satisfaction.

Ranking the Best Cantinas in Miami for Big Appetites

Navigating South Florida’s Mexican dining scene requires separating late-night social hubs from kitchens that prioritize volume, traditional techniques, and fresh ingredients. The following selections represent the top venues across the city, ranked by their ability to deliver a satisfying, high-quality meal for any appetite:

5. Xochimex Cantina Grill

This dependable neighborhood spot offers classic Mexican plates in a relaxed and casual setting. The menu sticks to familiar, comforting favorites executed with daily consistency, making it a reliable choice for a low-key lunch or a simple dinner. While it operates with a straightforward counter-service model rather than the scale or spectacle of full-service dining, its approachable prices and quick turnarounds earn it a solid place on the map for everyday Mexican cravings.

4. Tacology

Located in the heart of Brickell, Tacology is built for speed, high energy, and late-night social gatherings. Its menu centers around creative, highly shareable small plates, ceviches, and tacos that satisfy crowd cravings long after midnight. The kitchen trades a slower, traditional made-to-order feast style for efficient service and vibrant presentation, which works exceptionally well when your priority is enjoying a fast, tasty bite alongside craft cocktails in an energetic urban setting.

3. SoCal Cantina

A popular Brickell destination, SoCal Cantina brings Southern California taco culture, burritos, and flavorful bowls together under one roof. Backed by an inventive cocktail list and a bustling patio, it consistently draws a large happy-hour crowd looking to unwind. The energy here leans heavily toward the social bar atmosphere rather than a traditional sit-down dinner, making it the ideal spot for evening drinks accompanied by satisfying, West Coast-inspired street bites.

2. Cantina La Veinte

As one of the most polished and upscale cantinas in the city, Cantina La Veinte combines stunning Art Deco design, waterfront views, live mariachi performances, and high-end coastal Mexican cuisine. Traditional techniques, such as whole fish grilled over charcoal, take center stage alongside a curated tequila and mezcal selection. While the premium price point and reservation-heavy hours make it geared more toward special occasions than casual weeknight meals, the craftsmanship and luxurious atmosphere deliver an unforgettable dining experience.

1. Tacos & Cantina La Potranca

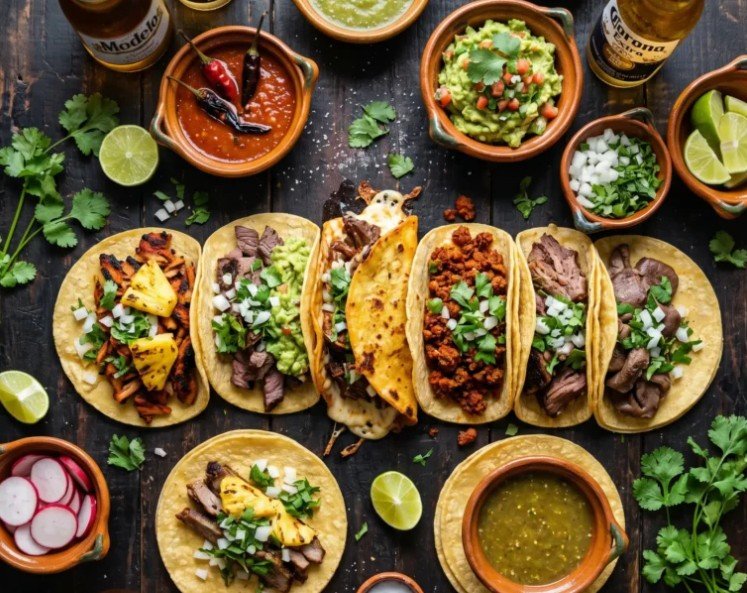
Taking the top spot is a family-run establishment serving South Florida since 2005, La Potraca follows an uncompromising made-to-order standard: every meat is seared fresh on the comal upon ordering, salsas are handcrafted daily from 100% natural ingredients without artificial preservatives, and nothing ever touches a heat lamp. With massive portions ranging from house Tacotes and rich birria with consomé to signature 14-inch burritos, it delivers the ultimate authentic feast for serious appetites.

Casual Feast or Special Occasion: Know What You’re Ordering For

The most important factor in choosing among the best cantinas in Miami is matching the spot to your specific occasion. A cocktail-focused evening in an energetic neighborhood calls for a very different venue than a day when you simply want a rich, filling plate of authentic street food without delays. Price points play a key role as well: high-end venues justify their cost through immersive ambiance and refined technique, while made-to-order spots focus their value directly on volume, freshness, and bold natural flavors. Knowing what experience you crave makes picking your next dining destination simple.

Finding Your Own Favorite

Each of these cantinas serves a different kind of night out, from a quick bite to a full sit-down meal. If what you’re after is volume and fresh, made-to-order preparation, it’s worth planning your next visit around La Potranca. Head to their official website to check out the full menu and find the location closest to you, then get ready to see what a true heavyweight feast looks like on your own table.

Allulose Manufacturer Trends Connected With Modern Annatto Color Applications

Allulose Manufacturer Trends Connected With Modern Annatto Color Applications

Packaged food manufacturers are now updating recipes more regularly as today’s customer preferences continue to change in the competitive international retail industry. Shoppers regularly observe sugar options and factor in transparency when purchasing beverages, snacks, candies, and dairy products at the grocery store. Due to these market changes, an efficient allulose producer regularly food companies growing low-sugar products worldwide work with caution. Different applications of annatto color also support visually appealing product presentation while helping brands maintain cleaner ingredient positioning across modern packaged food markets.

Sweetener Selection Influences Final Product Appearance Greatly

Reduced-sugar products sometimes require additional formulation adjustments because ingredient interactions can affect texture, moisture balance, and visual presentation afterward. Some sweetener systems influence how colors appear during processing, storage, and transportation throughout large commercial distribution networks globally today. A reliable allulose manufacturer generally supports manufacturers by providing formulation guidance during recipe development and production testing activities commercially. Different annatto color applications also help companies maintain warm yellow or orange shades inside beverages, dairy products, sauces, and processed snack categories worldwide.

Processing Temperatures Affect Ingredient Performance Differently

In industrial food environments, materials are exposed to temperature, stress, and changing humidity conditions every single day during commercial manufacturing operations. Some formulas remain visually robust, as others require careful temperature control sometime in later mixing and packaging stages. A professional allulose manufacturer generally recommends testing the sweetener’s overall performance under actual production conditions before officially scaling up the product to larger retail markets. Many annatto paint suppliers additionally offer technical hints that help with greater appearance stability, sometimes in commercial food processing around the world, as well as prolonged garage intervals.

Beverage and Dairy Products Need Stable Ingredient Compatibility

Liquid and dairy-based products create several formulation challenges because acidity levels and refrigeration conditions influence ingredient stability throughout distribution operations globally today. Manufacturers often test element combinations before releasing products in commercially competitive retail environments. A reputable allulose manufacturer often supports beverage and dairy brands, which later develop low-calorie products that require smooth texture and balanced sweetness all through production. Reliable annatto color formulas additionally within flavored milk, processed cheese, nutrient-dense desserts, and cereals’ presentation worldwide.

Ingredient Transparency Keeps Influencing Consumer Purchasing Decisions

Modern consumers now carefully evaluate product labels, as well-known ingredients strongly influence buying behavior in the packaged food industry around the world these days. Synthetic additives are receiving additional attention, especially among customers who often prefer simpler ingredient lists in liquid, snack, and confectionery products. Commercial partnerships with a trusted allulose manufacturer often help businesses support cleaner product positioning while adapting to changing retail expectations globally. Different annatto color applications also assist manufacturers in creating warm natural-looking shades without depending fully on older synthetic ingredient systems anymore.

Conclusion

Food manufacturing continues evolving because ingredient transparency and reduced-sugar formulations influence modern product development strategies globally today. Many businesses now explore foodrgb.com for ingredient insights and practical information supporting commercial formulation requirements across competitive industries. Choosing an experienced allulose manufacturer often helps companies develop balanced products supporting modern consumer expectations regarding sweetness and ingredient presentation successfully. Reliable annatto color solutions also support stronger visual consistency throughout beverages, dairy products, confectionery items, and processed snack manufacturing operations internationally. Businesses planning future product expansion should review supplier quality practices, technical support, and formulation compatibility carefully before making long-term sourcing decisions.

Traditional St. Patrick’s Day Food: The Dishes I Learned to Make for a Proper Irish Celebration

Traditional St. Patrick’s Day Food: The Dishes I Learned to Make for a Proper Irish Celebration

The first time I tried cooking a full St. Patrick’s Day dinner, I’ll admit I didn’t really know what counted as “traditional.” I figured throwing together corned beef and some green-colored desserts would be enough. Turns out, there’s a lot more history and flavor behind traditional St. Patrick’s Day food than I realized.

I remember standing in the kitchen with a pot of corned beef simmering away, cabbage chopped up, and potatoes everywhere on the counter. It smelled amazing, but I also felt like I was guessing half the time. Over the years though, I started learning which dishes are truly classic and how they’re usually prepared.

Some recipes came from old cookbooks, others from chatting with folks who grew up with Irish cooking traditions. A few attempts failed pretty badly, if I’m honest. My first Irish soda bread was dense enough to stop a door from closing. But after enough practice, these dishes became some of my favorite comfort foods.

So if you’re planning a St. Patrick’s Day meal, here are some of the most traditional Irish foods that show up on the table year after year.

Corned Beef and Cabbage

When most people think about St. Patrick’s Day food, corned beef and cabbage is usually the first dish that comes to mind.

This meal has become strongly associated with Irish-American celebrations.

Why Corned Beef Became a St. Patrick’s Day Classic

Interestingly, corned beef wasn’t originally a staple in Ireland. Irish immigrants in the United States began cooking it because beef brisket was more affordable and available than traditional Irish bacon.

They paired it with cabbage and potatoes, creating a dish that slowly became the centerpiece of St. Patrick’s Day meals.

How It’s Typically Served

A classic plate usually includes:

Slow-cooked corned beef
Boiled cabbage wedges
Carrots
Potatoes

Everything cooks together in the same pot, absorbing the salty and savory broth.

The first time I made it, I cooked the cabbage too long and it turned mushy. Now I add it during the last 15 minutes so it stays tender but not overdone.

Irish Soda Bread

Irish soda bread is one of the easiest traditional breads you can make.

And thankfully, it doesn’t require yeast.

What Makes Soda Bread Unique

Instead of yeast, soda bread uses baking soda as the leavening agent.

Traditional ingredients include:

Flour
Buttermilk
Baking soda
Salt

The buttermilk reacts with the baking soda, helping the bread rise.

The dough comes together quickly, which is perfect if you’re not in the mood for a long baking project.

A Lesson I Learned the Hard Way

My first soda bread was tough because I overworked the dough.

This bread actually prefers a gentle touch.

Mix just until the ingredients come together. That’s it.

Too much kneading makes the bread dense.

Irish Stew

If there’s one dish that truly feels like traditional Irish comfort food, it’s Irish stew.

This meal has been around for centuries.

Classic Irish Stew Ingredients

Traditional Irish stew usually includes:

Lamb or mutton
Potatoes
Onions
Carrots
Fresh herbs like thyme or parsley

Everything simmers slowly in a pot until the meat becomes tender and the broth thickens.

The result is a hearty, rustic stew that warms you up fast.

Why Slow Cooking Matters

Irish stew isn’t meant to be rushed.

Low heat and long cooking time allow the flavors to develop.

I tried speeding it up once by using higher heat, and the meat came out tough. Lesson learned.

Colcannon

Colcannon is one of those dishes that feels incredibly simple but tastes surprisingly rich.

It’s basically mashed potatoes mixed with greens and butter.

Typical Colcannon Ingredients

Most recipes include:

Mashed potatoes
Butter
Cabbage or kale
Green onions
Milk or cream

The greens are cooked first, then folded into the mashed potatoes.

The Secret to Great Colcannon

Butter.

Lots of butter.

Traditional versions often include a small pool of melted butter in the center of the mashed potatoes.

Each spoonful gets dipped into it.

It’s not exactly a light dish, but wow it’s good.

Boxty (Irish Potato Pancakes)

Potatoes are a major part of Irish cooking, and boxty is one of the more interesting ways they’re used.

Boxty is a type of potato pancake that combines grated potatoes with mashed potatoes.

Boxty Ingredients

Typical boxty batter includes:

Raw grated potatoes
Mashed potatoes
Flour
Buttermilk
Salt and pepper

The mixture is fried in a pan until crispy on the outside.

Why I Love Making Boxty

The first time I made boxty, I was surprised by the texture.

It’s crispy like a pancake but soft inside like mashed potatoes.

Honestly, it’s one of those foods that disappears quickly once served.

Shepherd’s Pie

Another hearty dish often served during St. Patrick’s Day celebrations is shepherd’s pie.

This baked dish is incredibly comforting.

What Goes Into Shepherd’s Pie

Traditional shepherd’s pie includes:

Ground lamb
Onions
Carrots
Peas
Gravy
Mashed potato topping

Everything is layered in a baking dish and baked until the potatoes form a golden crust.

My First Attempt Was… Interesting

The first shepherd’s pie I made was way too watery.

I learned that letting the filling simmer a bit longer thickens the gravy and prevents soggy layers.

Now I let the meat mixture cook down before assembling the pie.

Bangers and Mash

This dish is simple but incredibly satisfying.

Bangers and mash consists of sausages served with mashed potatoes and onion gravy.

Classic Components

A traditional plate includes:

Pork sausages
Creamy mashed potatoes
Rich onion gravy

The gravy is usually made by slowly cooking onions until caramelized, then adding broth.

Why It’s So Popular

It’s quick, filling, and full of flavor.

Sometimes the simplest meals end up being the most comforting.

Irish Apple Cake

Dessert is often overlooked during St. Patrick’s Day meals, but Irish apple cake is a wonderful traditional treat.

What Makes Irish Apple Cake Different

It’s not overly sweet.

The cake is usually packed with sliced apples and lightly spiced with cinnamon or nutmeg.

Many recipes serve it with a warm custard sauce.

Why I Keep Coming Back to This Recipe

The first time I baked Irish apple cake, the house smelled incredible.

Apples and cinnamon baking together is hard to beat.

It’s simple, rustic, and perfect after a hearty meal.

Traditional Irish Drinks

No St. Patrick’s Day meal feels complete without something to drink.

Irish Tea

Tea is extremely popular in Ireland.

Strong black tea served with milk often accompanies meals or desserts.

Irish Coffee

Irish coffee combines:

Hot coffee
Irish whiskey
Sugar
Cream

The cream floats on top, creating a smooth finish.

It’s a cozy drink, especially after dinner.

Why Food Is Such a Big Part of St. Patrick’s Day

Food brings people together, and St. Patrick’s Day celebrations often revolve around shared meals.

Many of these dishes are hearty, simple, and built around affordable ingredients.

That’s part of their charm.

They were originally everyday meals meant to feed families with what was available.

Final Thoughts on Traditional St. Patrick’s Day Food

Cooking traditional St. Patrick’s Day dishes taught me something interesting.

Irish food isn’t complicated or fancy. Instead, it focuses on simple ingredients prepared well.

Potatoes, cabbage, meat, butter, and bread appear again and again.

But when those ingredients are cooked slowly and thoughtfully, they become incredibly comforting meals.

Now whenever St. Patrick’s Day rolls around, I find myself returning to these classic recipes. And even though my first attempts weren’t perfect, learning how to cook these dishes has been a pretty fun journey.

Homemade Angel Food Cake Recipe: How I Finally Got That Light, Fluffy Texture

Homemade Angel Food Cake Recipe: How I Finally Got That Light, Fluffy Texture

The first time I tried baking angel food cake from scratch, I thought it would be pretty simple. I mean, the ingredient list looked short and harmless. Egg whites, sugar, flour… how hard could it be?

Well, let’s just say my first attempt came out looking more like a sad sponge than a cloud-like cake. It tasted okay, but it was dense and kind of rubbery. Definitely not the tall, airy angel food cake I was hoping for.

After a few more tries—and a couple mistakes that were honestly pretty avoidable—I finally figured out the tricks that make homemade angel food cake work. Once the method clicked, the results were amazing: tall, soft cake with that delicate texture that practically melts in your mouth.

So if you’ve ever been curious about making angel food cake at home, let me walk you through the recipe and a few lessons I learned along the way.

What Makes Angel Food Cake Unique?

Angel food cake is very different from most cakes.

Unlike butter cakes or sponge cakes, it contains no butter, no oil, and no egg yolks.

Instead, the structure comes almost entirely from whipped egg whites.

Because of that, the cake becomes:

Extremely light
Soft and airy
Low in fat

The texture should feel almost like a fluffy cloud.

That’s actually where the name “angel food cake” supposedly comes from—it’s light enough for angels.

Ingredients for Homemade Angel Food Cake

The ingredient list is simple, but the technique matters a lot.

Main Ingredients

1 cup cake flour
1 ½ cups granulated sugar
12 large egg whites (room temperature)
1 teaspoon cream of tartar
1 teaspoon vanilla extract
¼ teaspoon salt

That’s it.

But each ingredient plays a specific role in creating the cake’s airy structure.

Why Cake Flour Matters

Cake flour is lighter and finer than all-purpose flour.

This helps keep the cake soft and delicate.

I once tried making angel food cake with regular flour, and the texture turned out heavier than it should have been.

Cake flour really does make a difference.

Step 1: Prepare the Oven and Pan

Preheat the oven to 325°F (163°C).

Use a tube pan, also called an angel food cake pan.

Important note: do NOT grease the pan.

That might sound strange, but the batter needs to cling to the sides of the pan in order to rise properly.

The first time I made this cake, I greased the pan out of habit… and the cake collapsed. Lesson learned.

Step 2: Sift the Flour and Sugar

In a bowl, sift together:

Cake flour
Half of the sugar (¾ cup)

Sifting helps remove lumps and keeps the cake light.

Angel food cake batter is very delicate, so even small lumps can affect the final texture.

Step 3: Beat the Egg Whites

Place the egg whites in a large mixing bowl.

Make sure the bowl is completely clean and free of grease.

Even a small amount of fat can prevent the egg whites from whipping properly.

Start beating the egg whites on medium speed until they become foamy.

Step 4: Add Cream of Tartar

Once the egg whites are foamy, add the cream of tartar.

This ingredient helps stabilize the egg whites and keeps them from collapsing.

Continue beating until soft peaks form.

The first time I made angel food cake, I skipped cream of tartar because I didn’t have it. Big mistake. The structure just wasn’t the same.

Step 5: Gradually Add Sugar

Slowly add the remaining sugar while beating the egg whites.

Add it about one tablespoon at a time.

Keep beating until stiff, glossy peaks form.

This step takes a little patience, but it’s worth it.

The egg whites should look thick and shiny, almost like marshmallow fluff.

Step 6: Add Vanilla and Salt

Gently mix in:

Vanilla extract
Salt

At this stage, the mixture should still be fluffy and smooth.

Try not to overmix.

Step 7: Fold in the Flour Mixture

Now comes the most delicate step.

Gradually sift the flour mixture over the whipped egg whites.

Then gently fold it in using a spatula.

Do this slowly and carefully.

If the batter is stirred too aggressively, the air in the egg whites will collapse.

And trust me, once that air is gone… the cake won’t rise properly.

Step 8: Transfer the Batter to the Pan

Pour the batter into the ungreased tube pan.

Use a spatula to smooth the top gently.

Sometimes I tap the pan lightly on the counter to remove large air pockets.

But be gentle—this batter is fragile.

Step 9: Bake the Cake

Place the pan in the oven and bake for 35 to 40 minutes.

The cake should turn golden brown and spring back when lightly touched.

Another good sign is when cracks appear on the top surface.

The smell during this stage is amazing—sweet, vanilla, slightly toasted.

Step 10: Cool the Cake Upside Down

This step is very important.

Immediately after removing the cake from the oven, turn the pan upside down.

Many tube pans have small feet designed for this.

Cooling upside down prevents the cake from collapsing under its own weight.

The first time I skipped this step, my cake sank almost instantly. It was sad to watch.

Removing the Cake from the Pan

Once the cake is completely cool, run a thin knife around the edges of the pan.

Gently loosen the cake and remove it.

Angel food cake is soft and delicate, so take your time here.

Sometimes a few crumbs break off, which is totally normal.

How Angel Food Cake Should Taste

A properly baked angel food cake should be:

Light and airy
Soft and slightly springy
Mildly sweet with vanilla flavor

The texture should feel almost fluffy.

Not dense, not heavy, and definitely not rubbery.

Ways to Serve Angel Food Cake

Angel food cake is delicious on its own, but it pairs well with many toppings.

Fresh Berries

Strawberries, blueberries, or raspberries add freshness and color.

Whipped Cream

Light whipped cream complements the airy texture of the cake.

Lemon Glaze

A simple lemon glaze adds a bright citrus flavor.

Common Angel Food Cake Mistakes

Angel food cake can be a little tricky if you’re new to it.

Here are a few mistakes I’ve made before.

Greasing the Pan

This prevents the batter from climbing the sides.

The cake needs grip to rise.

Using Cold Egg Whites

Room temperature egg whites whip more easily.

They also create more volume.

Overmixing the Batter

Folding the flour too aggressively deflates the egg whites.

Gentle folding is key.

Tips That Helped Me Improve This Cake

After baking angel food cake several times, a few tricks made the process easier.

Separate Eggs Carefully

Even a small drop of yolk can prevent egg whites from whipping properly.

Use a Clean Mixing Bowl

Grease or oil residue can ruin whipped egg whites.

Glass or metal bowls work best.

Be Patient While Whipping Egg Whites

Rushing this step can affect the cake’s texture.

Properly whipped egg whites create the cake’s structure.

Final Thoughts on Homemade Angel Food Cake

Angel food cake might seem intimidating at first, but once you understand how the egg whites create the structure, the recipe becomes much easier.

The key lessons I learned were:

Whip egg whites properly
Fold ingredients gently
Cool the cake upside down

Once those steps are followed, the result is a beautiful, airy cake that feels incredibly light.

And honestly, when you slice into a homemade angel food cake and see that fluffy interior… it’s pretty satisfying knowing you made it from scratch.

Best Chocolate Chip Cookie Recipe: How I Finally Got Soft, Bakery-Style Cookies at Home

Best Chocolate Chip Cookie Recipe: How I Finally Got Soft, Bakery-Style Cookies at Home

I’ve baked a lot of cookies over the years, and I mean a lot. Some were too crunchy, some spread into thin little pancakes, and a few batches were so dry they probably could have been used as hockey pucks.

But the first time I tasted a truly perfect chocolate chip cookie, I realized how far my homemade ones were from the real deal. It was thick, soft in the middle, slightly crispy on the edges, and packed with melted chocolate. That moment sort of became my mission—to recreate the best chocolate chip cookie recipe at home.

My early attempts were… well, inconsistent. Sometimes the cookies were flat, other times they didn’t spread at all. One batch actually came out tasting a bit like flour. Turns out I measured wrong, which happens more than I’d like to admit.

After experimenting with ingredients, baking temperatures, and dough chilling times, I finally landed on a recipe that produces soft, chewy cookies almost every time. And honestly, once you understand a few key tricks, chocolate chip cookies become one of the most reliable desserts you can make.

What Makes the Best Chocolate Chip Cookie?

Before diving into the recipe, it helps to understand what makes a great cookie.

In my experience, the best chocolate chip cookies have three main qualities:

Soft and chewy centers
Slightly crisp edges
Rich buttery flavor with plenty of chocolate

Texture is everything. If the balance between crisp and chewy is off, the cookie just doesn’t feel right.

One small change in ingredients—like the amount of butter or brown sugar—can completely change the result.

Ingredients for the Best Chocolate Chip Cookies

This recipe uses simple pantry ingredients, but the ratios matter a lot.

Main Ingredients

2 ¼ cups all-purpose flour
1 teaspoon baking soda
½ teaspoon salt
¾ cup unsalted butter (softened)
¾ cup brown sugar
½ cup granulated sugar
2 large eggs
2 teaspoons vanilla extract
2 cups chocolate chips

When I first started baking cookies, I didn’t realize how important brown sugar was. It adds moisture and creates that chewy texture everyone loves.

Using only white sugar tends to produce crisp cookies instead.

Step 1: Mix the Dry Ingredients

In a medium bowl, whisk together:

Flour
Baking soda
Salt

Set this bowl aside.

This step might seem boring, but evenly mixing the dry ingredients helps the cookies bake properly.

Once I skipped this step and added everything directly to the batter. Some cookies puffed up, others stayed flat. It was a weird batch.

Step 2: Cream the Butter and Sugars

In a large bowl, beat together the softened butter, brown sugar, and granulated sugar.

Mix for about 2 to 3 minutes until the mixture becomes light and fluffy.

This step is called creaming, and it helps incorporate air into the dough.

If the butter is too cold, this step won’t work properly. I’ve rushed this before and the cookies turned out dense.

Soft butter really matters here.

Step 3: Add Eggs and Vanilla

Next, add the eggs one at a time.

Mix well after each egg.

Then stir in the vanilla extract.

The dough should look smooth and slightly creamy at this stage.

Sometimes the batter looks a little curdled, which is normal. It usually comes together once the flour is added.

Step 4: Combine Wet and Dry Ingredients

Gradually add the dry ingredients to the butter mixture.

Mix just until combined.

Overmixing can make cookies tough, which I learned the hard way during one of my early baking experiments.

The dough should look thick and slightly sticky.

Step 5: Fold in Chocolate Chips

Stir the chocolate chips into the dough.

Make sure they are evenly distributed.

I like using semi-sweet chocolate chips, but milk chocolate or dark chocolate works too.

Sometimes I even mix two types together. That creates little pockets of different chocolate flavors throughout the cookie.

Step 6: Chill the Dough

Here’s the step many people skip, but it makes a big difference.

Cover the dough and refrigerate it for 30 to 60 minutes.

Chilling the dough helps:

Improve flavor
Prevent cookies from spreading too much
Create thicker cookies

The first time I chilled cookie dough I was skeptical. But once I compared chilled dough cookies to fresh dough cookies, the difference was obvious.

The chilled ones were thicker and chewier.

Step 7: Prepare for Baking

Preheat your oven to 350°F (175°C).

Line a baking sheet with parchment paper.

Parchment prevents sticking and makes cleanup easier.

I used to bake cookies directly on the tray, but sometimes the bottoms would burn slightly.

Parchment paper fixed that problem.

Step 8: Scoop the Cookie Dough

Use a cookie scoop or spoon to portion the dough.

Place dough balls about 2 inches apart on the baking sheet.

The cookies will spread as they bake.

I usually make dough balls about the size of a golf ball for thick bakery-style cookies.

Step 9: Bake the Cookies

Bake the cookies for 10 to 12 minutes.

The edges should turn golden brown, but the centers should still look slightly soft.

This part always messes with my brain a little because the cookies look underbaked when they come out.

But they continue cooking on the hot tray.

If you bake until they look fully done, they’ll probably be overbaked.

Step 10: Let the Cookies Cool

Allow the cookies to cool on the baking sheet for 5 minutes before transferring them to a wire rack.

During this time, the cookies firm up and the chocolate settles.

I used to move them too quickly and sometimes they broke apart.

Patience helps here.

Common Chocolate Chip Cookie Mistakes

Even simple cookie recipes can go wrong if certain steps are skipped.

Here are a few mistakes I’ve personally made.

Using Melted Butter

Melted butter can cause cookies to spread too much.

Softened butter works much better.

Adding Too Much Flour

Too much flour makes cookies dry.

If you scoop flour directly from the bag, you might accidentally pack too much into the cup.

I usually spoon flour into the measuring cup instead.

Overbaking the Cookies

Chocolate chip cookies should be removed from the oven while the center is still soft.

They continue baking on the tray.

This was a big lesson for me.

Tips for Perfect Chocolate Chip Cookies

Over time, a few small tricks have made my cookies even better.

Use Good Chocolate

High-quality chocolate chips or chunks create richer flavor.

Sometimes I chop a chocolate bar instead of using chips.

Add a Sprinkle of Sea Salt

A tiny sprinkle of sea salt on top of the cookies before baking adds amazing flavor.

Sweet and salty together just works.

Don’t Overcrowd the Pan

Giving cookies space allows them to bake evenly.

Crowded trays can cause uneven spreading.

How to Store Chocolate Chip Cookies

Fresh cookies can be stored in an airtight container at room temperature.

They usually stay soft for about 3 to 4 days.

Adding a slice of bread to the container helps keep them soft.

The cookies absorb moisture from the bread.

It sounds weird, but it works.

Why Homemade Cookies Are Worth It

There’s something satisfying about baking cookies from scratch.

The smell of butter, vanilla, and chocolate filling the kitchen is pretty hard to beat.

Plus, homemade cookies taste richer than most store-bought versions.

And honestly, watching friends or family grab a second cookie right after finishing the first one is always a good sign.

Final Thoughts on the Best Chocolate Chip Cookie Recipe

After plenty of trial and error, I realized that great chocolate chip cookies aren’t complicated—they just require the right technique.

The biggest lessons I learned were:

Use softened butter
Chill the dough
Don’t overbake the cookies

Once those steps are followed, the results are consistently soft, chewy, and full of chocolate.

And if you’re anything like me, you’ll probably end up sneaking a warm cookie straight from the tray before they even finish cooling. Honestly… it happens every time.