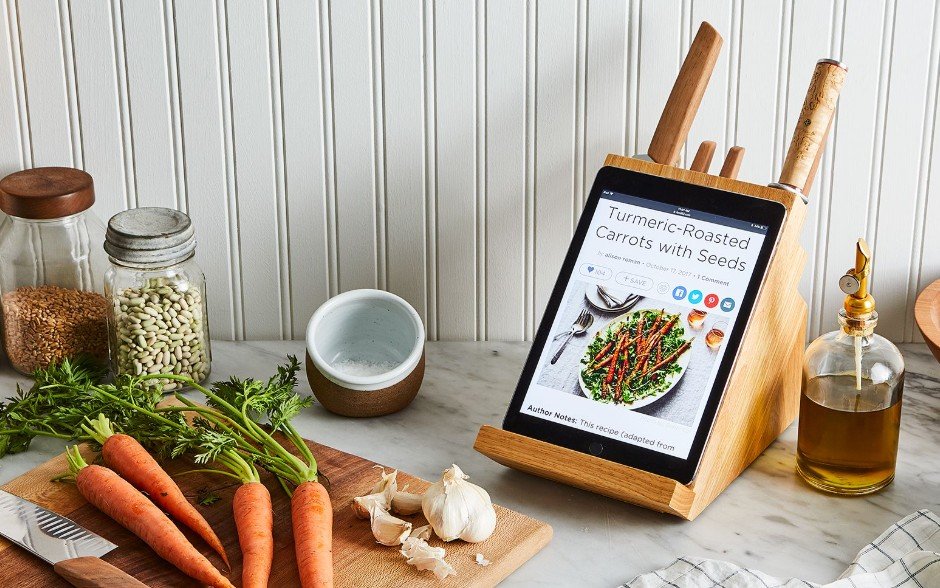
From Kitchen Notes to a Recipe Blog Readers Can Trust

From Kitchen Notes to a Recipe Blog Readers Can Trust

A recipe often begins as a scribble on a flour-dusted page: a handful of herbs, an oven temperature, or a note to add more lemon next time. Turning that idea into a recipe other people can cook takes a little more care. Clear measurements, repeatable testing, and honest descriptions help readers get good results—and make a personal collection of favorite dishes useful well beyond your own kitchen.

Start With a Dish You Know Well

The best first recipe to write down is one you have cooked more than once. Familiarity helps you notice what matters: how finely the onion should be chopped, what the mixture looks like before it goes into the oven, and which steps can happen while something else cooks. A dish you know also gives you a reliable starting point for testing changes.

Write down the ingredients as you use them, not from memory afterward. Include quantities, preparation details, and the order in which they go into the pan. “One onion” may be enough for your household, but a more useful note might specify a medium onion, finely diced. Record the pan size and heat level, too. These small details can make a recipe easier to repeat.

Test Before You Publish

A recipe that tastes good once may still need refining. Cook it again, following your written directions as if you were a new reader. If you find yourself relying on an unrecorded instinct—adding water until the sauce looks right, for example—note what that looks like or give a range to guide others.

Change only one or two things at a time when testing. If a loaf is dense, adjusting the flour and the liquid together makes it harder to know what helped. Keep a simple kitchen log with the date, ingredient amounts, cooking time, and result. The next attempt can then build on useful information rather than guesswork.

Pay attention to the difference between a precise instruction and a helpful cue. “Bake for 25 minutes” is a starting point; “bake until the edges are golden and a toothpick comes out with a few moist crumbs” gives readers a way to judge doneness in ovens that run differently.

Write Steps That Reduce Guesswork

Put the ingredients in the order they are used, and group them when a recipe has distinct parts, such as a sauce and a filling. Use familiar measurements and state whether ingredients are packed, sifted, drained, or at room temperature when that detail affects the outcome. For foods that need safe handling, include practical guidance such as cooking poultry to a safe internal temperature and refrigerating leftovers promptly.

Keep each instruction focused on one action where possible. “Warm the oil, add the garlic, and cook until fragrant” is clearer than a paragraph that combines chopping, frying, seasoning, and simmering. Mention visual and sensory cues alongside times, since ingredient size, cookware, and appliances can all affect cooking speed.

  • Give a yield: State how many servings the dish makes, or how many portions it produces.
  • Explain preparation: Clarify whether vegetables are peeled, chopped, or measured after cooking.
  • Offer substitutions carefully: Note changes that you have tested, and explain when they may affect texture or flavor.
  • Include storage advice: Say how to refrigerate or freeze leftovers and how to reheat them.

Make the Recipe Easy to Find and Use

A useful recipe page answers readers’ questions without making them search through a long story. A short introduction can explain what the dish tastes like, when you serve it, or what makes the method distinctive. Then make the recipe details easy to scan, with clear headings for ingredients, preparation, cooking time, and serving suggestions.

If you publish recipes online, basic search guidance can help the right readers discover them. The iCopify blog covers topics such as SEO and publishing, which can help food writers understand how online content is found. Apply that knowledge without letting keywords take over: an accurate title, a direct description, and useful answers to common cooking questions are better for readers than repeated search phrases.

Use Photos to Clarify, Not Just Decorate

A photograph can show the texture of a finished dish, the color of a properly browned crust, or how a serving should look. Natural light near a window often gives food a clear, appealing appearance. Keep the setting simple enough that the dish remains the focus, and consider adding a process photo when a visual step—such as shaping dough—is difficult to describe.

Good photos take practice, but food creators do not have to handle every task alone. A freelance marketplace such as Osdire spans services including food photography, graphic design, and writing. If you hire help, agree on the deliverables and style in advance, and make sure the final images accurately represent the recipe readers will make.

Keep Improving the Collection

After publishing, pay attention to the questions people ask and the points where they get stuck. If several readers wonder whether a sauce can be made ahead, add a tested answer. If a substitution changes the result, explain that clearly. Updating a recipe with better instructions is part of caring for it, just as adjusting seasoning is part of cooking.

A trustworthy recipe is not simply a list of ingredients. It is a record of a dish that has been tested, explained, and made easier for someone else to enjoy. Whether you are preserving family favorites or sharing new experiments, careful notes and reader-focused directions turn kitchen knowledge into something people can return to—and cook with confidence.

Oxtail Recipe: How I Learned to Cook Tender, Flavorful Oxtail the Right Way

Oxtail Recipe: How I Learned to Cook Tender, Flavorful Oxtail the Right Way

Oxtail Recipe: How I Learned to Cook Tender, Flavorful Oxtail the Right Way

The first time I tried cooking oxtail, I’ll be honest… I had no idea what I was doing. I had tasted it before at a family gathering and remembered how incredibly tender and rich it was. The meat practically fell off the bone, and the sauce was deep, savory, and comforting.

So naturally, I thought I could recreate it easily at home. I bought some oxtail, tossed it in a pot, added broth and seasoning, and waited. The result? Tough meat and a thin sauce that didn’t have much flavor.

It wasn’t terrible, but it definitely wasn’t the melt-in-your-mouth oxtail I remembered. After doing a little research and trying again a few times, I realized the secret to great oxtail stew is simple: slow cooking, proper browning, and patience. Lots of patience.

Once I figured that out, the dish became one of my favorite slow-cooked comfort meals. Let me show you the oxtail recipe that finally worked for me.

What Is Oxtail?

Oxtail is exactly what the name suggests—the tail of a cow. It’s cut into thick sections with bone in the center and meat surrounding it.

This cut is rich in:

Collagen
Connective tissue
Marrow

Because of that, it needs long, slow cooking to become tender.

When cooked properly, the collagen melts into the sauce and creates a rich, silky texture that’s incredibly flavorful.

That’s why oxtail is often used in stews and braised dishes around the world.

Ingredients for a Classic Oxtail Recipe

The ingredients are simple, but the flavors become deep and complex during cooking.

Main Ingredients

2 to 3 pounds oxtail pieces
2 tablespoons vegetable oil
1 medium onion (chopped)
3 cloves garlic (minced)
2 carrots (sliced)
2 tablespoons tomato paste
3 cups beef broth
1 tablespoon Worcestershire sauce

These ingredients form the base of a rich stew.

The tomato paste adds depth and a slightly sweet richness that really enhances the sauce.

Seasonings

1 teaspoon salt
½ teaspoon black pepper
1 teaspoon paprika
½ teaspoon thyme
1 bay leaf

These simple spices help build the savory flavor of the dish.

Sometimes I add a pinch of smoked paprika for extra warmth.

Preparing the Oxtail

Before cooking, the oxtail needs to be seasoned and browned.

This step adds a lot of flavor to the final dish.

Step 1: Season the Oxtail

Pat the oxtail pieces dry with paper towels.

Then season them with salt, pepper, and paprika.

Drying the meat first helps it brown properly.

The first time I skipped this step, and the meat didn’t develop that nice crust.

Step 2: Brown the Oxtail

Heat vegetable oil in a large pot or Dutch oven over medium-high heat.

Add the oxtail pieces and sear them for about 3 to 4 minutes per side.

You want them to develop a deep brown color.

This browning step creates rich flavor in the stew.

I used to rush this step, but letting the meat brown properly really makes a difference.

Building the Flavor Base

Once the meat is browned, the next step is building the sauce.

Step 3: Cook the Vegetables

Remove the oxtail from the pot and set it aside.

In the same pot, add chopped onions, garlic, and carrots.

Cook them for about 5 minutes until the onions soften.

The vegetables absorb all those flavorful bits left behind from browning the meat.

Step 4: Add Tomato Paste

Stir in the tomato paste and cook for about 1 minute.

Cooking the paste briefly helps remove the raw taste and deepens the flavor.

This was something I didn’t know during my first attempt.

Simmering the Oxtail Stew

Now the slow cooking begins.

Step 5: Add Liquid and Seasonings

Return the browned oxtail to the pot.

Add:

Beef broth
Worcestershire sauce
Thyme
Bay leaf

Stir everything gently.

The liquid should almost cover the meat.

Step 6: Slow Simmer the Stew

Bring the pot to a gentle simmer.

Then reduce the heat to low, cover, and cook for 2½ to 3 hours.

This long cooking time allows the meat to become incredibly tender.

The collagen breaks down and thickens the sauce naturally.

The smell during this stage is amazing. Rich, savory, and comforting.

How to Know When Oxtail Is Ready

Properly cooked oxtail should be very tender.

The meat should easily pull away from the bone.

If it still feels tough, it probably needs another 30 to 45 minutes.

Oxtail really rewards patience.

Thickening the Sauce (Optional)

Sometimes the sauce thickens naturally from the collagen.

But if you prefer a thicker gravy, there’s a simple trick.

Step 7: Reduce the Sauce

Remove the lid and let the stew simmer uncovered for 10 to 15 minutes.

This allows some liquid to evaporate and concentrate the flavors.

Another option is mixing 1 teaspoon cornstarch with water and stirring it into the sauce.

But honestly, most of the time the stew thickens enough on its own.

How to Serve Oxtail

Oxtail stew pairs well with simple side dishes that soak up the sauce.

Here are a few of my favorites.

With Rice

Steamed white rice is one of the best pairings.

The rice absorbs the rich gravy beautifully.

With Mashed Potatoes

Creamy mashed potatoes make a comforting combination with tender oxtail.

The flavors work perfectly together.

With Crusty Bread

A good piece of bread is perfect for soaking up the sauce.

Sometimes this is my favorite way to eat it.

Common Mistakes I Made When Cooking Oxtail

Oxtail can be forgiving, but there are a few things that can go wrong.

Not Browning the Meat First

Skipping the browning step leads to less flavorful stew.

Those browned bits add a lot of depth.

Cooking Too Fast

Oxtail needs slow cooking.

High heat makes the meat tough instead of tender.

Not Cooking It Long Enough

If the meat isn’t tender, it simply needs more time.

Oxtail often takes longer than expected.

Tips That Helped Me Improve This Recipe

After cooking oxtail several times, a few small tricks made the dish even better.

Use a Dutch Oven

A heavy pot distributes heat evenly during long cooking.

It makes the simmering process more consistent.

Skim Excess Fat

Oxtail can release quite a bit of fat.

Sometimes I skim a little off the surface before serving.

Let the Stew Rest

Oxtail stew actually tastes even better after resting for 20 minutes.

The flavors settle and the sauce thickens slightly.

Why Oxtail Stew Tastes Even Better the Next Day

One interesting thing about oxtail is that the flavor improves overnight.

When stored in the refrigerator, the sauce thickens and the spices deepen.

Reheated leftovers can taste even richer than the first serving.

That’s why many people say oxtail stew is even better the next day.

Final Thoughts on Cooking Oxtail

Oxtail might seem intimidating at first, but it’s actually one of the most rewarding cuts of meat to cook.

The key lessons I learned were simple:

Brown the meat well
Cook it slowly
Be patient

Once those steps are followed, the result is incredibly tender meat and a rich, flavorful sauce.

Now whenever I want a comforting slow-cooked meal, oxtail stew is one of the first recipes that comes to mind.

And honestly, watching that meat fall off the bone after hours of simmering is always worth the wait.

Sticky Toffee Pudding Recipe: How I Finally Mastered This Classic British Dessert

Sticky Toffee Pudding Recipe: How I Finally Mastered This Classic British Dessert

The first time I heard the name sticky toffee pudding, I imagined something overly sweet and heavy. The word sticky alone sounded like it might be too much. But then I tasted it at a small café during a rainy afternoon, and wow… that first bite completely changed my mind.

Warm sponge cake soaked in rich toffee sauce, soft dates giving it moisture, and sometimes a scoop of vanilla ice cream melting on top. It was comforting in a way few desserts are.

Of course, when I tried making it at home the first time, things didn’t go exactly as planned. My cake came out dense and the sauce turned grainy. It still tasted okay, but it definitely wasn’t that dreamy dessert I remembered.

After a few attempts and a lot of small adjustments, I finally figured out how to make a sticky toffee pudding recipe that turns out soft, rich, and perfectly saucy every time. Let me share the method that worked for me.

What Is Sticky Toffee Pudding?

Sticky toffee pudding is a classic British dessert made with a soft sponge cake that contains finely chopped dates.

The cake is baked and then covered with a warm toffee sauce made from butter, brown sugar, and cream.

Despite the name, it’s actually more like a cake than a pudding.

The magic of this dessert comes from three elements:

Moist date sponge cake
Rich caramel-like toffee sauce
Warm serving temperature

When all three come together, it’s honestly one of the most comforting desserts you can make.

Ingredients for Sticky Toffee Pudding

Before starting, it helps to gather everything so the process feels smooth.

Ingredients for the Cake

200 g pitted dates (about 1 cup chopped)
1 cup boiling water
1 teaspoon baking soda
¾ cup brown sugar
¼ cup butter (softened)
2 large eggs
1 teaspoon vanilla extract
1 ¼ cups all-purpose flour
1 teaspoon baking powder
¼ teaspoon salt

Dates are the key ingredient here. They give the cake its signature moisture and subtle caramel flavor.

The first time I made this dessert I underestimated how important the dates were. Without them, the cake just tastes like regular sponge.

Ingredients for the Toffee Sauce

½ cup butter
1 cup brown sugar
¾ cup heavy cream
1 teaspoon vanilla extract
Pinch of salt

The sauce is honestly the star of the show. It’s sweet, buttery, and rich enough to soak into the cake perfectly.

Preparing the Dates

The first step in making sticky toffee pudding is softening the dates.

Step 1: Soak the Dates

Place the chopped dates in a bowl and pour 1 cup of boiling water over them.

Then add the baking soda and stir gently.

Let this mixture sit for about 10 minutes.

The dates will soften and break down slightly, creating a thick mixture that blends easily into the batter.

The first time I skipped this step because I was impatient. Big mistake. The cake ended up with chewy date chunks instead of that smooth, moist texture.

Making the Sticky Toffee Pudding Batter

Once the dates are ready, the cake batter comes together pretty quickly.

Step 2: Cream Butter and Sugar

In a mixing bowl, cream together the butter and brown sugar.

Mix until the texture becomes light and fluffy.

This step helps create a soft sponge cake.

Sometimes I rush this step, and honestly the texture suffers when I do. Taking a minute or two extra really helps.

Step 3: Add Eggs and Vanilla

Next, beat in the eggs one at a time.

Then add the vanilla extract.

The batter should become smooth and creamy.

At this stage it already smells pretty good, which is always a nice sign.

Step 4: Mix in the Dry Ingredients

In a separate bowl, combine:

Flour
Baking powder
Salt

Gradually add the dry ingredients into the butter mixture.

Mix gently until combined.

Overmixing can make the cake dense, something I learned the hard way once.

Step 5: Add the Date Mixture

Finally, stir in the softened date mixture along with the soaking liquid.

The batter will look quite loose and slightly lumpy. That’s completely normal.

In fact, the looser batter helps create that incredibly moist cake texture.

Baking the Sticky Toffee Pudding

Once the batter is ready, it’s time to bake.

Step 6: Prepare the Baking Dish

Preheat the oven to 350°F (175°C).

Grease a medium baking dish or an 8-inch square pan.

Pour the batter evenly into the dish.

The batter may seem thin, but it thickens beautifully while baking.

Step 7: Bake the Cake

Bake for 30 to 35 minutes.

The top should turn golden brown and the center should feel firm when gently pressed.

A toothpick inserted in the center should come out mostly clean.

The smell during baking is incredible. Warm caramel and dates filling the kitchen.

Making the Toffee Sauce

While the cake bakes, it’s the perfect time to prepare the sauce.

Step 8: Melt Butter and Sugar

In a saucepan, combine butter and brown sugar over medium heat.

Stir constantly until the sugar dissolves.

The mixture should become smooth and glossy.

Step 9: Add Cream Slowly

Pour the cream in slowly while stirring.

The sauce will bubble and thicken slightly.

Then add the vanilla and a pinch of salt.

Let the sauce simmer for 2 to 3 minutes until it reaches a rich caramel consistency.

The first time I made this sauce I cooked it too long and it became overly thick. It’s better to keep it slightly runny since it thickens as it cools.

Assembling the Sticky Toffee Pudding

Now comes the most satisfying part.

Step 10: Pour Sauce Over the Warm Cake

Once the cake comes out of the oven, poke a few small holes on top with a fork.

Pour about half of the warm toffee sauce over the cake.

The sauce soaks into the sponge and makes it incredibly moist.

Reserve the remaining sauce for serving.

How to Serve Sticky Toffee Pudding

Sticky toffee pudding is best served warm.

Here are a few serving ideas I love.

With Vanilla Ice Cream

A scoop of vanilla ice cream on top of warm pudding is amazing.

The cold ice cream melts slightly into the hot toffee sauce.

It’s one of those simple dessert pairings that just works perfectly.

With Whipped Cream

Light whipped cream balances the richness of the dessert.

Sometimes I prefer this option when the pudding feels extra rich.

Extra Toffee Sauce on Top

Never be shy with the sauce.

A generous drizzle of warm toffee sauce makes the dessert even better.

Honestly, people usually ask for extra anyway.

Common Mistakes I Made When Learning This Recipe

Sticky toffee pudding is pretty forgiving, but there are a few things that can go wrong.

Using Dry or Hard Dates

Fresh, soft dates work best.

Dry dates don’t blend as smoothly and can affect the cake texture.

Overbaking the Cake

If the cake bakes too long, it loses its soft texture.

Check it around the 30-minute mark.

Cooking the Sauce Too Long

Overcooking can make the sauce too thick or slightly bitter.

Keep it gentle and stir constantly.

Tips That Helped Me Perfect This Dessert

After making sticky toffee pudding several times, a few small tricks improved the results.

Use Dark Brown Sugar

Dark brown sugar gives the sauce deeper caramel flavor.

The difference is small but noticeable.

Serve the Cake Warm

Sticky toffee pudding tastes best when warm.

If reheating leftovers, microwave a slice for about 20 seconds.

Let the Sauce Soak Into the Cake

Pouring sauce over the cake right after baking allows it to absorb into the sponge.

This creates that classic sticky texture.

Final Thoughts on Making Sticky Toffee Pudding

Sticky toffee pudding might sound fancy, but the recipe itself is surprisingly simple.

The combination of soft date cake and warm toffee sauce creates a dessert that feels comforting and indulgent at the same time.

My early attempts were far from perfect, but once I understood the key steps—softening the dates, mixing gently, and making a good sauce—the recipe became reliable.

Now it’s one of those desserts I make when I want something that feels special but still approachable.

And honestly, watching that warm toffee sauce soak into the cake never gets old.

How to Make Homemade Pizza & The Best Pizza Dough Recipe

How to Make Homemade Pizza & The Best Pizza Dough Recipe

There’s something magical about making pizza from scratch. The smell of freshly baked dough, the sizzling cheese, and that first crispy-yet-chewy bite—pure happiness. I used to think homemade pizza was complicated, but once I nailed the dough recipe, it became a weekly tradition.

If you’ve ever struggled with dough that’s too sticky, too tough, or just doesn’t taste right, don’t worry—I’ve been there. After many (many) failed attempts, I finally found the perfect balance. Today, I’m sharing my foolproof pizza dough recipe and step-by-step tips to make the best homemade pizza.

Step 1: Gather Your Ingredients

For the dough, you only need a few basic pantry staples:

Pizza Dough Ingredients

✔ 3 ½ cups all-purpose flour (or bread flour for a chewier crust)
✔ 1 packet (2 ¼ tsp) active dry yeast
✔ 1 ¼ cups warm water (about 110°F, warm but not hot)
✔ 1 tbsp olive oil
✔ 1 tsp sugar (feeds the yeast)
✔ 1 tsp salt

Toppings (Get Creative!)

✔ Tomato sauce – Crushed San Marzano tomatoes with a little garlic & olive oil = chef’s kiss.
✔ Cheese – Mozzarella is classic, but try parmesan, ricotta, or provolone.
✔ Toppings – Pepperoni, mushrooms, basil, bell peppers—whatever you love!

Step 2: Make the Pizza Dough

1️⃣ Activate the Yeast – In a small bowl, mix warm water, sugar, and yeast. Let it sit for 5-10 minutes until foamy. If it doesn’t foam, your yeast might be dead (try again with fresh yeast).

2️⃣ Mix the Dough – In a large bowl, combine flour and salt. Add the yeast mixture and olive oil, then mix with a spoon or your hands until it starts coming together.

3️⃣ Knead It – Transfer to a floured surface and knead for 8-10 minutes until smooth and elastic. If the dough is sticky, sprinkle in a little more flour.

4️⃣ First Rise – Place the dough in an oiled bowl, cover with a damp towel, and let it rise for 1-2 hours (or until doubled in size).

💡 Shortcut: No time? Let it rise in the fridge overnight—this actually improves the flavor!

Step 3: Shape & Prep the Dough

1️⃣ Punch Down & Divide – Once risen, punch the dough down to release air. If making two pizzas, divide it in half.

2️⃣ Roll or Stretch It – Lightly flour your surface and roll/stretch the dough into a 12-inch circle. Don’t press too hard—you want those airy pockets!

3️⃣ Preheat Your Oven – Set it to 475°F (or 500°F for an extra crispy crust). If using a pizza stone, heat it in the oven for at least 30 minutes.

4️⃣ Transfer to a Baking Sheet or Pizza Peel – If using a baking sheet, lightly grease it or sprinkle with cornmeal to prevent sticking. If using a pizza peel for a stone, dust it with flour or semolina.

Step 4: Assemble & Bake the Pizza

1️⃣ Sauce First – Spread a thin layer of tomato sauce over the dough—don’t drown it!

2️⃣ Cheese & Toppings – Add mozzarella and your favorite toppings. Less is more to avoid a soggy crust.

3️⃣ Bake to Perfection – Place the pizza in the oven and bake for 10-15 minutes (or until the crust is golden and the cheese is bubbly).

4️⃣ Cool & Enjoy – Let it sit for a couple of minutes before slicing. Resist the urge to dive in immediately—molten cheese burns are real.

Bonus Tips for Perfect Pizza

✔ For Extra Crispy Crust – Bake on a preheated pizza stone or an upside-down baking sheet.
✔ No Rolling Pin? No Problem – Hand-stretching creates a more rustic, airy crust.
✔ Want Fluffy Crust? – Let the shaped dough rest for 10-15 minutes before adding toppings.
✔ Try a Garlic Butter Crust – Brush the edges with melted butter & garlic for a pizzeria-style finish.

Final Thoughts

Making homemade pizza is easier than you think, and the results are so much better than frozen or takeout. Plus, once you master this dough recipe, you can use it for garlic knots, calzones, or even breadsticks.

Have you tried making pizza from scratch? Let me know your favorite toppings in the comments! 🍕🔥

Cooking with Wine: Techniques, Tips, and Pairings

Cooking with Wine: Techniques, Tips, and Pairings

Cooking with wine is a delightful way to infuse your dishes with rich, complex flavors that elevate your culinary creations to new heights. Whether you’re a seasoned chef or an enthusiastic home cook, understanding the techniques, tips, and pairings for cooking with wine can transform your meals from ordinary to extraordinary. Wine can be used to deglaze pans, create flavorful sauces, and enhance the taste of various ingredients, adding a touch of sophistication to your dishes. In this guide, “Cooking with Wine: Techniques, Tips, and Pairings,” we will delve into the art of incorporating wine into your cooking, offering expert advice on selecting the right wines, mastering essential techniques, and creating perfect pairings. Discover how to unlock the full potential of wine in your kitchen and impress your guests with gourmet-quality meals.

Check out the detailed infographic below to get started on your journey to mastering the art of cooking with wine.


industrial freezer

Infographic provided by Iron Mountain, a top company to get an industrial freezer

The Ultimate Guide to Writing Compelling Restaurant Reviews

The Ultimate Guide to Writing Compelling Restaurant Reviews

The Ultimate Guide to Writing Compelling Restaurant Reviews

In the vast world of dining experiences, restaurant reviews hold immense power. They serve as guideposts for diners, helping them make informed choices and navigate the culinary landscape. At the same time, reviews shape the reputation of dining establishments, influencing their success and growth.

A well-written restaurant review goes beyond merely sharing personal opinions; it captures the essence of the dining experience, engaging readers and transporting them to the table. It is an art that requires a keen eye, a discerning palate, and the ability to express thoughts eloquently.

In this ultimate guide, we will explore the intricacies of crafting compelling restaurant reviews. Whether you aspire to be a respected food critic or simply wish to share your gastronomic adventures, this guide will equip you with the knowledge and techniques to write reviews that leave a lasting impact.

So, let’s embark on a flavorful journey through the art of reviewing restaurants, and discover how your words can shape the culinary conversation. Get ready to unlock the secrets of capturing ambiance, analyzing flavors, and balancing criticism with praise. Together, we will delve into the world of restaurant reviews and unleash your inner food writer.

Setting the Stage: Assessing Ambiance and Service

When we step into a restaurant, we are not only greeted by enticing aromas and delectable dishes but also by the ambiance that surrounds us. Ambiance sets the stage for a memorable dining experience, creating a mood and atmosphere that can elevate or detract from the meal.

As a reviewer, it is essential to assess and effectively communicate the ambiance of a restaurant. Begin by observing the overall decor, lighting, and music. Is the atmosphere cozy and intimate, or vibrant and energetic? Take note of the attention to detail in the interior design, as well as any unique architectural elements that contribute to the overall ambiance.

While ambiance is crucial, the quality of service also plays a significant role in the dining experience. Pay attention to how the staff interacts with guests, their attentiveness, and their knowledge about the menu. Evaluate the efficiency of service, including the speed of food delivery and the attentiveness to special requests. Communicate these observations in your review, capturing the essence of the service and its impact on the overall experience.

Remember, every restaurant has its own distinct ambiance and service style. Be attentive to the specific atmosphere the establishment aims to create, and assess how well they achieve it. By providing readers with a clear understanding of the ambiance and service, you enable them to anticipate and align their expectations with the dining experience.

In the next section of our guide, we will explore the art of analyzing flavors and presentation, as we unravel the culinary journey that awaits us in a restaurant review.

A Gastronomic Journey: Analyzing Flavors and Presentation

A remarkable dining experience is incomplete without savoring the flavors and appreciating the artful presentation of the dishes. As a reviewer, your role is to guide readers through this gastronomic journey, immersing them in the world of flavors and visual delights.

To analyze flavors, take your time to fully engage with the dishes. Pay attention to the balance of flavors, the use of seasonings, and the overall taste profile. Is it a harmonious blend of sweet and savory, or does it showcase bold and contrasting flavors? Describe the taste sensations, such as richness, freshness, or complexity, to transport readers to the table and evoke their senses.

In addition to flavors, presentation plays a significant role in the overall dining experience. Take note of how the dishes are arranged on the plate, the use of vibrant colors, and the artistic flair of garnishes. Does the presentation enhance the anticipation of the meal? Is it visually appealing and aesthetically pleasing? Share your observations in vivid detail, allowing readers to appreciate the craftsmanship behind each plate.

Furthermore, go beyond the individual dishes and explore the cohesion of the menu as a whole. Is there a clear theme or concept behind the culinary offerings? Does the menu showcase creativity and innovation? Consider how the flavors and presentation align with the restaurant’s vision and culinary philosophy.

As you embark on this gastronomic journey, remember that taste is subjective. What might appeal to one palate may not resonate with another. However, by providing a thorough and thoughtful analysis of flavors and presentation, you empower your readers to make informed choices and appreciate the culinary nuances of the dining experience.

In the next section of our guide, we will venture beyond the plate and explore the atmosphere and unique features that distinguish a restaurant, enriching the overall dining experience.

Beyond the Plate: Exploring Atmosphere and Unique Features

A truly exceptional dining experience extends beyond the flavors and presentation on the plate. It encompasses the atmosphere, ambiance, and unique features that make a restaurant stand out from the rest. As a reviewer, it is your role to delve into these aspects and highlight the distinguishing factors that contribute to the overall experience.

Firstly, consider the atmosphere that surrounds you. Take note of the overall vibe, the energy in the room, and the interactions between guests. Is it a lively and bustling atmosphere, or a more relaxed and intimate setting? Assess how well the ambiance aligns with the intended dining concept of the restaurant.

Beyond the general ambiance, explore the unique features that set the restaurant apart. It could be a stunning view, a captivating live entertainment performance, or a distinctive theme that permeates every aspect of the dining experience. These features add an extra layer of allure and charm, making the restaurant memorable and enticing. Share your observations and insights, allowing readers to envision themselves in the space and anticipate the extraordinary elements that await them.

Furthermore, consider how these unique features enhance or complement the overall dining experience. Do they add depth and richness to the atmosphere? Do they create a sense of wonder or surprise? By capturing and articulating these elements, you provide readers with a glimpse into the magic that awaits them beyond the plate.

Remember, each restaurant has its own story to tell and its own unique offerings. By exploring and highlighting the atmosphere and unique features, you paint a more comprehensive picture of the dining experience, enabling readers to make informed choices and select a restaurant that aligns with their desires and preferences.

In the next section of our guide, we will explore the art of balancing criticism and praise, as we navigate the delicate path of delivering honest feedback while recognizing the strengths of a restaurant.

Honesty and Objectivity: Balancing Criticism and Praise

One of the key responsibilities of a restaurant reviewer is to provide honest feedback that helps both the establishment and potential diners. Balancing criticism and praise requires a delicate approach, where your objective observations can guide readers while acknowledging the restaurant’s strengths.

When offering criticism, focus on constructive feedback that can contribute to the restaurant’s growth and improvement. Identify areas where the dining experience fell short, such as service issues, inconsistent flavors, or presentation shortcomings. However, it is crucial to express criticism with respect and fairness, providing specific examples and offering suggestions for potential enhancements.

Alongside criticism, it is equally important to recognize and highlight the restaurant’s strengths. Acknowledge exceptional service, remarkable flavors, or any standout aspects of the dining experience. By showcasing these positive elements, you provide a balanced perspective that reflects the restaurant’s overall performance.

Maintaining objectivity throughout the review process is vital. While personal preferences may influence your perception, strive to evaluate the dining experience objectively, considering the restaurant’s intended concept, target audience, and industry standards. This approach ensures that your review resonates with a wider audience and holds credibility within the culinary community.

Remember, the goal is to provide readers with valuable insights to help them make informed dining decisions. By striking a balance between criticism and praise, you empower readers to navigate the dining landscape, while also acknowledging the efforts and achievements of the restaurant.

In the next section of our guide, we will explore the art of storytelling with structure, where you can elevate your restaurant reviews by crafting engaging narratives that captivate your readers from start to finish.

Storytelling with Structure: Crafting Engaging Reviews

A well-crafted review a restaurant is more than just a collection of observations and opinions; it is a captivating story that engages readers from the very beginning. By employing storytelling techniques and a structured approach, you can elevate your reviews to new heights and create an immersive experience for your audience.

Start by crafting an engaging introduction that hooks your readers. Set the scene by describing the anticipation and excitement as you enter the restaurant. Paint a vivid picture of the ambiance, the aromas wafting through the air, and the palpable sense of anticipation. Grab your readers’ attention from the first sentence and entice them to continue reading.

As you progress through your review, structure it in a way that creates a narrative flow. Consider organizing your review chronologically, starting with the initial impressions and then moving through the various courses of the meal. Alternatively, you can focus on different aspects of the dining experience, such as ambiance, service, flavors, and presentation, dedicating sections to each.

Within this structure, weave a captivating narrative by incorporating sensory details and personal experiences. Describe the emotions evoked by each dish, the interactions with the staff, and the overall atmosphere. Use descriptive language to bring the dining experience to life, allowing your readers to imagine themselves seated at the table.

Build suspense and maintain your readers’ interest by creating a sense of anticipation. Discuss each course with enthusiasm and reveal surprising elements or unexpected flavor combinations. Craft your review in a way that keeps your readers engaged and eager to discover what comes next.

Finally, conclude your review with a satisfying resolution. Summarize your overall impressions and highlight the standout moments or features that made the dining experience memorable. Offer a final recommendation or a closing thought that leaves a lasting impact on your readers.

By infusing your restaurant reviews with storytelling techniques and employing a well-structured approach, you can captivate your audience and transport them into the culinary world you experienced. In the next section of our guide, we will explore the role of visuals, ratings, and additional elements in enhancing your restaurant reviews.

Photos, Ratings, and Additional Elements

In today’s digital age, visual elements play a crucial role in capturing readers’ attention and enhancing the impact of your restaurant reviews. Alongside visuals, ratings and other additional elements provide valuable information and further enrich the review experience. Let’s explore these elements in more detail.

  1. Photos: Including high-quality photos of the restaurant, dishes, and ambiance can significantly enhance your review. Visuals allow readers to visually connect with the dining experience and get a sense of the restaurant’s atmosphere and food presentation. Capture the dishes in their full glory, showcasing their colors, textures, and artistic plating. Additionally, consider including photos that highlight the unique features and ambiance of the restaurant.
  2. Ratings: Ratings provide a quick snapshot of your overall assessment and help readers gauge the quality of the dining experience. Consider using a rating system, such as a scale of 1 to 5 stars or a numerical rating, to rate different aspects of the restaurant, such as service, flavors, ambiance, and value for money. Be consistent and transparent in your rating methodology, ensuring readers can easily interpret and compare the ratings across your reviews.
  3. Additional Elements: Depending on the nature of your review and the specific restaurant, you may consider incorporating additional elements to enhance the reader’s understanding. This could include mentioning any special dietary options or restrictions offered by the restaurant, providing information about the chef or culinary team, or sharing anecdotes or interesting facts related to the restaurant’s history or concept. These additional elements add depth and context to your review, making it more informative and engaging.

Remember to use visuals, ratings, and additional elements thoughtfully and purposefully. They should complement your written review and provide valuable information to your readers. When including photos, ensure they are of high quality and accurately represent the dining experience. Ratings should be fair and consistent, reflecting your overall assessment. Additional elements should be relevant and add value to the review without overwhelming the main content.

In the final section of our guide, we will summarize the key takeaways and provide some tips to help you continue refining your restaurant review skills.

Sharing Your Review: Blogging and Social Media

Once you have crafted a compelling restaurant review, it’s time to share it with the world. Blogging and social media platforms offer excellent avenues for reaching a wider audience and engaging with fellow food enthusiasts. Let’s explore how you can effectively share your review through these channels.

  1. Blogging: If you have your own blog, publish your restaurant review as a dedicated post. Optimize it for search engines by incorporating relevant keywords in the title, headings, and content. Consider adding links to the restaurant’s website or menu for readers who want to explore further. Share personal anecdotes and insights that make your review unique and relatable. Encourage readers to leave comments and engage in discussions about their own dining experiences.
  2. Social Media: Leverage the power of social media platforms to amplify your restaurant review. Share a brief teaser or snippet of your review on platforms like Instagram, Twitter, or Facebook, along with an eye-catching photo from your dining experience. Use relevant hashtags to increase discoverability. Engage with your followers by asking questions or inviting them to share their favorite restaurants or dishes. Consider collaborating with local food influencers or participating in food-related communities to expand your reach.
  3. Collaborations and Guest Posts: Explore opportunities to collaborate with other bloggers or publications in the food and dining niche. Guest posting allows you to tap into their existing audience and gain exposure to new readers. Write guest posts for established food blogs or contribute to local publications. Ensure your guest posts align with their audience and maintain your unique voice and style.
  4. Engagement and Interaction: Actively engage with your readers and followers by responding to comments and messages. Encourage discussions and ask for their recommendations or opinions on other restaurants. Build a community around your reviews and foster meaningful connections with fellow food enthusiasts.
  5. Cross-Promotion: Consider cross-promoting your restaurant reviews through various channels. Include links to your blog posts in your social media profiles, email newsletters, or other relevant online platforms. Collaborate with local businesses, such as food-related events or food delivery services, to promote each other’s content and expand your reach.

Remember to maintain a consistent brand and voice across your blogging and social media platforms. Cultivate an authentic and trustworthy persona that resonates with your audience. Stay active, regularly post new content, and engage with your followers to build a loyal community of food lovers.

By effectively sharing your restaurant reviews through blogging and social media, you can connect with a broader audience, inspire others to explore new dining experiences, and establish yourself as a trusted voice in the culinary world.

Conclusion

In conclusion, our guide has taken you through the various aspects of writing a comprehensive restaurant review. From assessing ambiance and flavors to exploring unique features and balancing criticism and praise, you have gained valuable insights into creating engaging and informative reviews. By incorporating storytelling techniques, visuals, ratings, and additional elements, you can captivate your readers and provide them with valuable guidance in their dining choices.

Now it’s time to put your newfound knowledge into practice and embark on your own culinary adventures. Happy reviewing!