Homemade Angel Food Cake Recipe: How I Finally Got That Light, Fluffy Texture

Homemade Angel Food Cake Recipe: How I Finally Got That Light, Fluffy Texture

The first time I tried baking angel food cake from scratch, I thought it would be pretty simple. I mean, the ingredient list looked short and harmless. Egg whites, sugar, flour… how hard could it be?

Well, let’s just say my first attempt came out looking more like a sad sponge than a cloud-like cake. It tasted okay, but it was dense and kind of rubbery. Definitely not the tall, airy angel food cake I was hoping for.

After a few more tries—and a couple mistakes that were honestly pretty avoidable—I finally figured out the tricks that make homemade angel food cake work. Once the method clicked, the results were amazing: tall, soft cake with that delicate texture that practically melts in your mouth.

So if you’ve ever been curious about making angel food cake at home, let me walk you through the recipe and a few lessons I learned along the way.

What Makes Angel Food Cake Unique?

Angel food cake is very different from most cakes.

Unlike butter cakes or sponge cakes, it contains no butter, no oil, and no egg yolks.

Instead, the structure comes almost entirely from whipped egg whites.

Because of that, the cake becomes:

Extremely light
Soft and airy
Low in fat

The texture should feel almost like a fluffy cloud.

That’s actually where the name “angel food cake” supposedly comes from—it’s light enough for angels.

Ingredients for Homemade Angel Food Cake

The ingredient list is simple, but the technique matters a lot.

Main Ingredients

1 cup cake flour
1 ½ cups granulated sugar
12 large egg whites (room temperature)
1 teaspoon cream of tartar
1 teaspoon vanilla extract
¼ teaspoon salt

That’s it.

But each ingredient plays a specific role in creating the cake’s airy structure.

Why Cake Flour Matters

Cake flour is lighter and finer than all-purpose flour.

This helps keep the cake soft and delicate.

I once tried making angel food cake with regular flour, and the texture turned out heavier than it should have been.

Cake flour really does make a difference.

Step 1: Prepare the Oven and Pan

Preheat the oven to 325°F (163°C).

Use a tube pan, also called an angel food cake pan.

Important note: do NOT grease the pan.

That might sound strange, but the batter needs to cling to the sides of the pan in order to rise properly.

The first time I made this cake, I greased the pan out of habit… and the cake collapsed. Lesson learned.

Step 2: Sift the Flour and Sugar

In a bowl, sift together:

Cake flour
Half of the sugar (¾ cup)

Sifting helps remove lumps and keeps the cake light.

Angel food cake batter is very delicate, so even small lumps can affect the final texture.

Step 3: Beat the Egg Whites

Place the egg whites in a large mixing bowl.

Make sure the bowl is completely clean and free of grease.

Even a small amount of fat can prevent the egg whites from whipping properly.

Start beating the egg whites on medium speed until they become foamy.

Step 4: Add Cream of Tartar

Once the egg whites are foamy, add the cream of tartar.

This ingredient helps stabilize the egg whites and keeps them from collapsing.

Continue beating until soft peaks form.

The first time I made angel food cake, I skipped cream of tartar because I didn’t have it. Big mistake. The structure just wasn’t the same.

Step 5: Gradually Add Sugar

Slowly add the remaining sugar while beating the egg whites.

Add it about one tablespoon at a time.

Keep beating until stiff, glossy peaks form.

This step takes a little patience, but it’s worth it.

The egg whites should look thick and shiny, almost like marshmallow fluff.

Step 6: Add Vanilla and Salt

Gently mix in:

Vanilla extract
Salt

At this stage, the mixture should still be fluffy and smooth.

Try not to overmix.

Step 7: Fold in the Flour Mixture

Now comes the most delicate step.

Gradually sift the flour mixture over the whipped egg whites.

Then gently fold it in using a spatula.

Do this slowly and carefully.

If the batter is stirred too aggressively, the air in the egg whites will collapse.

And trust me, once that air is gone… the cake won’t rise properly.

Step 8: Transfer the Batter to the Pan

Pour the batter into the ungreased tube pan.

Use a spatula to smooth the top gently.

Sometimes I tap the pan lightly on the counter to remove large air pockets.

But be gentle—this batter is fragile.

Step 9: Bake the Cake

Place the pan in the oven and bake for 35 to 40 minutes.

The cake should turn golden brown and spring back when lightly touched.

Another good sign is when cracks appear on the top surface.

The smell during this stage is amazing—sweet, vanilla, slightly toasted.

Step 10: Cool the Cake Upside Down

This step is very important.

Immediately after removing the cake from the oven, turn the pan upside down.

Many tube pans have small feet designed for this.

Cooling upside down prevents the cake from collapsing under its own weight.

The first time I skipped this step, my cake sank almost instantly. It was sad to watch.

Removing the Cake from the Pan

Once the cake is completely cool, run a thin knife around the edges of the pan.

Gently loosen the cake and remove it.

Angel food cake is soft and delicate, so take your time here.

Sometimes a few crumbs break off, which is totally normal.

How Angel Food Cake Should Taste

A properly baked angel food cake should be:

Light and airy
Soft and slightly springy
Mildly sweet with vanilla flavor

The texture should feel almost fluffy.

Not dense, not heavy, and definitely not rubbery.

Ways to Serve Angel Food Cake

Angel food cake is delicious on its own, but it pairs well with many toppings.

Fresh Berries

Strawberries, blueberries, or raspberries add freshness and color.

Whipped Cream

Light whipped cream complements the airy texture of the cake.

Lemon Glaze

A simple lemon glaze adds a bright citrus flavor.

Common Angel Food Cake Mistakes

Angel food cake can be a little tricky if you’re new to it.

Here are a few mistakes I’ve made before.

Greasing the Pan

This prevents the batter from climbing the sides.

The cake needs grip to rise.

Using Cold Egg Whites

Room temperature egg whites whip more easily.

They also create more volume.

Overmixing the Batter

Folding the flour too aggressively deflates the egg whites.

Gentle folding is key.

Tips That Helped Me Improve This Cake

After baking angel food cake several times, a few tricks made the process easier.

Separate Eggs Carefully

Even a small drop of yolk can prevent egg whites from whipping properly.

Use a Clean Mixing Bowl

Grease or oil residue can ruin whipped egg whites.

Glass or metal bowls work best.

Be Patient While Whipping Egg Whites

Rushing this step can affect the cake’s texture.

Properly whipped egg whites create the cake’s structure.

Final Thoughts on Homemade Angel Food Cake

Angel food cake might seem intimidating at first, but once you understand how the egg whites create the structure, the recipe becomes much easier.

The key lessons I learned were:

Whip egg whites properly
Fold ingredients gently
Cool the cake upside down

Once those steps are followed, the result is a beautiful, airy cake that feels incredibly light.

And honestly, when you slice into a homemade angel food cake and see that fluffy interior… it’s pretty satisfying knowing you made it from scratch.

Best Chocolate Chip Cookie Recipe: How I Finally Got Soft, Bakery-Style Cookies at Home

Best Chocolate Chip Cookie Recipe: How I Finally Got Soft, Bakery-Style Cookies at Home

I’ve baked a lot of cookies over the years, and I mean a lot. Some were too crunchy, some spread into thin little pancakes, and a few batches were so dry they probably could have been used as hockey pucks.

But the first time I tasted a truly perfect chocolate chip cookie, I realized how far my homemade ones were from the real deal. It was thick, soft in the middle, slightly crispy on the edges, and packed with melted chocolate. That moment sort of became my mission—to recreate the best chocolate chip cookie recipe at home.

My early attempts were… well, inconsistent. Sometimes the cookies were flat, other times they didn’t spread at all. One batch actually came out tasting a bit like flour. Turns out I measured wrong, which happens more than I’d like to admit.

After experimenting with ingredients, baking temperatures, and dough chilling times, I finally landed on a recipe that produces soft, chewy cookies almost every time. And honestly, once you understand a few key tricks, chocolate chip cookies become one of the most reliable desserts you can make.

What Makes the Best Chocolate Chip Cookie?

Before diving into the recipe, it helps to understand what makes a great cookie.

In my experience, the best chocolate chip cookies have three main qualities:

Soft and chewy centers
Slightly crisp edges
Rich buttery flavor with plenty of chocolate

Texture is everything. If the balance between crisp and chewy is off, the cookie just doesn’t feel right.

One small change in ingredients—like the amount of butter or brown sugar—can completely change the result.

Ingredients for the Best Chocolate Chip Cookies

This recipe uses simple pantry ingredients, but the ratios matter a lot.

Main Ingredients

2 ¼ cups all-purpose flour
1 teaspoon baking soda
½ teaspoon salt
¾ cup unsalted butter (softened)
¾ cup brown sugar
½ cup granulated sugar
2 large eggs
2 teaspoons vanilla extract
2 cups chocolate chips

When I first started baking cookies, I didn’t realize how important brown sugar was. It adds moisture and creates that chewy texture everyone loves.

Using only white sugar tends to produce crisp cookies instead.

Step 1: Mix the Dry Ingredients

In a medium bowl, whisk together:

Flour
Baking soda
Salt

Set this bowl aside.

This step might seem boring, but evenly mixing the dry ingredients helps the cookies bake properly.

Once I skipped this step and added everything directly to the batter. Some cookies puffed up, others stayed flat. It was a weird batch.

Step 2: Cream the Butter and Sugars

In a large bowl, beat together the softened butter, brown sugar, and granulated sugar.

Mix for about 2 to 3 minutes until the mixture becomes light and fluffy.

This step is called creaming, and it helps incorporate air into the dough.

If the butter is too cold, this step won’t work properly. I’ve rushed this before and the cookies turned out dense.

Soft butter really matters here.

Step 3: Add Eggs and Vanilla

Next, add the eggs one at a time.

Mix well after each egg.

Then stir in the vanilla extract.

The dough should look smooth and slightly creamy at this stage.

Sometimes the batter looks a little curdled, which is normal. It usually comes together once the flour is added.

Step 4: Combine Wet and Dry Ingredients

Gradually add the dry ingredients to the butter mixture.

Mix just until combined.

Overmixing can make cookies tough, which I learned the hard way during one of my early baking experiments.

The dough should look thick and slightly sticky.

Step 5: Fold in Chocolate Chips

Stir the chocolate chips into the dough.

Make sure they are evenly distributed.

I like using semi-sweet chocolate chips, but milk chocolate or dark chocolate works too.

Sometimes I even mix two types together. That creates little pockets of different chocolate flavors throughout the cookie.

Step 6: Chill the Dough

Here’s the step many people skip, but it makes a big difference.

Cover the dough and refrigerate it for 30 to 60 minutes.

Chilling the dough helps:

Improve flavor
Prevent cookies from spreading too much
Create thicker cookies

The first time I chilled cookie dough I was skeptical. But once I compared chilled dough cookies to fresh dough cookies, the difference was obvious.

The chilled ones were thicker and chewier.

Step 7: Prepare for Baking

Preheat your oven to 350°F (175°C).

Line a baking sheet with parchment paper.

Parchment prevents sticking and makes cleanup easier.

I used to bake cookies directly on the tray, but sometimes the bottoms would burn slightly.

Parchment paper fixed that problem.

Step 8: Scoop the Cookie Dough

Use a cookie scoop or spoon to portion the dough.

Place dough balls about 2 inches apart on the baking sheet.

The cookies will spread as they bake.

I usually make dough balls about the size of a golf ball for thick bakery-style cookies.

Step 9: Bake the Cookies

Bake the cookies for 10 to 12 minutes.

The edges should turn golden brown, but the centers should still look slightly soft.

This part always messes with my brain a little because the cookies look underbaked when they come out.

But they continue cooking on the hot tray.

If you bake until they look fully done, they’ll probably be overbaked.

Step 10: Let the Cookies Cool

Allow the cookies to cool on the baking sheet for 5 minutes before transferring them to a wire rack.

During this time, the cookies firm up and the chocolate settles.

I used to move them too quickly and sometimes they broke apart.

Patience helps here.

Common Chocolate Chip Cookie Mistakes

Even simple cookie recipes can go wrong if certain steps are skipped.

Here are a few mistakes I’ve personally made.

Using Melted Butter

Melted butter can cause cookies to spread too much.

Softened butter works much better.

Adding Too Much Flour

Too much flour makes cookies dry.

If you scoop flour directly from the bag, you might accidentally pack too much into the cup.

I usually spoon flour into the measuring cup instead.

Overbaking the Cookies

Chocolate chip cookies should be removed from the oven while the center is still soft.

They continue baking on the tray.

This was a big lesson for me.

Tips for Perfect Chocolate Chip Cookies

Over time, a few small tricks have made my cookies even better.

Use Good Chocolate

High-quality chocolate chips or chunks create richer flavor.

Sometimes I chop a chocolate bar instead of using chips.

Add a Sprinkle of Sea Salt

A tiny sprinkle of sea salt on top of the cookies before baking adds amazing flavor.

Sweet and salty together just works.

Don’t Overcrowd the Pan

Giving cookies space allows them to bake evenly.

Crowded trays can cause uneven spreading.

How to Store Chocolate Chip Cookies

Fresh cookies can be stored in an airtight container at room temperature.

They usually stay soft for about 3 to 4 days.

Adding a slice of bread to the container helps keep them soft.

The cookies absorb moisture from the bread.

It sounds weird, but it works.

Why Homemade Cookies Are Worth It

There’s something satisfying about baking cookies from scratch.

The smell of butter, vanilla, and chocolate filling the kitchen is pretty hard to beat.

Plus, homemade cookies taste richer than most store-bought versions.

And honestly, watching friends or family grab a second cookie right after finishing the first one is always a good sign.

Final Thoughts on the Best Chocolate Chip Cookie Recipe

After plenty of trial and error, I realized that great chocolate chip cookies aren’t complicated—they just require the right technique.

The biggest lessons I learned were:

Use softened butter
Chill the dough
Don’t overbake the cookies

Once those steps are followed, the results are consistently soft, chewy, and full of chocolate.

And if you’re anything like me, you’ll probably end up sneaking a warm cookie straight from the tray before they even finish cooling. Honestly… it happens every time.

Chicken Parmesan Recipe: How I Finally Got That Crispy, Cheesy Restaurant-Style Chicken Parm at Home

Chicken Parmesan Recipe: How I Finally Got That Crispy, Cheesy Restaurant-Style Chicken Parm at Home

Chicken Parmesan Recipe: How I Finally Got That Crispy, Cheesy Restaurant-Style Chicken Parm at Home

The first time I tried making chicken parmesan, I thought it would be simple. Bread some chicken, fry it, add sauce and cheese, then bake it. Easy enough, right?

Well… my first attempt was a bit of a disaster. The breading fell off, the chicken wasn’t very crispy, and the sauce made everything soggy. It still tasted good, but it definitely didn’t look like the beautiful chicken parm you see in restaurants.

After a few more attempts and a lot of small adjustments, I finally figured out how to make crispy, juicy chicken parmesan that actually holds together and tastes incredible. Turns out the secret is all about layering the flavors properly and not rushing the breading process.

Now it’s one of my favorite comfort meals to cook, especially when I want something hearty but still homemade. Let me show you the chicken parmesan recipe that worked best for me.

What Is Chicken Parmesan?

Chicken parmesan, also known as chicken parmigiana, is a classic Italian-American dish.

It consists of:

Breaded chicken cutlets
Tomato marinara sauce
Melted mozzarella cheese
Parmesan cheese

The chicken is usually fried until crispy, then topped with sauce and cheese and finished in the oven.

It’s often served with:

Spaghetti
Garlic bread
Salad

The combination of crispy chicken, rich tomato sauce, and melted cheese is what makes the dish so satisfying.

Ingredients for Chicken Parmesan

One thing I like about this recipe is that most ingredients are pantry staples.

Main Ingredients

2 large chicken breasts
1 cup marinara sauce
1 cup shredded mozzarella cheese
½ cup grated Parmesan cheese
Olive oil for frying

Chicken breasts work best when sliced into thinner cutlets.

The first time I made this recipe, I used thick chicken breasts without cutting them. The outside cooked too fast while the inside stayed undercooked.

Lesson learned.

Breading Ingredients

1 cup breadcrumbs (preferably panko)
½ cup grated Parmesan cheese
1 teaspoon garlic powder
1 teaspoon Italian seasoning
½ teaspoon salt
½ teaspoon black pepper

Panko breadcrumbs give the chicken extra crispiness, which I personally love.

Egg Coating

2 large eggs
2 tablespoons milk

This mixture helps the breadcrumbs stick to the chicken.

Preparing the Chicken Cutlets

This step is important for even cooking.

Step 1: Slice the Chicken

Cut each chicken breast horizontally to create thinner pieces.

You should end up with 4 chicken cutlets.

Thin cutlets cook faster and more evenly.

Sometimes I lightly pound them with a meat mallet to make them even thinner.

Step 2: Season the Chicken

Sprinkle both sides of the chicken with a little salt and pepper.

Seasoning the meat itself makes a big difference in the final flavor.

I used to rely only on the breading for flavor, and the chicken tasted a bit bland.

Setting Up the Breading Station

Breaded chicken works best when you prepare everything in advance.

Step 3: Prepare Three Bowls

Set up three shallow bowls:

Flour (about ½ cup)
Egg mixture (eggs + milk)
Breadcrumb mixture

The breadcrumb mixture should contain:

Breadcrumbs
Parmesan
Garlic powder
Italian seasoning
Salt and pepper

This setup makes the breading process much smoother.

Breading the Chicken

Now comes the part where patience really helps.

Step 4: Coat the Chicken

Dip each chicken cutlet in the following order:

Flour
Egg mixture
Breadcrumb mixture

Press the breadcrumbs gently onto the chicken so they stick well.

The first time I rushed this step and barely pressed the coating. The breading slid right off while frying.

Step 5: Let the Chicken Rest

Place the breaded chicken on a plate and let it sit for 10 minutes.

This helps the coating stick better during cooking.

It’s a small trick, but it really works.

Cooking the Chicken

This is where the crispy texture develops.

Step 6: Fry the Chicken

Heat olive oil in a large skillet over medium heat.

Cook the chicken for 3 to 4 minutes per side until golden brown.

The crust should look crispy and evenly browned.

You don’t need a lot of oil, just enough to coat the bottom of the pan.

Adding Sauce and Cheese

Once the chicken is crispy, it’s time to add the classic toppings.

Step 7: Add Marinara Sauce

Place the cooked chicken in a baking dish.

Spoon marinara sauce over each piece.

Be careful not to add too much sauce.

The first time I made chicken parmesan I drowned the chicken in sauce. The crispy coating disappeared instantly.

Step 8: Add Cheese

Top each chicken piece with:

Mozzarella cheese
A little extra Parmesan

The combination creates that classic cheesy layer everyone loves.

Finishing in the Oven

The oven melts the cheese and brings everything together.

Step 9: Bake the Chicken Parmesan

Preheat the oven to 375°F (190°C).

Bake the chicken for 10 to 15 minutes.

The cheese should melt and bubble slightly.

Sometimes the edges even get a little golden, which looks amazing.

How to Serve Chicken Parmesan

Chicken parmesan is incredibly versatile.

Here are a few ways I like to serve it.

With Spaghetti

This is the classic pairing.

Serve the chicken on top of spaghetti with extra marinara sauce.

It’s a hearty, comforting meal.

Chicken Parmesan Sandwich

Place the chicken inside a toasted sandwich roll.

Add extra sauce and melted mozzarella.

It’s messy but incredibly delicious.

With Garlic Bread and Salad

Sometimes I skip pasta and serve chicken parmesan with:

Garlic bread
Caesar salad

It feels lighter but still satisfying.

Common Mistakes I Made When Cooking Chicken Parmesan

Even simple recipes have their tricky moments.

Using Too Much Sauce

Too much marinara makes the breading soggy.

A thin layer works best.

Skipping the Flour Step

Flour helps the egg stick to the chicken.

Without it, the breading can slide off.

Cooking Chicken That’s Too Thick

Thick chicken breasts cook unevenly.

Thin cutlets ensure the chicken stays juicy and fully cooked.

Tips That Helped Me Improve This Recipe

After making chicken parmesan many times, a few small tricks made it even better.

Use Freshly Grated Parmesan

Fresh Parmesan melts better and tastes richer.

Pre-grated cheese sometimes feels a bit dry.

Use Panko Breadcrumbs

Panko breadcrumbs create a crispier crust.

Regular breadcrumbs work too, but panko adds extra crunch.

Let the Chicken Rest After Frying

Resting the chicken for a couple minutes keeps the crust crisp before adding sauce.

Final Thoughts on Making Chicken Parmesan

Chicken parmesan is one of those meals that feels like restaurant food but is actually pretty easy to make at home.

The key lessons I learned were simple:

Slice the chicken thin
Bread it properly
Fry until crispy
Add sauce carefully

Once those steps come together, the result is crispy, juicy chicken topped with rich marinara and melted cheese.

And honestly, when that cheese starts bubbling in the oven and the kitchen smells like garlic and tomato sauce… it’s hard not to feel a little proud of the dish.

Pulled Pork Recipe: How I Learned to Make Tender, Juicy Pulled Pork at Home

Pulled Pork Recipe: How I Learned to Make Tender, Juicy Pulled Pork at Home

The first time I tried making pulled pork, I thought it would be easy. Throw some pork in the oven, add barbecue sauce, and wait. That was my brilliant plan.

Well… it didn’t go so well. The pork came out tough, a little dry, and honestly kind of disappointing. It tasted okay, but it definitely wasn’t that fall-apart, juicy pulled pork you get at good barbecue places.

After a few attempts and a lot of experimenting with cooking times and seasoning, I finally figured out the method that works every time. The secret is slow cooking, patience, and letting the meat break down naturally.

Once I got it right, pulled pork became one of my favorite things to cook. It’s easy, feeds a crowd, and the leftovers are fantastic. So let me walk you through the pulled pork recipe I rely on now.

What Is Pulled Pork?

Pulled pork is a slow-cooked pork dish where the meat becomes so tender that it can literally be pulled apart with forks.

It’s commonly used in:

Barbecue sandwiches
Tacos
Nachos
Rice bowls
Sliders

The traditional cut used is pork shoulder, sometimes called pork butt or Boston butt.

This cut has enough fat and connective tissue to stay juicy during long cooking times. Leaner cuts like pork loin don’t work as well because they dry out too quickly.

The first time I made pulled pork, I used pork loin. Big mistake. Lesson learned.

Ingredients for a Simple Pulled Pork Recipe

One thing I love about pulled pork is that the ingredient list is simple but full of flavor.

Main Ingredients

3 to 4 pounds pork shoulder (boneless or bone-in)
2 tablespoons olive oil
1 cup barbecue sauce
½ cup chicken broth or apple juice

The liquid helps keep the meat moist while it cooks.

I’ve tried both broth and apple juice, and honestly apple juice gives the pork a subtle sweetness that works really well.

Dry Rub Ingredients

A good dry rub adds most of the flavor.

2 tablespoons brown sugar
1 tablespoon paprika
1 teaspoon garlic powder
1 teaspoon onion powder
1 teaspoon salt
½ teaspoon black pepper
½ teaspoon smoked paprika (optional)
½ teaspoon chili powder

You can adjust the spices depending on how smoky or spicy you like your pulled pork.

Preparing the Pork Shoulder

Before cooking, the pork needs to be seasoned properly.

Step 1: Pat the Pork Dry

Use paper towels to pat the pork shoulder dry.

This helps the seasoning stick better.

It’s a small step, but it makes a difference.

Step 2: Apply the Dry Rub

Rub the spice mixture all over the pork.

Make sure every side is covered.

I like to massage the spices into the meat a little. It feels weirdly satisfying and helps the flavor penetrate.

If you have time, let the seasoned pork sit for 30 minutes to an hour before cooking.

Sometimes I even leave it in the fridge overnight when I remember.

Cooking Pulled Pork Low and Slow

This is where patience really matters.

Pulled pork becomes tender only after hours of slow cooking.

Step 3: Sear the Pork (Optional but Worth It)

Heat olive oil in a large skillet over medium-high heat.

Sear the pork on each side for about 2 to 3 minutes.

This creates a flavorful crust.

I used to skip this step, but the extra flavor from searing is definitely noticeable.

Step 4: Transfer to Slow Cooker or Oven

Place the pork in a slow cooker or Dutch oven.

Add the chicken broth or apple juice.

Cover and cook slowly.

Cooking Times for Pulled Pork

Pulled pork needs time for the connective tissue to break down.

Here are the typical cooking options.

Slow Cooker Method

Cook on low for 8 to 10 hours.

This is the easiest method.

I usually start it in the morning and by dinner the pork is perfectly tender.

Oven Method

Preheat the oven to 300°F (150°C).

Cover the pork tightly with foil or a lid.

Cook for 4 to 5 hours until the meat is very tender.

The pork should shred easily with a fork when it’s ready.

If it doesn’t pull apart easily, it probably needs another hour.

Shredding the Pulled Pork

Once the pork is cooked, it’s time for the fun part.

Step 5: Let the Pork Rest

Remove the pork from the cooker and let it rest for 10 to 15 minutes.

This allows the juices to settle.

I used to skip resting, but the meat actually stays juicier when you wait a bit.

Step 6: Pull the Meat Apart

Use two forks to shred the pork.

The meat should fall apart easily into tender strands.

If it feels tough, it likely needs more cooking time.

Good pulled pork practically shreds itself.

Adding Barbecue Sauce

After shredding the meat, mix in barbecue sauce.

Step 7: Mix Pork with Sauce

Return the shredded pork to the cooking juices.

Add about 1 cup barbecue sauce and stir.

Let the pork simmer for another 10 to 15 minutes so the sauce absorbs into the meat.

This step makes the pulled pork extra flavorful.

How to Serve Pulled Pork

Pulled pork is incredibly versatile.

There are so many ways to serve it.

Pulled Pork Sandwiches

This is the classic option.

Serve the pork on soft buns with:

Coleslaw
Pickles
Extra barbecue sauce

The crunch of coleslaw with the tender pork is perfect.

Pulled Pork Tacos

Pulled pork works beautifully in tacos.

Add toppings like:

Avocado
Fresh cilantro
Lime juice
Salsa

The flavors pair really well.

Pulled Pork Rice Bowls

Sometimes I serve pulled pork over rice with roasted vegetables.

It becomes a quick and filling dinner.

Common Mistakes I Made When Cooking Pulled Pork

Pulled pork is forgiving, but a few mistakes can ruin the texture.

Using the Wrong Cut of Pork

Lean cuts like pork loin dry out.

Always use pork shoulder.

The fat helps keep the meat juicy.

Not Cooking It Long Enough

Pulled pork needs time to break down.

If the meat is tough, it probably needs another hour or two.

Patience is key here.

Skipping the Resting Step

Letting the pork rest helps the juices stay inside the meat.

Cutting it too soon can make it dry.

Tips That Helped Me Improve My Pulled Pork

After cooking this recipe many times, a few small tips made a big difference.

Use Apple Juice for Moisture

Apple juice adds subtle sweetness that complements barbecue flavors.

It’s one of my favorite tricks.

Save the Cooking Juices

The liquid in the pot is full of flavor.

Mix some of it back into the shredded pork for extra moisture.

Don’t Overdo the Sauce

Too much barbecue sauce can overpower the pork.

I usually start with a small amount and add more later.

How to Store and Reheat Pulled Pork

Pulled pork actually tastes even better the next day.

Refrigerating Pulled Pork

Store leftovers in an airtight container in the fridge.

It keeps well for 3 to 4 days.

Freezing Pulled Pork

Pulled pork freezes beautifully.

Store it in freezer-safe bags for up to 3 months.

When reheating, add a little broth or sauce to keep it moist.

Final Thoughts on Making Pulled Pork

Pulled pork is one of those dishes that looks impressive but is surprisingly simple to make.

Once you understand the basics—good pork shoulder, slow cooking, and patience—the recipe becomes very reliable.

My early attempts were a bit rough, but after learning the importance of low heat and long cooking time, everything changed.

Now pulled pork is one of my favorite meals to cook when friends or family come over.

It’s comforting, flavorful, and incredibly satisfying.

And honestly, seeing that tender pork fall apart with a fork never gets old.

BBC Good Food Yorkshire Pudding Recipe: My Honest Experience Making the Perfect Yorkshire Puddings

BBC Good Food Yorkshire Pudding Recipe: My Honest Experience Making the Perfect Yorkshire Puddings

I still remember the first time I tried making Yorkshire pudding using the well-known BBC Good Food Yorkshire pudding recipe.
It looked ridiculously simple on paper. Just flour, eggs, milk, and oil. That’s it. But wow… my first batch turned out flat, chewy, and honestly a bit sad looking.
Over time though, after many Sunday roasts and a few cooking disasters, I figured out the little tricks that actually make Yorkshire puddings rise tall, crispy on the outside, and soft in the middle. If you’re trying the classic BBC-style recipe, lemme walk you through what really worked for me.

What Makes Yorkshire Pudding So Special?

Yorkshire pudding is one of those traditional British recipes that seems humble but carries a lot of culinary pride.
Originally, it was served with Sunday roast beef so the batter could catch the meat drippings. The puddings puffed up beautifully and soaked up the gravy.
And trust me, when done right, they’re kinda magical.
Crispy edges.
Golden brown tops.
Soft, airy centers perfect for gravy.
But when done wrong? You get flat little pancakes that make you question your cooking abilities… yeah, been there.

The Classic BBC Good Food Yorkshire Pudding Recipe

The reason so many people search for the BBC Good Food version is because it sticks to a very reliable batter ratio.
Here’s the basic recipe that I’ve used dozens of times now.

Ingredients

• 140 g plain flour (about 1 cup)
• 4 large eggs
• 200 ml milk
• Sunflower oil or vegetable oil
• Pinch of salt (optional)
That’s it. No baking powder. No fancy stuff.
I used to think baking powder was necessary. Turns out, nope. The rise mostly comes from steam and super hot oil.

Equipment You’ll Need

Before starting, make sure you have:
• A muffin tin or Yorkshire pudding tray
• Mixing bowl
• Whisk
• Measuring jug
• Oven that gets really hot
A weak oven is honestly one of the biggest reasons puddings fail. Mine struggled the first time and the batter just sat there like it didn’t care.

Step-by-Step: How I Make Yorkshire Pudding Batter

Over time I realized the batter technique matters more than people think.

Step 1: Mix Eggs and Flour First

I crack the eggs into a bowl and add the flour.
Then whisk until thick and smooth.
At this stage it looks kinda like pancake batter but thicker.
A few lumps sometimes appear, and honestly I used to stress about that. But small lumps disappear once the milk goes in.

Step 2: Slowly Add the Milk

Next I pour the milk in slowly while whisking.
The batter should become smooth and pourable, similar to crepe batter.
If it feels too thick, something probably went wrong with measurements.
But generally it works out fine.

Step 3: Let the Batter Rest

This step is often skipped… and I skipped it for years.
But resting the batter for 30 minutes makes a noticeable difference.
The flour hydrates and gluten relaxes, which helps create better structure during baking.
Sometimes I leave it an hour if I’m prepping a roast dinner.

The Secret to Yorkshire Puddings That Actually Rise

The Secret to Yorkshire Puddings That Actually Rise
BBC Good Food Yorkshire pudding recipe

Here’s the trick that changed everything for me.
It’s not the batter.
It’s the heat of the oil.
Seriously.

Step 4: Preheat the Oven Properly

Set the oven to 220°C (425°F).
Then place your muffin tray inside with about 1 teaspoon oil in each hole.
Let that tray heat for 10–15 minutes.
The oil should be smoking slightly.
If the oil isn’t hot enough, the batter won’t rise. It just spreads.
And yes… I learned that the hard way.

Step 5: Pour Batter Into Hot Oil

Once the tray is blazing hot, carefully remove it.
Then pour batter into each section until about halfway full.
You should hear a little sizzle.
That sound is a good sign.
If there’s no sizzle… well, your oil probably wasn’t hot enough.

Step 6: Bake Without Opening the Oven

Place the tray back into the oven immediately.
Bake for 20–25 minutes.
Important tip: do not open the oven door.
I used to peek. Big mistake.
Cold air enters and the puddings collapse. Very sad moment.

How Yorkshire Puddings Should Look When Done

A good Yorkshire pudding should have:
• Tall puffed edges
• Deep golden brown color
• Crispy outer shell
• Soft hollow center
Sometimes mine lean to one side or rise unevenly. Totally normal.
Honestly, those weird shapes hold gravy better.

Common Yorkshire Pudding Mistakes I Made

Let me save you a few failed batches.

Mistake #1: Cold Oil

Cold oil = flat puddings.
Always heat the oil first.
This is probably the #1 reason recipes fail.

Mistake #2: Opening the Oven Too Early

Yorkshire puddings rely on trapped steam.
If the oven door opens too soon, they collapse.
I once opened it at minute 10 and the whole tray deflated like balloons.
Lesson learned.

Mistake #3: Overfilling the Tray

At first I filled each cup nearly full.
Bad idea.
They overflow and stick together.
Half full works best.

Tips I Learned After Many Sunday Roasts

After cooking this recipe many times, a few small tricks really helped.

Use Room Temperature Ingredients

Cold milk and eggs slow the batter reaction.
Room temp ingredients work better.
Not mandatory, but it helps.

Use Beef Drippings for More Flavor

When making Yorkshire pudding with roast beef, use beef drippings instead of oil.
It gives incredible flavor.
Honestly, it’s how the recipe was meant to be done.

Make Extra Batter

Yorkshire puddings disappear fast.
People grab them like snacks before dinner even starts.
I usually double the batter recipe now.

What to Serve with Yorkshire Pudding

Traditionally they go with roast beef and gravy, but there are many options.
My favorite pairings:
• Roast beef and onion gravy
• Roast chicken with herb gravy
• Sausages and mashed potatoes
• Slow cooked beef stew
Sometimes I even eat leftover puddings with butter and jam the next day. Not traditional, but pretty good honestly.

Can You Make Yorkshire Pudding Ahead of Time?

Yes, but they’re best fresh.
If needed:
1. Bake them fully.
2. Let them cool.
3. Store in an airtight container.
To reheat, bake again for 5 minutes at 200°C.
They crisp back up surprisingly well.

Why the BBC Good Food Recipe Works So Well

The BBC recipe uses a balanced batter ratio.
• Enough eggs for structure
• Enough milk for steam
• Enough flour for shape
Some recipes add baking powder or extra ingredients, but honestly this simple ratio works best.
Simple recipes often do.

Final Thoughts from My Yorkshire Pudding Trials

I won’t lie — my first attempts were kinda embarrassing.
Flat puddings. Burnt edges. Batter spills everywhere.
But once I understood the hot oil trick, everything changed.
Now they rise tall almost every time.
Cooking is funny like that. One small detail makes the whole recipe work.
So if you’re trying the BBC Good Food Yorkshire pudding recipe, just remember:
• Heat the oil properly
• Rest the batter
• Don’t open the oven
Do those three things, and you’ll probably get the tall golden Yorkshire puddings everyone loves.
And if your first batch fails… hey, welcome to the club. Happens to all of us.

Massaman Curry Recipe, Thailand: My Journey into One of the World’s Most Comforting Dishes

Massaman Curry Recipe, Thailand: My Journey into One of the World’s Most Comforting Dishes

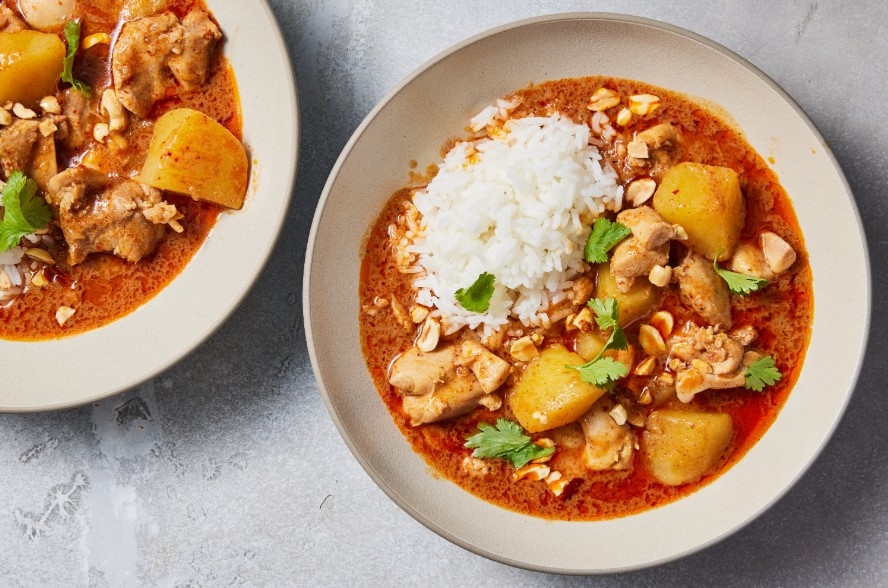
I still remember the first time I tasted Massaman curry. It was on a hot afternoon in Chiang Mai, tucked away in a small family-run restaurant that smelled like roasted peanuts and coconut milk. I had no idea that bowl of golden-brown curry would change how I viewed Thai food forever.
Massaman isn’t just another Thai dish — it’s a love letter to flavor. It’s sweet, savory, nutty, and slightly tangy all at once. The kind of meal that wraps around you like a warm blanket on a rainy day.

Over the years, I’ve experimented (and yes, failed a few times) to recreate that same magic at home. The key, I learned, isn’t just about following a recipe — it’s about understanding the soul of Massaman curry.

What Makes Massaman Curry So Special

Massaman curry, or “Matsaman” as locals might pronounce it, isn’t your typical spicy Thai curry. Its roots trace back to southern Thailand, influenced by Persian and Indian traders centuries ago. That’s why it feels different — deeper in spices like cardamom, cinnamon, and cumin — yet balanced beautifully with Thai ingredients like lemongrass, galangal, and fish sauce.

The result? A curry that’s both rich and gentle. Perfect for those who find green curry too spicy but still want something exotic and comforting. The fusion of cultures in one pot is what makes it truly fascinating.

And honestly, that’s what I love about Thai cooking: it’s global but grounded, spicy but soulful.

Gathering the Ingredients (and Why Each One Matters)

When I first tried making Massaman curry at home, I made the mistake of substituting too many ingredients. Big mistake. Authenticity matters here because every spice and sauce plays a role in creating that layered depth.

Here’s what you’ll need — and why.

For the Curry Paste (if making from scratch)

You can buy store-bought paste (Mae Ploy and Maesri are solid brands), but making it yourself is oddly satisfying.

  • 4 dried red chilies (soaked and deseeded) – for mild heat and color.
  • 1 shallot – gives sweetness and body.
  • 3 cloves garlic – the backbone of Thai curry flavor.
  • 1 stalk lemongrass (white part) – brings citrusy brightness.
  • 1 tsp galangal (or ginger if you can’t find it) – adds warmth.
  • 1 tsp coriander seeds – earthy and aromatic.
  • ½ tsp cumin seeds – Indian influence right here.
  • 1 small cinnamon stick – unexpected, but crucial.
  • 2 cloves & 2 cardamom pods – gives Massaman that signature aroma.
  • 1 tbsp roasted peanuts – this is where that nutty undertone begins.
  • 1 tbsp shrimp paste (optional) – for a deeper umami flavor.

Pound everything in a mortar and pestle until smooth. It’s hard work, I won’t lie. But as you grind the spices together, that scent — oh man — it’s like standing in a Thai kitchen.

For the Curry Itself

  • 500g beef (or chicken or tofu for vegetarian) – beef brisket or chuck gives the best tenderness.
  • 2 cups coconut milk – the creamy heart of the curry.
  • 2 potatoes, cubed – they absorb the flavor beautifully.
  • 1 onion, sliced – adds sweetness and depth.
  • 2 tbsp tamarind juice – for that gentle tang.
  • 2 tbsp palm sugar (or brown sugar) – balances the heat and spice.
  • 2 tbsp fish sauce (or soy sauce for vegetarians) – adds saltiness and umami.
  • ½ cup roasted peanuts – crunch and aroma.
  • 1 stick cinnamon – subtle warmth that ties everything together.

Cooking Massaman Curry Like a Local (and Avoiding My Early Mistakes)

Alright, let’s talk technique. I’ve messed this up before — adding ingredients in the wrong order, boiling coconut milk too hard, or not letting the meat simmer long enough.
Thai cooking is patient cooking. It’s more like jazz than a strict recipe. You learn to listen to the bubbling pot, smell the curry, and taste as you go.

Here’s how I finally nailed it.

  1. Fry the curry paste first.
    Heat a bit of coconut cream (the thick part that sits on top of the can) in a wok or pot until it starts to separate slightly. Then, stir in your curry paste and fry it slowly. You’ll know it’s ready when the oil starts to release from the paste — that’s where the magic begins.
    This step deepens the flavor and gives your curry that restaurant-level aroma.
  2. Add the meat and coat it well.
    Toss in your beef or chicken and make sure every piece is covered in the paste. This helps lock in flavor early.
  3. Add coconut milk, cinnamon, and peanuts.
    Let it all simmer gently. Don’t rush this. The slow cooking makes the meat tender and allows the spices to mingle like old friends.
    (One time, I got impatient and turned the heat up. Big mistake. The coconut milk curdled, and the curry split. It still tasted okay, but it wasn’t pretty.)
  4. Add potatoes and onions.
    These soak up the curry like sponges, making every bite flavorful.
  5. Balance with tamarind, fish sauce, and sugar.
    This is where Thai cooking philosophy shines — sweet, sour, salty, spicy — all in perfect harmony. Adjust slowly, tasting along the way.

After about an hour of simmering, your kitchen should smell like heaven. That’s when you know it’s ready.

Serving Suggestions: The Right Way to Enjoy It

Massaman curry pairs beautifully with steamed jasmine rice or roti bread. The soft rice helps soak up all that rich sauce, while roti adds a buttery contrast.

I sometimes top mine with fresh cilantro or a sprinkle of crushed peanuts. My Thai friend once told me, “Curry is not about the garnish — it’s about the moment.” And she was right.

Serve it hot, ideally shared with family or friends. Massaman isn’t a solo meal; it’s made for company, laughter, and second servings.

My Tips for Making It Unforgettable

Over the years, I’ve discovered a few tricks that consistently make my Massaman curry shine:

  • Use fresh spices. Old spices lose their power. Toast them before grinding to release their oils.
  • Don’t skimp on the coconut milk. The thicker, the better. Avoid “light” versions — they’re too watery.
  • Low and slow cooking. Especially for beef. The longer it simmers, the more tender and flavorful it becomes.
  • Adjust balance at the end. A little tamarind or sugar tweak can make all the difference.
  • Let it rest. Like a good stew, Massaman tastes even better the next day as the flavors meld together.

A Quick Vegetarian or Vegan Twist

Not a meat eater? No worries. Massaman curry adapts beautifully.

Swap beef for tofu, chickpeas, or jackfruit. Use vegetable stock instead of meat broth and soy sauce instead of fish sauce.
I’ve made vegan Massaman a few times for friends, and honestly, it’s still rich and satisfying. The peanuts and coconut milk do all the heavy lifting for creaminess.

The Cultural Story Behind the Curry

Here’s something fascinating: Massaman curry was once a dish served to Thai royalty. It came from Persian merchants who brought their spices to Ayutthaya (the old capital of Thailand) centuries ago.

That’s why you find spices like cardamom and cinnamon — they’re not native to typical Thai food but came from those early global connections.
The word “Massaman” likely comes from “Mussulman,” meaning Muslim, which explains the use of halal meats in some traditional versions.

So, every time you eat this curry, you’re tasting history — a blend of Thai and Persian cultures simmered together over centuries. Pretty amazing, right?

Common Mistakes (and How to Avoid Them)

I’ll be honest — I made every mistake possible when I started.

  1. Boiling coconut milk too hard.
    It curdles and separates. Always simmer gently.
  2. Not frying the paste long enough.
    Undercooked paste makes the curry taste flat. Wait for that fragrant oil to release.
  3. Adding all ingredients at once.
    It’s tempting but wrong. Layer them — protein first, then coconut milk, then veggies.
  4. Ignoring the balance.
    If it tastes “off,” tweak the sugar, tamarind, or fish sauce. Massaman should never be too sweet or salty.
  5. Using lean cuts of meat.
    Don’t. Fatty cuts melt beautifully into the curry. That’s flavor you can’t fake.

Health Benefits (Because Food Should Be Delicious and Good for You)

Despite its richness, Massaman curry isn’t all indulgence. Coconut milk is packed with good fats, and the spices — turmeric, cinnamon, cardamom — all have anti-inflammatory properties.
Add in some veggies, and you’ve got a meal that’s hearty yet nourishing.

Of course, portion control helps. (I say that, but let’s be real — resisting a second serving is tough.)

A Personal Reflection: Why Massaman Curry Feels Like Home

There’s something deeply comforting about this dish. Maybe it’s the slow cooking, or the aroma of cinnamon and peanuts wafting through the air. Maybe it’s how it brings people together.

Whenever I cook it now, I think back to that tiny restaurant in Chiang Mai — the owner smiling as she handed me that steaming bowl. I remember thinking, How can something taste both familiar and foreign at the same time?

That’s the beauty of Massaman curry. It’s a crossroads dish — a reminder that the best flavors often come from cultural blending and patience.

Cooking it isn’t just about feeding yourself. It’s about honoring a story that started centuries ago and continues every time someone takes a bite.

Final Thoughts: Bring Thailand to Your Kitchen

If you’ve never tried making Massaman curry before, don’t be intimidated. Start simple, taste as you go, and don’t stress about perfection.
The joy is in the process — the pounding of the curry paste, the simmering pot, the little dance your kitchen does with every aroma.

Whether you’re cooking it for family, a special date, or just yourself after a long day, Massaman curry never disappoints. It’s rich, complex, and deeply comforting — just like the best parts of life.

SEO-Optimized FAQ

  1. What meat is best for Massaman curry?
    Beef brisket or chuck is traditional because it becomes tender after slow simmering. Chicken thighs also work great if you prefer poultry.
  2. Can I make Massaman curry vegetarian or vegan?
    Yes! Swap meat for tofu, jackfruit, or chickpeas, and use soy sauce instead of fish sauce. The flavor stays authentic and rich.
  3. How long does Massaman curry last?
    Stored in the fridge, it lasts up to 3–4 days. The flavor deepens over time, so the next day’s leftovers are even better.
  4. What’s the difference between Massaman and Panang curry?
    Massaman is milder, with more Indian-style spices like cinnamon and cardamom. Panang is thicker, spicier, and uses more chili and kaffir lime.
  5. Can I freeze Massaman curry?
    Absolutely. Freeze in airtight containers for up to 2 months. Reheat gently to maintain the coconut milk texture.