
From Kitchen Notes to a Recipe Blog Readers Can Trust

From Kitchen Notes to a Recipe Blog Readers Can Trust

A recipe often begins as a scribble on a flour-dusted page: a handful of herbs, an oven temperature, or a note to add more lemon next time. Turning that idea into a recipe other people can cook takes a little more care. Clear measurements, repeatable testing, and honest descriptions help readers get good results—and make a personal collection of favorite dishes useful well beyond your own kitchen.

Start With a Dish You Know Well

The best first recipe to write down is one you have cooked more than once. Familiarity helps you notice what matters: how finely the onion should be chopped, what the mixture looks like before it goes into the oven, and which steps can happen while something else cooks. A dish you know also gives you a reliable starting point for testing changes.

Write down the ingredients as you use them, not from memory afterward. Include quantities, preparation details, and the order in which they go into the pan. “One onion” may be enough for your household, but a more useful note might specify a medium onion, finely diced. Record the pan size and heat level, too. These small details can make a recipe easier to repeat.

Test Before You Publish

A recipe that tastes good once may still need refining. Cook it again, following your written directions as if you were a new reader. If you find yourself relying on an unrecorded instinct—adding water until the sauce looks right, for example—note what that looks like or give a range to guide others.

Change only one or two things at a time when testing. If a loaf is dense, adjusting the flour and the liquid together makes it harder to know what helped. Keep a simple kitchen log with the date, ingredient amounts, cooking time, and result. The next attempt can then build on useful information rather than guesswork.

Pay attention to the difference between a precise instruction and a helpful cue. “Bake for 25 minutes” is a starting point; “bake until the edges are golden and a toothpick comes out with a few moist crumbs” gives readers a way to judge doneness in ovens that run differently.

Write Steps That Reduce Guesswork

Put the ingredients in the order they are used, and group them when a recipe has distinct parts, such as a sauce and a filling. Use familiar measurements and state whether ingredients are packed, sifted, drained, or at room temperature when that detail affects the outcome. For foods that need safe handling, include practical guidance such as cooking poultry to a safe internal temperature and refrigerating leftovers promptly.

Keep each instruction focused on one action where possible. “Warm the oil, add the garlic, and cook until fragrant” is clearer than a paragraph that combines chopping, frying, seasoning, and simmering. Mention visual and sensory cues alongside times, since ingredient size, cookware, and appliances can all affect cooking speed.

  • Give a yield: State how many servings the dish makes, or how many portions it produces.
  • Explain preparation: Clarify whether vegetables are peeled, chopped, or measured after cooking.
  • Offer substitutions carefully: Note changes that you have tested, and explain when they may affect texture or flavor.
  • Include storage advice: Say how to refrigerate or freeze leftovers and how to reheat them.

Make the Recipe Easy to Find and Use

A useful recipe page answers readers’ questions without making them search through a long story. A short introduction can explain what the dish tastes like, when you serve it, or what makes the method distinctive. Then make the recipe details easy to scan, with clear headings for ingredients, preparation, cooking time, and serving suggestions.

If you publish recipes online, basic search guidance can help the right readers discover them. The iCopify blog covers topics such as SEO and publishing, which can help food writers understand how online content is found. Apply that knowledge without letting keywords take over: an accurate title, a direct description, and useful answers to common cooking questions are better for readers than repeated search phrases.

Use Photos to Clarify, Not Just Decorate

A photograph can show the texture of a finished dish, the color of a properly browned crust, or how a serving should look. Natural light near a window often gives food a clear, appealing appearance. Keep the setting simple enough that the dish remains the focus, and consider adding a process photo when a visual step—such as shaping dough—is difficult to describe.

Good photos take practice, but food creators do not have to handle every task alone. A freelance marketplace such as Osdire spans services including food photography, graphic design, and writing. If you hire help, agree on the deliverables and style in advance, and make sure the final images accurately represent the recipe readers will make.

Keep Improving the Collection

After publishing, pay attention to the questions people ask and the points where they get stuck. If several readers wonder whether a sauce can be made ahead, add a tested answer. If a substitution changes the result, explain that clearly. Updating a recipe with better instructions is part of caring for it, just as adjusting seasoning is part of cooking.

A trustworthy recipe is not simply a list of ingredients. It is a record of a dish that has been tested, explained, and made easier for someone else to enjoy. Whether you are preserving family favorites or sharing new experiments, careful notes and reader-focused directions turn kitchen knowledge into something people can return to—and cook with confidence.
Allulose Manufacturer Trends Connected With Modern Annatto Color Applications

Allulose Manufacturer Trends Connected With Modern Annatto Color Applications

Packaged food manufacturers are now updating recipes more regularly as today’s customer preferences continue to change in the competitive international retail industry. Shoppers regularly observe sugar options and factor in transparency when purchasing beverages, snacks, candies, and dairy products at the grocery store. Due to these market changes, an efficient allulose producer regularly food companies growing low-sugar products worldwide work with caution. Different applications of annatto color also support visually appealing product presentation while helping brands maintain cleaner ingredient positioning across modern packaged food markets.

Sweetener Selection Influences Final Product Appearance Greatly

Reduced-sugar products sometimes require additional formulation adjustments because ingredient interactions can affect texture, moisture balance, and visual presentation afterward. Some sweetener systems influence how colors appear during processing, storage, and transportation throughout large commercial distribution networks globally today. A reliable allulose manufacturer generally supports manufacturers by providing formulation guidance during recipe development and production testing activities commercially. Different annatto color applications also help companies maintain warm yellow or orange shades inside beverages, dairy products, sauces, and processed snack categories worldwide.

Processing Temperatures Affect Ingredient Performance Differently

In industrial food environments, materials are exposed to temperature, stress, and changing humidity conditions every single day during commercial manufacturing operations. Some formulas remain visually robust, as others require careful temperature control sometime in later mixing and packaging stages. A professional allulose manufacturer generally recommends testing the sweetener’s overall performance under actual production conditions before officially scaling up the product to larger retail markets. Many annatto paint suppliers additionally offer technical hints that help with greater appearance stability, sometimes in commercial food processing around the world, as well as prolonged garage intervals.

Beverage and Dairy Products Need Stable Ingredient Compatibility

Liquid and dairy-based products create several formulation challenges because acidity levels and refrigeration conditions influence ingredient stability throughout distribution operations globally today. Manufacturers often test element combinations before releasing products in commercially competitive retail environments. A reputable allulose manufacturer often supports beverage and dairy brands, which later develop low-calorie products that require smooth texture and balanced sweetness all through production. Reliable annatto color formulas additionally within flavored milk, processed cheese, nutrient-dense desserts, and cereals’ presentation worldwide.

Ingredient Transparency Keeps Influencing Consumer Purchasing Decisions

Modern consumers now carefully evaluate product labels, as well-known ingredients strongly influence buying behavior in the packaged food industry around the world these days. Synthetic additives are receiving additional attention, especially among customers who often prefer simpler ingredient lists in liquid, snack, and confectionery products. Commercial partnerships with a trusted allulose manufacturer often help businesses support cleaner product positioning while adapting to changing retail expectations globally. Different annatto color applications also assist manufacturers in creating warm natural-looking shades without depending fully on older synthetic ingredient systems anymore.

Conclusion

Food manufacturing continues evolving because ingredient transparency and reduced-sugar formulations influence modern product development strategies globally today. Many businesses now explore foodrgb.com for ingredient insights and practical information supporting commercial formulation requirements across competitive industries. Choosing an experienced allulose manufacturer often helps companies develop balanced products supporting modern consumer expectations regarding sweetness and ingredient presentation successfully. Reliable annatto color solutions also support stronger visual consistency throughout beverages, dairy products, confectionery items, and processed snack manufacturing operations internationally. Businesses planning future product expansion should review supplier quality practices, technical support, and formulation compatibility carefully before making long-term sourcing decisions.

Strawberry Shortcake Recipe: How I Learned to Make the Perfect Homemade Strawberry Shortcake

Strawberry Shortcake Recipe: How I Learned to Make the Perfect Homemade Strawberry Shortcake

Strawberry Shortcake Recipe: How I Learned to Make the Perfect Homemade Strawberry ShortcakeThe first time I made strawberry shortcake, I assumed it would be super easy. After all, it’s just strawberries, cream, and cake… right? That was my thinking anyway.

But my first attempt turned out a little disappointing. The cake was too dry, the strawberries were bland, and the whipped cream didn’t hold its shape very well. It tasted fine, but it didn’t have that fresh, bakery-style magic I was hoping for.

After a few tries and some experimenting with different techniques, I finally found the version that works beautifully every time. The secret, as it turns out, is using soft biscuit-style shortcake instead of regular sponge cake, plus letting the strawberries macerate long enough to create their own sweet syrup.

Now strawberry shortcake has become one of my favorite desserts to make when strawberries are in season. It’s simple, fresh, and honestly pretty impressive for something made with such basic ingredients.

Let me show you the strawberry shortcake recipe that finally worked for me.

What Is Strawberry Shortcake?

Strawberry shortcake is a classic dessert made with three main elements:

Sweet biscuits or shortcake
Fresh strawberries
Whipped cream

The shortcake is usually split in half, filled with strawberries and cream, then topped with more berries and cream.

Some people use sponge cake instead of biscuits, but traditional shortcake uses a slightly crumbly biscuit that soaks up the strawberry juice beautifully.

The contrast between the soft cake, juicy strawberries, and fluffy whipped cream is what makes this dessert so satisfying.

Ingredients for Strawberry Shortcake

One thing I love about this dessert is that it doesn’t require fancy ingredients.

For the Strawberry Filling

1 pound fresh strawberries
¼ cup sugar
1 teaspoon lemon juice (optional)

The lemon juice helps brighten the flavor of the berries.

The first time I skipped this step and the strawberries tasted a little flat. A small splash of lemon makes a noticeable difference.

For the Shortcake Biscuits

2 cups all-purpose flour
¼ cup sugar
1 tablespoon baking powder
½ teaspoon salt
½ cup cold butter (cut into cubes)
⅔ cup milk or heavy cream
1 teaspoon vanilla extract

Cold butter is important here. It helps create those tender, flaky layers in the biscuit.

For the Whipped Cream

1 cup heavy whipping cream
2 tablespoons powdered sugar
1 teaspoon vanilla extract

Fresh whipped cream makes a big difference compared to store-bought toppings.

Preparing the Strawberries

This step might seem simple, but it’s actually very important.

Step 1: Slice the Strawberries

Wash and slice the strawberries into medium pieces.

Place them in a bowl and sprinkle with sugar.

Add the lemon juice if using.

Step 2: Let the Strawberries Sit

Stir the berries gently and let them sit for 20 to 30 minutes.

This process is called macerating.

The sugar pulls out the juices from the strawberries, creating a sweet syrup that soaks into the shortcake.

The first time I made strawberry shortcake I skipped the waiting part. Big mistake. The strawberries didn’t release enough juice, and the dessert felt dry.

Making the Shortcake Biscuits

The biscuit base is what gives strawberry shortcake its signature texture.

Step 3: Mix the Dry Ingredients

In a large bowl combine:

Flour
Sugar
Baking powder
Salt

Stir everything together until evenly mixed.

Step 4: Cut in the Butter

Add the cold butter cubes to the flour mixture.

Use a pastry cutter or your fingers to mix the butter into the flour.

The mixture should resemble coarse crumbs.

This step creates those flaky layers in the biscuit.

Sometimes I rush this step and the butter melts too quickly. When that happens, the biscuits become a little dense.

Step 5: Add Milk and Vanilla

Pour in the milk and vanilla extract.

Mix gently until a soft dough forms.

Be careful not to overmix.

The dough should look slightly rough and shaggy, not perfectly smooth.

Shaping and Baking the Shortcakes

Once the dough is ready, shaping the biscuits is pretty quick.

Step 6: Shape the Dough

Turn the dough onto a lightly floured surface.

Pat it into a circle about 1 inch thick.

Use a biscuit cutter or glass to cut out rounds.

You should get about 6 shortcakes.

Step 7: Bake the Biscuits

Preheat the oven to 400°F (200°C).

Place the biscuits on a baking sheet lined with parchment paper.

Bake for 12 to 15 minutes until golden brown.

The tops should look slightly crisp while the inside stays soft.

Making Fresh Whipped Cream

Whipped cream only takes a couple minutes but makes a huge difference.

Step 8: Whip the Cream

In a chilled bowl combine:

Heavy cream
Powdered sugar
Vanilla extract

Whip with a mixer until soft peaks form.

Soft peaks mean the cream holds its shape but still looks smooth.

Overwhipping can turn the cream grainy, which I’ve done before more than once.

Assembling the Strawberry Shortcake

This is the fun part.

Step 9: Slice the Shortcakes

Cut each biscuit in half horizontally.

Place the bottom half on a plate.

Step 10: Add Strawberries and Cream

Spoon a generous amount of strawberries and syrup over the bottom half.

Add a dollop of whipped cream.

Place the top half of the biscuit over the filling.

Then add more strawberries and whipped cream on top.

It might get messy, but that’s part of the charm.

How Strawberry Shortcake Should Taste

A good strawberry shortcake should have a perfect balance of textures.

You should taste:

Juicy strawberries
Soft buttery biscuit
Light whipped cream

The strawberry syrup should soak slightly into the biscuit without making it soggy.

When everything comes together, it’s one of the most refreshing desserts around.

Common Mistakes I Made When Making Strawberry Shortcake

Even simple recipes have their pitfalls.

Using Warm Butter in the Dough

Warm butter ruins the biscuit texture.

Always use cold butter for flaky layers.

Skipping the Maceration Step

Strawberries need time to release their juices.

Without that syrup, the dessert tastes dry.

Overmixing the Biscuit Dough

Overmixing makes the shortcakes tough.

Gentle mixing keeps them tender.

Tips That Helped Me Improve My Strawberry Shortcake

After making this dessert many times, a few tricks really helped.

Use Ripe Strawberries

The quality of the strawberries matters a lot.

Sweet, ripe berries create the best flavor.

Chill the Whipping Bowl

Cold bowls help whipped cream form faster.

Sometimes I place the bowl in the freezer for 10 minutes.

Serve Immediately

Strawberry shortcake tastes best right after assembling.

The biscuits stay light and the cream stays fluffy.

Variations of Strawberry Shortcake

Once you learn the basic recipe, it’s fun to experiment.

Some variations include:

Adding blueberries or raspberries
Using lemon zest in the biscuits
Drizzling chocolate sauce on top
Adding mascarpone to the whipped cream

Small changes can create entirely new flavors.

Final Thoughts on Making Strawberry Shortcake

Strawberry shortcake is one of those desserts that feels simple but incredibly satisfying.

It doesn’t require complicated techniques or fancy ingredients.

Just good strawberries, tender biscuits, and fresh whipped cream.

My first attempts were a little rough, but once I understood the importance of cold butter and macerated berries, the recipe became very reliable.

Now it’s a dessert I love making whenever fresh strawberries are available.

And honestly, watching that strawberry syrup soak into a warm biscuit with whipped cream on top never gets old.

Tabbouleh Recipe: How I Learned to Make Fresh, Authentic Middle Eastern Tabbouleh

Tabbouleh Recipe: How I Learned to Make Fresh, Authentic Middle Eastern Tabbouleh

The first time I tried tabbouleh, I honestly didn’t expect much. It looked like a simple salad—just parsley, tomatoes, and a little bulgur. Nothing too exciting at first glance. But one bite completely changed my mind.
It was bright, lemony, herby, and incredibly fresh. The kind of food that somehow tastes light but still satisfying. I remember thinking, why don’t I make this more often?
Of course, my first attempt at making tabbouleh at home didn’t go perfectly. I used way too much bulgur and barely enough parsley. The result tasted fine, but it definitely wasn’t the vibrant Middle Eastern salad I had tasted before.
After a few tries and some adjustments, I finally understood the secret: real tabbouleh is mostly parsley, not bulgur. That little discovery changed everything.
Let me walk you through the tabbouleh recipe I now use, along with some practical tips I learned along the way.

What Is Tabbouleh?

Tabbouleh is a traditional Middle Eastern parsley salad that originates from the Levant region, especially Lebanon and Syria.
The dish is known for its fresh ingredients and bright citrus flavor.
Traditional tabbouleh includes:
• Fresh parsley
• Bulgur wheat
• Tomatoes
• Mint
• Lemon juice
• Olive oil
What makes it special is the balance. The herbs should dominate the dish, while the bulgur adds just a little texture.
The first time I made tabbouleh, I treated it like a grain salad. Big mistake. Authentic tabbouleh is more like a herb salad with a little grain mixed in.

Ingredients for a Traditional Tabbouleh Recipe

One thing I love about tabbouleh is that the ingredients are simple and fresh.

Main Ingredients

• 2 cups fresh parsley (finely chopped)
• ¼ cup fine bulgur wheat
• 2 medium tomatoes (diced)
• 2 tablespoons fresh mint (chopped)
• 3 tablespoons lemon juice
• 3 tablespoons olive oil
• ½ teaspoon salt
• ¼ teaspoon black pepper
• 2 green onions (optional)
Fresh herbs are absolutely essential here. Dried parsley just won’t work.
When I first made tabbouleh, I underestimated how much parsley I needed. It looked like an enormous pile while chopping, but once everything mixes together it becomes just right.

Preparing the Bulgur Wheat

Bulgur is the only grain used in traditional tabbouleh.
The good news is that it doesn’t require much cooking.

Step 1: Soak the Bulgur

Place the bulgur in a small bowl and cover it with warm water.
Let it soak for 10 to 15 minutes.
After soaking, drain it and squeeze out excess water.
The bulgur should feel soft but not mushy.
The first time I made tabbouleh, I added too much water and forgot to drain it properly. The salad turned soggy pretty fast. Now I always squeeze the bulgur slightly to remove extra moisture.

Chopping the Herbs the Right Way

This is where tabbouleh really comes together.

Step 2: Finely Chop the Parsley

Finely chop the parsley using a sharp knife.
You want small pieces, not huge leafy chunks.
Some people use a food processor, but I prefer chopping by hand. The texture stays better, and the parsley doesn’t become mushy.
Plus, there’s something satisfying about chopping herbs slowly. It kinda becomes a relaxing kitchen moment.

Step 3: Prepare the Mint and Tomatoes

Chop the mint leaves finely.
Dice the tomatoes into small cubes.
If the tomatoes are very juicy, remove some seeds. Too much tomato juice can make the salad watery.
I learned that the messy way once… my first bowl of tabbouleh looked more like soup than salad.

Mixing the Tabbouleh Salad

Now comes the easy part.

Step 4: Combine Everything

In a large bowl, mix together:
• Chopped parsley
• Mint
• Tomatoes
• Soaked bulgur
• Green onions (if using)
Toss everything gently so the ingredients distribute evenly.
The colors at this stage are beautiful—bright green herbs with red tomato pieces.

Step 5: Add the Dressing

Next, add the lemon juice, olive oil, salt, and black pepper.
Toss the salad again until everything is coated.
The lemon and olive oil dressing is what gives tabbouleh its fresh, zesty flavor.
Sometimes I add an extra squeeze of lemon because I really enjoy that citrus brightness.

Let the Salad Rest Before Serving

This step might seem small, but it really helps the flavor.

Why Resting Improves Flavor

Let the tabbouleh sit for about 15 to 30 minutes before serving.
This allows the bulgur to absorb the dressing and the flavors to blend together.
I used to serve it immediately, but the salad tastes noticeably better after resting a bit.

How Tabbouleh Should Taste

Good tabbouleh should taste:
• Fresh
• Lemon bright
• Lightly salty
• Herb-forward
The parsley should dominate the flavor.
The bulgur should be present but subtle.
If the salad tastes mostly like grains, it probably has too much bulgur.

Common Mistakes I Made When Learning This Recipe

Honestly, tabbouleh seems easy, but there are a few mistakes that can throw it off.

Using Too Much Bulgur

This is the most common mistake.
Authentic tabbouleh contains very little bulgur.
Think of it as a garnish rather than the main ingredient.

Not Chopping the Herbs Fine Enough

Large parsley pieces make the salad harder to eat.
Finely chopped herbs create the right texture.

Adding Too Much Tomato Juice

Juicy tomatoes can make the salad watery.
Removing some seeds helps keep the texture balanced.

Serving Ideas for Tabbouleh

Tabbouleh is incredibly versatile.
Here are a few ways I like to serve it.

With Grilled Meat

Tabbouleh pairs perfectly with grilled dishes like:
• Chicken kebabs
• Lamb skewers
• Grilled fish
The fresh herbs balance rich flavors really well.

Inside Pita Bread

One of my favorite ways to eat tabbouleh is stuffed inside warm pita bread.
Add hummus or grilled vegetables and it becomes a fantastic sandwich.

As Part of a Mezze Plate

Tabbouleh is often served alongside other Middle Eastern dishes like:
• Hummus
• Baba ganoush
• Falafel
• Stuffed grape leaves
A big mezze platter with several small dishes always feels special.

Helpful Tips I Learned Over Time

After making tabbouleh many times, a few small tricks made the recipe even better.

Use Flat-Leaf Parsley

Flat-leaf parsley has a stronger flavor than curly parsley.
It’s usually the best choice for tabbouleh.

Use Fresh Lemon Juice

Fresh lemon juice gives the salad its signature brightness.
Bottled lemon juice just doesn’t taste the same.

Add Olive Oil Slowly

Sometimes adding olive oil gradually helps keep the salad from becoming too heavy.
Tabbouleh should feel light and refreshing.

Why Homemade Tabbouleh Tastes Better

Store-bought tabbouleh can be convenient, but homemade versions taste far fresher.
The herbs are brighter.
The lemon flavor is stronger.
And the texture stays crisp instead of soggy.
Once I started making tabbouleh at home, I realized how easy it really is.

Final Thoughts on Making Tabbouleh

Tabbouleh might look like a simple salad, but when made properly it’s incredibly flavorful.
The key lessons I learned were simple:
• Use lots of parsley
• Keep bulgur minimal
• Chop herbs finely
• Balance lemon and olive oil
Once you get those basics right, the recipe becomes effortless.
Now whenever I have fresh parsley in the fridge, tabbouleh is one of the first dishes that comes to mind.
It’s quick, healthy, and packed with flavor.
And honestly, sometimes the simplest recipes end up being the most satisfying.

Chocolate Chip Cookie Recipe: The Homemade Method That Finally Worked for Me

Chocolate Chip Cookie Recipe: The Homemade Method That Finally Worked for Me

Introduction: My Long Journey to the Perfect Chocolate Chip Cookie

I’ll admit something right away — my first batch of chocolate chip cookies was a complete disaster. The cookies spread into one giant sheet on the baking tray. They were thin, greasy, and honestly kinda sad looking.
At the time I thought baking cookies would be simple. You mix ingredients, bake them, and boom… cookies. Turns out there’s a little more science involved than I expected.
Over the years I’ve tested different chocolate chip cookie recipes, experimented with baking temperatures, changed sugar ratios, and even ruined a few batches along the way. But eventually I found a method that consistently produces cookies that are soft in the center, slightly crispy on the edges, and packed with chocolate flavor.
This recipe is the one I come back to again and again. It’s reliable, simple, and doesn’t require fancy baking skills. If you follow a few small tricks — which I learned the hard way — you’ll end up with cookies that taste like they came from a bakery.

Ingredients for Classic Chocolate Chip Cookies

The beauty of chocolate chip cookies is that the ingredients are simple and easy to find.

Main Ingredients

Here’s what you’ll need for one batch:
• 2 1/4 cups all-purpose flour
• 1 teaspoon baking soda
• 1 teaspoon salt
• 3/4 cup unsalted butter (softened)
• 3/4 cup brown sugar
• 1/2 cup granulated sugar
• 2 large eggs
• 2 teaspoons vanilla extract
• 2 cups semi-sweet chocolate chips
Optional ingredients that I sometimes add:
• 1 cup chopped walnuts or pecans
• 1/2 teaspoon cinnamon for extra warmth
• A sprinkle of flaky sea salt on top
One thing I learned the hard way: using room-temperature ingredients makes mixing much easier.

Step-by-Step Chocolate Chip Cookie Instructions

The process is simple, but small details can make a big difference in texture and flavor.

Step 1: Prepare the Dry Ingredients

In a medium bowl, combine:
• Flour
• Baking soda
• Salt
Whisk these together until evenly mixed.
This step might seem unnecessary, but it helps distribute the baking soda evenly through the dough. Skipping this once gave me cookies that baked unevenly.

Step 2: Cream the Butter and Sugars

In a large mixing bowl, beat together:
• Softened butter
• Brown sugar
• Granulated sugar
Mix until the texture becomes light and fluffy. This usually takes about 2–3 minutes with an electric mixer.
Creaming the butter properly helps create cookies that are soft rather than dense.

Step 3: Add Eggs and Vanilla

Next, add the eggs one at a time, mixing well after each addition.
Then stir in the vanilla extract.
At this point the mixture should look smooth and slightly creamy.

Step 4: Combine Wet and Dry Ingredients

Gradually add the flour mixture to the wet ingredients.
Mix slowly until the dough forms.
Avoid overmixing here. I used to stir the dough forever thinking it would make things better. Instead it made the cookies tougher.

Step 5: Add the Chocolate Chips

Now fold in the chocolate chips.
Make sure they’re evenly distributed throughout the dough.
Sometimes I sneak in a few extra chocolate chips because… well, more chocolate never hurts.

Chilling the Dough (A Trick That Makes Better Cookies)

This step changed everything for me.

Why You Should Chill Cookie Dough

Once the dough is mixed, cover it and place it in the refrigerator for at least 30 minutes.
Chilling helps:
• Prevent cookies from spreading too much
• Improve flavor
• Create thicker, chewier cookies
The first time I tried chilling dough I noticed a huge difference. The cookies baked taller and had better texture.
Some bakers chill dough overnight, which can make the flavor even richer.

Baking the Cookies

Now the fun part begins.

Step 1: Preheat the Oven

Set your oven to 350°F (175°C).
Line a baking sheet with parchment paper or a silicone baking mat.
This prevents cookies from sticking and makes cleanup easier.

Step 2: Scoop the Dough

Use a cookie scoop or tablespoon to portion dough balls.
Place them about 2 inches apart on the baking sheet.
Cookies spread as they bake, so spacing matters.

Step 3: Bake the Cookies

Bake for 10–12 minutes.
The edges should look golden brown, while the centers may still look slightly soft.
This is normal. Cookies continue cooking slightly after being removed from the oven.
I used to overbake cookies because I thought they looked underdone. Turns out that’s how you accidentally make crunchy cookies instead of soft ones.

Cooling the Cookies Properly

Let the cookies cool on the baking sheet for about 5 minutes.
Then transfer them to a wire rack to cool completely.
Cooling allows the cookies to set and develop their final texture.
And honestly… waiting for them to cool is probably the hardest part.
The smell of freshly baked cookies makes patience very difficult.

Tips That Help Make the Best Chocolate Chip Cookies

After many batches, I picked up a few tricks that consistently improve results.

Use Brown Sugar for Moisture

Brown sugar contains molasses, which helps keep cookies soft and chewy.
That’s why many recipes use more brown sugar than white sugar.

Measure Flour Correctly

Too much flour can make cookies dry.
Instead of scooping flour directly from the bag, spoon it into the measuring cup and level it off.
It sounds picky, but it actually makes a difference.

Try Different Chocolate Chips

Chocolate chips come in many varieties:
• Semi-sweet
• Dark chocolate
• Milk chocolate
• White chocolate
Sometimes I mix two types together for a more interesting flavor.

Fun Variations of Chocolate Chip Cookies

Once you master the classic recipe, you can try different variations.

Chocolate Chip Walnut Cookies

Adding chopped walnuts introduces a crunchy texture that pairs nicely with the soft cookie base.
Just fold about 1 cup of chopped walnuts into the dough.

Sea Salt Chocolate Chip Cookies

Sprinkle a small pinch of flaky sea salt on top of each cookie before baking.
The salty-sweet combination tastes amazing.

Double Chocolate Chip Cookies

Replace 1/4 cup of flour with cocoa powder to create a chocolate cookie base.
Then add chocolate chips for extra richness.
These cookies are incredibly chocolatey.

Common Mistakes When Baking Chocolate Chip Cookies

Even experienced bakers run into problems sometimes.

Cookies Spread Too Much

This can happen if:
• Butter is too soft
• Dough wasn’t chilled
• Too little flour was used
Chilling the dough usually solves this problem.

Cookies Turn Out Hard

Hard cookies are often caused by:
• Overbaking
• Too much flour
• Overmixing the dough
Removing cookies from the oven when the centers still look slightly soft usually fixes this.

Final Thoughts: Why Homemade Cookies Are Always Worth It

Baking chocolate chip cookies at home is one of those small pleasures that never gets old.
The smell alone can fill an entire kitchen with warmth. And the first bite of a soft, warm cookie fresh from the oven? That’s hard to beat.
Sure, it might take a few tries to get the recipe just right. My early attempts were far from perfect.
But once you learn a few key techniques — like chilling the dough and measuring ingredients carefully — making great cookies becomes surprisingly easy.
And before long, you might find yourself baking them again and again… just because the house feels a little happier when cookies are in the oven.

Massaman Curry Recipe, Thailand: My Journey into One of the World’s Most Comforting Dishes

Massaman Curry Recipe, Thailand: My Journey into One of the World’s Most Comforting Dishes

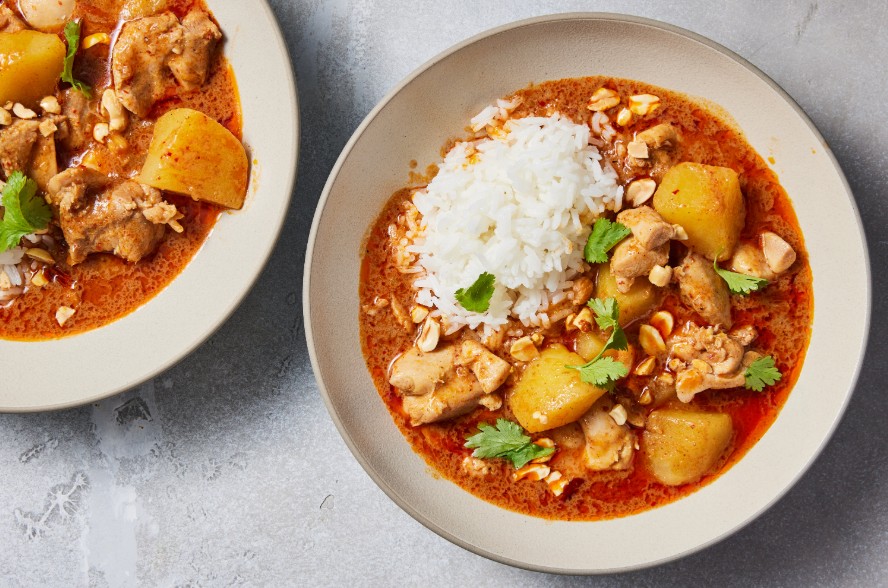
I still remember the first time I tasted Massaman curry. It was on a hot afternoon in Chiang Mai, tucked away in a small family-run restaurant that smelled like roasted peanuts and coconut milk. I had no idea that bowl of golden-brown curry would change how I viewed Thai food forever.
Massaman isn’t just another Thai dish — it’s a love letter to flavor. It’s sweet, savory, nutty, and slightly tangy all at once. The kind of meal that wraps around you like a warm blanket on a rainy day.

Over the years, I’ve experimented (and yes, failed a few times) to recreate that same magic at home. The key, I learned, isn’t just about following a recipe — it’s about understanding the soul of Massaman curry.

What Makes Massaman Curry So Special

Massaman curry, or “Matsaman” as locals might pronounce it, isn’t your typical spicy Thai curry. Its roots trace back to southern Thailand, influenced by Persian and Indian traders centuries ago. That’s why it feels different — deeper in spices like cardamom, cinnamon, and cumin — yet balanced beautifully with Thai ingredients like lemongrass, galangal, and fish sauce.

The result? A curry that’s both rich and gentle. Perfect for those who find green curry too spicy but still want something exotic and comforting. The fusion of cultures in one pot is what makes it truly fascinating.

And honestly, that’s what I love about Thai cooking: it’s global but grounded, spicy but soulful.

Gathering the Ingredients (and Why Each One Matters)

When I first tried making Massaman curry at home, I made the mistake of substituting too many ingredients. Big mistake. Authenticity matters here because every spice and sauce plays a role in creating that layered depth.

Here’s what you’ll need — and why.

For the Curry Paste (if making from scratch)

You can buy store-bought paste (Mae Ploy and Maesri are solid brands), but making it yourself is oddly satisfying.

  • 4 dried red chilies (soaked and deseeded) – for mild heat and color.
  • 1 shallot – gives sweetness and body.
  • 3 cloves garlic – the backbone of Thai curry flavor.
  • 1 stalk lemongrass (white part) – brings citrusy brightness.
  • 1 tsp galangal (or ginger if you can’t find it) – adds warmth.
  • 1 tsp coriander seeds – earthy and aromatic.
  • ½ tsp cumin seeds – Indian influence right here.
  • 1 small cinnamon stick – unexpected, but crucial.
  • 2 cloves & 2 cardamom pods – gives Massaman that signature aroma.
  • 1 tbsp roasted peanuts – this is where that nutty undertone begins.
  • 1 tbsp shrimp paste (optional) – for a deeper umami flavor.

Pound everything in a mortar and pestle until smooth. It’s hard work, I won’t lie. But as you grind the spices together, that scent — oh man — it’s like standing in a Thai kitchen.

For the Curry Itself

  • 500g beef (or chicken or tofu for vegetarian) – beef brisket or chuck gives the best tenderness.
  • 2 cups coconut milk – the creamy heart of the curry.
  • 2 potatoes, cubed – they absorb the flavor beautifully.
  • 1 onion, sliced – adds sweetness and depth.
  • 2 tbsp tamarind juice – for that gentle tang.
  • 2 tbsp palm sugar (or brown sugar) – balances the heat and spice.
  • 2 tbsp fish sauce (or soy sauce for vegetarians) – adds saltiness and umami.
  • ½ cup roasted peanuts – crunch and aroma.
  • 1 stick cinnamon – subtle warmth that ties everything together.

Cooking Massaman Curry Like a Local (and Avoiding My Early Mistakes)

Alright, let’s talk technique. I’ve messed this up before — adding ingredients in the wrong order, boiling coconut milk too hard, or not letting the meat simmer long enough.
Thai cooking is patient cooking. It’s more like jazz than a strict recipe. You learn to listen to the bubbling pot, smell the curry, and taste as you go.

Here’s how I finally nailed it.

  1. Fry the curry paste first.
    Heat a bit of coconut cream (the thick part that sits on top of the can) in a wok or pot until it starts to separate slightly. Then, stir in your curry paste and fry it slowly. You’ll know it’s ready when the oil starts to release from the paste — that’s where the magic begins.
    This step deepens the flavor and gives your curry that restaurant-level aroma.
  2. Add the meat and coat it well.
    Toss in your beef or chicken and make sure every piece is covered in the paste. This helps lock in flavor early.
  3. Add coconut milk, cinnamon, and peanuts.
    Let it all simmer gently. Don’t rush this. The slow cooking makes the meat tender and allows the spices to mingle like old friends.
    (One time, I got impatient and turned the heat up. Big mistake. The coconut milk curdled, and the curry split. It still tasted okay, but it wasn’t pretty.)
  4. Add potatoes and onions.
    These soak up the curry like sponges, making every bite flavorful.
  5. Balance with tamarind, fish sauce, and sugar.
    This is where Thai cooking philosophy shines — sweet, sour, salty, spicy — all in perfect harmony. Adjust slowly, tasting along the way.

After about an hour of simmering, your kitchen should smell like heaven. That’s when you know it’s ready.

Serving Suggestions: The Right Way to Enjoy It

Massaman curry pairs beautifully with steamed jasmine rice or roti bread. The soft rice helps soak up all that rich sauce, while roti adds a buttery contrast.

I sometimes top mine with fresh cilantro or a sprinkle of crushed peanuts. My Thai friend once told me, “Curry is not about the garnish — it’s about the moment.” And she was right.

Serve it hot, ideally shared with family or friends. Massaman isn’t a solo meal; it’s made for company, laughter, and second servings.

My Tips for Making It Unforgettable

Over the years, I’ve discovered a few tricks that consistently make my Massaman curry shine:

  • Use fresh spices. Old spices lose their power. Toast them before grinding to release their oils.
  • Don’t skimp on the coconut milk. The thicker, the better. Avoid “light” versions — they’re too watery.
  • Low and slow cooking. Especially for beef. The longer it simmers, the more tender and flavorful it becomes.
  • Adjust balance at the end. A little tamarind or sugar tweak can make all the difference.
  • Let it rest. Like a good stew, Massaman tastes even better the next day as the flavors meld together.

A Quick Vegetarian or Vegan Twist

Not a meat eater? No worries. Massaman curry adapts beautifully.

Swap beef for tofu, chickpeas, or jackfruit. Use vegetable stock instead of meat broth and soy sauce instead of fish sauce.
I’ve made vegan Massaman a few times for friends, and honestly, it’s still rich and satisfying. The peanuts and coconut milk do all the heavy lifting for creaminess.

The Cultural Story Behind the Curry

Here’s something fascinating: Massaman curry was once a dish served to Thai royalty. It came from Persian merchants who brought their spices to Ayutthaya (the old capital of Thailand) centuries ago.

That’s why you find spices like cardamom and cinnamon — they’re not native to typical Thai food but came from those early global connections.
The word “Massaman” likely comes from “Mussulman,” meaning Muslim, which explains the use of halal meats in some traditional versions.

So, every time you eat this curry, you’re tasting history — a blend of Thai and Persian cultures simmered together over centuries. Pretty amazing, right?

Common Mistakes (and How to Avoid Them)

I’ll be honest — I made every mistake possible when I started.

  1. Boiling coconut milk too hard.
    It curdles and separates. Always simmer gently.
  2. Not frying the paste long enough.
    Undercooked paste makes the curry taste flat. Wait for that fragrant oil to release.
  3. Adding all ingredients at once.
    It’s tempting but wrong. Layer them — protein first, then coconut milk, then veggies.
  4. Ignoring the balance.
    If it tastes “off,” tweak the sugar, tamarind, or fish sauce. Massaman should never be too sweet or salty.
  5. Using lean cuts of meat.
    Don’t. Fatty cuts melt beautifully into the curry. That’s flavor you can’t fake.

Health Benefits (Because Food Should Be Delicious and Good for You)

Despite its richness, Massaman curry isn’t all indulgence. Coconut milk is packed with good fats, and the spices — turmeric, cinnamon, cardamom — all have anti-inflammatory properties.
Add in some veggies, and you’ve got a meal that’s hearty yet nourishing.

Of course, portion control helps. (I say that, but let’s be real — resisting a second serving is tough.)

A Personal Reflection: Why Massaman Curry Feels Like Home

There’s something deeply comforting about this dish. Maybe it’s the slow cooking, or the aroma of cinnamon and peanuts wafting through the air. Maybe it’s how it brings people together.

Whenever I cook it now, I think back to that tiny restaurant in Chiang Mai — the owner smiling as she handed me that steaming bowl. I remember thinking, How can something taste both familiar and foreign at the same time?

That’s the beauty of Massaman curry. It’s a crossroads dish — a reminder that the best flavors often come from cultural blending and patience.

Cooking it isn’t just about feeding yourself. It’s about honoring a story that started centuries ago and continues every time someone takes a bite.

Final Thoughts: Bring Thailand to Your Kitchen

If you’ve never tried making Massaman curry before, don’t be intimidated. Start simple, taste as you go, and don’t stress about perfection.
The joy is in the process — the pounding of the curry paste, the simmering pot, the little dance your kitchen does with every aroma.

Whether you’re cooking it for family, a special date, or just yourself after a long day, Massaman curry never disappoints. It’s rich, complex, and deeply comforting — just like the best parts of life.

SEO-Optimized FAQ

  1. What meat is best for Massaman curry?
    Beef brisket or chuck is traditional because it becomes tender after slow simmering. Chicken thighs also work great if you prefer poultry.
  2. Can I make Massaman curry vegetarian or vegan?
    Yes! Swap meat for tofu, jackfruit, or chickpeas, and use soy sauce instead of fish sauce. The flavor stays authentic and rich.
  3. How long does Massaman curry last?
    Stored in the fridge, it lasts up to 3–4 days. The flavor deepens over time, so the next day’s leftovers are even better.
  4. What’s the difference between Massaman and Panang curry?
    Massaman is milder, with more Indian-style spices like cinnamon and cardamom. Panang is thicker, spicier, and uses more chili and kaffir lime.
  5. Can I freeze Massaman curry?
    Absolutely. Freeze in airtight containers for up to 2 months. Reheat gently to maintain the coconut milk texture.