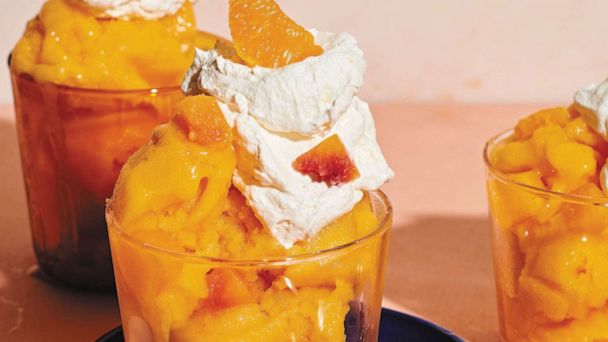
Cacio e pepe mac and cheese recipe with a sweet summer granita dessert

Cacio e pepe mac and cheese recipe with a sweet summer granita dessert

Private chef and cooking host Natasha Feldman is adding author to her repertoire.

Feldman joined “Good Morning America” to talk about her new cookbook, “The Dinner Party Project,” and shared two new recipes for cooks at home.

The “Nosh with Tash” creator shared one savory and one sweet treat that will be perfect for summer.

Check out the full recipes below.

Cacio e Pepe Mac and Cheese
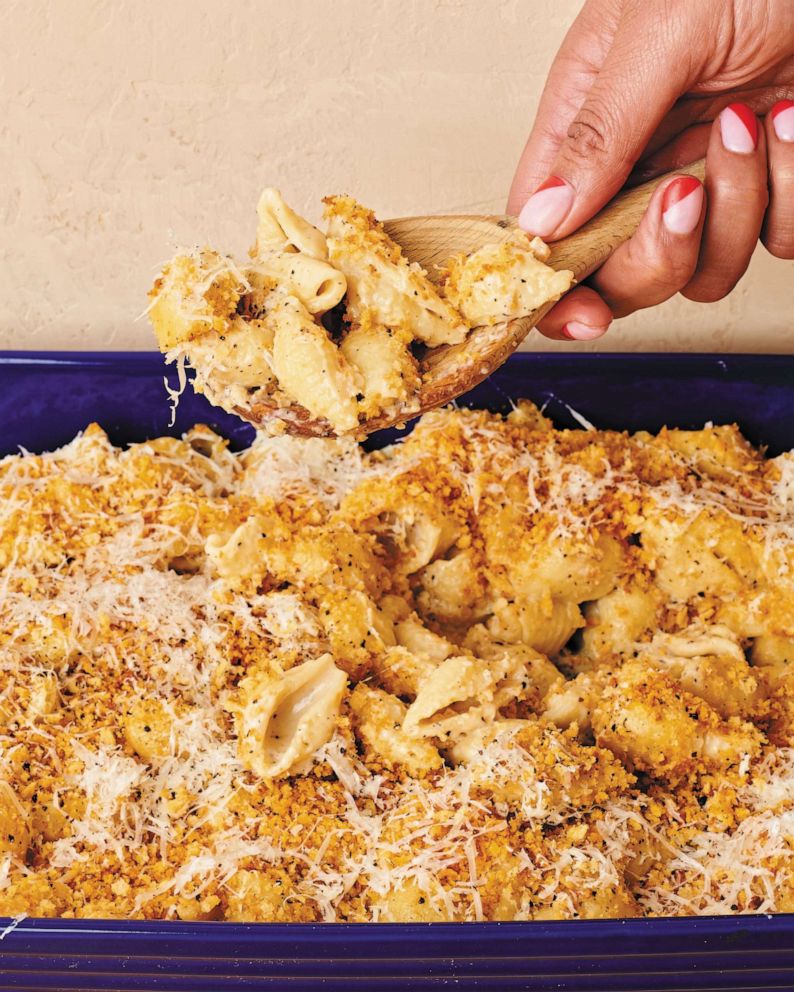
PHOTO: A baking dish of cacio e pepe mac and cheese.

Alana Kysar

A baking dish of cacio e pepe mac and cheese.

“The first time I had cacio e pepe, an Italian pasta dish aptly called ‘cheese and pepper’ because it’s made with only pasta, pecorino, and black pepper, I was skeptical,” she said. “How can so few ingredients be so impressive? Then I believe I blacked out and didn’t return until I had eaten the entire plate of pasta and also the plate. It’s magical to think about how often the best recipes, and the greatest flavors, come from simple, good ingredients. Because mac and cheese is an easy way to make a large quantity of pasta for a crowd, I wanted to bring these two friends together and I’m pretty pleased with the result. This hybrid features a basic white sauce (béchamel) loaded with fresh cracked pepper, lots of pecorino, and toasty bread crumbs to finish!”

1 tablespoon unsalted butter

4 teaspoons salt, divided

1 1/2 tablespoons freshly ground black pepper, plus extra to finish

4 tablespoons (1/2 stick) unsalted butter

4 teaspoons salt, divided

1/4 cup all-purpose flour

1 pound medium-shell pasta

2 cups grated pecorino romano cheese (1/2 pound), plus extra to finish

Preheat oven to 425 degrees.

To make the breadcrumbs: In a large pot over medium heat, melt 1 tablespoon butter. Once melted, add in ¼ teaspoon salt and 1 cup panko bread crumbs. Cook, stirring occasionally, until about half the bread crumbs are toasted a nice golden brown color, about 4 minutes. Set the bread crumbs aside.

To make the mac and cheese: Fill that same pot halfway full with water, add 3 teaspoons salt, and bring to a boil over high heat. While the pasta water is boiling, make the sauce. In a second pot over medium-low heat, add 1 1/2 tablespoons black pepper and stir just until aromatic, about 1 minute. (Yes, the pepper will become super-aromatic really fast. Yes, this is basically DIY pepper spray.) Add in 4 tablespoons butter and heat until melted. Whisk in 1/4 cup flour and 1 teaspoon salt. Slowly, while constantly whisking, add in 3½ cups milk to create a smooth, thin sauce. The sauce will get thicker before it gets thinner; just keep whisking! Crank up the heat to medium and bring the sauce to a boil, stirring occasionally.

This is probably the best time to toss your pasta into the boiling, salty water. Cook the pasta per the instructions on the package. Once the sauce is boiling, reduce the heat to medium-low and cook, whisking occasionally, until it thickens, about 6 minutes. The sauce should be thick enough to easily coat the back of a spoon. Remove the pot from the heat and whisk in 2 cups pecorino.

Once the pasta is cooked, use a slotted spoon to transfer it to the pot containing the sauce. Do not throw away the pasta water. Return the pasta⁄sauce pot to the cooktop and cook over medium-high heat, stirring constantly until all the pasta is well-coated in sauce. Season to taste with additional pasta water. (It’s salty, remember? And starchy, which will help create a sauce that will coat the pasta well. Win-win.)

Pour the mac and cheese into an ungreased 9 x 13-inch baking dish and top with the bread crumbs and a generous sprinkling of black pepper. Bake until the sauce is bubbling and the bread crumbs are a deep golden brown, 15 to 20 minutes.

Finish with some extra pecorino for good measure. Let rest for 5 to 10 minutes before serving—burnt mouths are a dinner-party bummer.

A cheesy pasta dish is always best fresh. In a pinch, you can make the sauce in advance and add pasta water to thin it out just before tossing the pasta in it. The bread crumbs can be made up to a day in advance and stored in an airtight container at room temp.

The less water you use for boiling the pasta, the starchier and more awesome your pasta water will be.

Can you use parmesan if you can’t find pecorino? Yeah, your dish will be less salty and tangy and a little nuttier . . . but still super-tasty.

This has a lot of pepper in it, obviously, so if you have a coffee grinder, that’s the most efficient way to get the quantity needed.
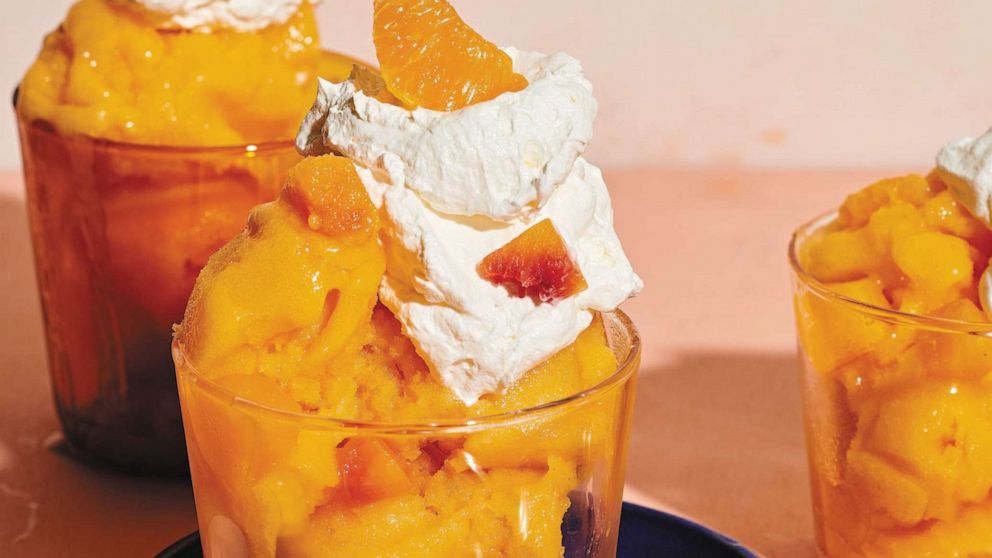
PHOTO: Natasha Feldman's orange dream granita.

Alana Kysar

Natasha Feldman’s orange dream granita.

Serves: 6
Total time: 5 hours ( includes 4¼ hours of mostly hands-off freezing time)

“Granita — an Italian shaved ice — is a miraculous thing,” she said. “It somehow strikes this perfect balance between rich and creamy and refreshing and icy. When I was testing this recipe at first, I made it with just oranges (using Orange Julius as my inspiration). But I found the recipe always remained a smidge too icy and not as exciting as I wanted. I then thought really hard about this nostalgic Orange Julius, Creamsicle flavor profile and I thought, ‘AHA! Peaches!’ and that was when the magic happened. The peaches add subtle sweetness and, more importantly, aid in creating a creamy texture — perfection.”

Ingredients
3/4 cup sugar
3/4 cup fresh orange juice (from 3 to 4 oranges)
1 teaspoon vanilla extract
1/4 teaspoon salt
2 1/4 cups chopped ripe juicy peaches (about 3 peaches)
1 large orange, peeled and seeds removed
1 tablespoon fresh lemon juice

Whipped Topping
1 cup heavy whipping cream
Fruit, like orange or peach slices, optional

To make the granita: Clear room in the freezer for a 9 x 9-inch baking dish. Leave it in there to get cold before using. In a small pot, combine ¾ cup sugar, ¾ cup orange juice, 1 teaspoon vanilla, and ¼ teaspoon salt over medium heat. Stir until the sugar dissolves, about 3 minutes. Set aside. In a blender or food processor, whiz up the peaches and orange with 1 tablespoon lemon juice until smooth, about a minute. Add the sugar mixture from the pot into the blender and blend again.

Pour the granita mixture into the frozen baking dish. Once every hour over the course of about 4 hours (or until the granita is firmly frozen), stir/scrape the mixture with a fork, reaching all the way to the bottom of the dish, to create small shavings.
Optional (but heavenly): Before serving, scoop the granita into a blender or food processor and process it until really smooth and almost tacky, like sorbet. Divide the granita among 6 cups and put the cups in the freezer for 5 to 30 minutes before serving.

To make the whipped topping: Whip the cup of cream to medium peaks using a hand mixer—no sugar needed. Divide the cream evenly over the granita. Top with fruit for flair as desired, and serve.

Tips and Timing
Make the granita up to a week in advance and store in an airtight container in the freezer. Make sure it is fully fluffed before tucking it into bed for the week. Whip the cream up to 4 hours before serving and store in the fridge in a bowl covered with plastic wrap.
If it’s not peach season, use frozen peaches!

Recipe reprinted with permission from “The Dinner Party Project” by Natasha Feldman. Copyright © 2023 by Natasha Feldman. Reprinted by permission of Harvest, an imprint of HarperCollins Publishers.

When Is Eid-Al-Fitr? Significance Of Meethi Eid And 5 Special Dessert Recipes

When Is Eid-Al-Fitr? Significance Of Meethi Eid And 5 Special Dessert Recipes

Eid-al-Fitr, also known as Eid-ul-Fitr or ‘Meethi Eid’, is right around the corner. The festive fervour is at an all-time high in the Muslim community, as the month-long period of fasting, draws to a close. On this day, the last day of the holy month of Ramadan, devotees break their fast and confirm Eid celebrations the next day upon the sighting of the moon. Eid is one of the most important festivals of the Islamic calendar and it is celebrated with much aplomb with near and dear ones. Exchanging greetings and gifts, wearing new clothes and enjoying a lavish feast is customary to Eid celebrations. Here’s all you need to know about the upcoming festival.

Eid-Al-Fitr 2023 Date | When Is Eid-Al-Fitr In India In 2023?

Eid-al-Fitr falls on the first day of Shawwal, the tenth month of the Islamic Calendar. The exact date of Eid may vary upon sighting the moon on the last day of Ramadan.

In 2023, the holy month of Ramadan began on Thursday, March 23. Thus, it will end on Friday, April 21. This means that Saturday, April 22, 2023, will be celebrated as Eid-al-Fitr in India.

Source: timeanddate.com

Also Read: Full Eid Party Menu With Recipes To Make Your Eid-ul-Fitr Celebrations Delicious

3p6llm3o

Eid Mubarak wishes are circulated on the internet. Photo: iStock

Significance Of Eid-Al-Fitr 2023 | Why Is It Called ‘Meethi Eid’ And How Is It Celebrated?

After a month of worship, fasting and abstinence – Eid is a day for celebration. On Eid day, families wish and greet each other ‘Eid Mubarak’ and don new clothes and jewellery and offer their morning prayers. Elders give the young ones a small sum of money known as ‘Eidi’. Some also donate amounts of money, food or clothing to charity. No Muslim is allowed to fast on this day as it is an occasion for festive rejoicing and feasting!

Eid-al-Fitr is a day when Muslim devotees break their fast and begin the new month on a sweet note. This is why it is also called ‘Meethi Eid’ in some parts of the world. Thus, sweet preparations and desserts play an important part in the Eid celebrations.

Also Read: Eid 2023: Celebrate The End Of Ramadan With These 10 Mouth-Watering Dishes

sevaiyan

Sevaiyan is traditionally made on Eid celebrations. Photo: iStock

Special Dessert Recipes For Meethi Eid 2023 | Eid-Al-Fitr Dessert Recipes

Along with meaty kebabs and biryani, sweets and desserts are also customary to the Eid-al-Fitr feast. We have collated a list of some amazing preparations for your ‘Meethi Eid’ celebrations. You will relish every bite of these wholesome desserts, from kulfi to sewaiyan and more.

Here Are 5 Special Desserts For Eid-al-Fitr 2023 Celebrations:

1. Kimami Sevaiyan

Eid celebrations would truly be incomplete without sevaiyan or vermicelli. This kimami sevaiyan recipe takes the traditional preparation a notch higher with the addition of several indulgent ingredients. Click here for the full recipe.

2. Sheer Khurma

Vermicelli is quite a versatile ingredient and it transforms into a delicious pudding in this preparation. Milk, dates, sugar and dry fruits make this tasty Indian dessert a must-have on Eid-al-Fitr 2023. Find the full recipe here.

3. Khoya Kulfi

Cool off during the hot summer months with this khoya kulfi. Its creamy and sweet taste will go perfectly with your Eid feast and leave you wanting more with every bite. Click here for the full recipe.

Also Read: Eid-Al-Fitr: Move Over Sheer Khurma, Celebrate Meethi Eid With Sevaiya Ki Barfi

bt1hei5o

Khoya kulfi is ideal for summer indulgence and Eid celebrations. Photo: iStock

4. Saffron Rose Phirni

Rose-flavoured drinks and desserts are also customary for Eid 2023 celebrations. This saffron-rose phirni is a thick and delicious treat that is best enjoyed chilled. Don’t forget to garnish with a few kesar strands for aesthetic appeal. Find the full recipe here.

5. Double Ka Meetha

Also known as Shahi Tukda, this Indian dessert is loaded with indulgence and is truly fit for royalty and deserves a place in your Eid 2023 feast. Add some khoya and dry fruits on top for that extra flavour and richness! Click here for the full recipe.

Here’s wishing all our readers Eid Mubarak!

Our Best Fancy Dessert Recipes

Our Best Fancy Dessert Recipes

If you need a fancy dessert recipe for a special occasion, we’ve got you covered. Even though these dessert recipes are sure to impress your guests, we’ve snuck in a few shortcuts to help make serving them up a little easier. There’s cakes on this list that start with boxed cake mix, ganaches that come together in the microwave, and even recipes that only require 30 minutes (or less) of hands-on time in the kitchen. With recipes this easy, you can whip up these fancy desserts for your family any day of the week.

Read on for our best fancy dessert recipes that are sure to wow any crowd. 


Antonis Achilleos; Food Styling: Ali Ramee; Prop Styling: Christine Kelly

Although this cake is pretty enough to serve at a special occasion, it actually starts with a boxed cake mix so it requires just 30 minutes of hands-on time to pull together.


Photographer: Will Dickey Prop Stylist: Missie Crawford Food Stylist: Erin Merhar

This decadent recipe transforms the flavors of chocolate covered strawberries into a pretty cheesecake. Plus, the layer of chocolate ganache actually comes together in the microwave.


Pam Lolley; Antonis Achilleos; Prop Styling: Ginny Branch; Food Styling: Torie Cox

Layers of peaches, whipped cream, and vanilla cake come together in a trifle dish to create a beautiful centerpiece that’s also delicious.


Greg DuPree; Food Stylist: Ali Ramee; Prop Stylist: Hannah Greenwood


These lava cakes come together from start to finish in just 35 minutes.


Southern Living

The Hummingbird Cake is a classic layer cake that features three moist cake layers that are packed with pineapples and bananas. The layers are then covered with a cream cheese frosting and finished off with toasted pecans.


Antonis Achilleos; Food Styling: Rishon Hanners; Prop Styling: Audrey Davis

Freeze-dried raspberries give homemade meringue a pretty pink hue.


Greg DuPree

This recipe transforms a sheet cake into miniature cakes so every guest has their own dessert.


Photographer: Greg DuPree, Food Stylist: Emily Neighbors Hall Prop Stylist: Christine Keely

Citrus and sugared berries not only give this cake a beautiful finish but add plenty of flavor in the cake layers and in the icing as well.


Photographer: Jen Causey, Prop Stylist: Josh Hoggle,Food Stylist: Ruth Blackburn

For the best meringue, make sure your egg whites are at room temperature before you add them to the mixture.


Antonis Achilleos; Food Styling: Emily Nabors Hall; Prop styling: Lydia Pursell


Serving bourbon balls on top of a chocolate tart gives them an impressive presentation.


Antonis Achilleos; Prop Styling: Christine Keely; Food Styling: Tina Bell Stamos


Not only does this pavlova cake come together with just 9 ingredients, but it’s also  dairy- and gluten-free.


Photographer: Jennifer Causey Food Stylist: Melissa Gray Prop Stylist: Christina Daley

This apple tart is almost too pretty to eat.


Antonis Achilleos; Food Styling: Emily Nabors Hall; Prop Styling: Mary Clayton Carl Jones

You may be surprised to learn that this decadent cake comes together using just 9 ingredients, boxed cake mix being one of them.


Victor Protasio; Prop Styling: Kay E. Clarke; Food Styling: Ana Kelly

Baked meringue serves at the crust for this cheerful pie that was originally published in The Junior League of Tampa’s cookbook in 1961.


Photo: Antonis Achilleos; Food Styling: Torie Cox; Prop Styling: Kay E. Clarke

Edible flowers such as violas, tuberous begonias, English daisies, or pansies instantly transform mini cakes into party-worthy desserts.


Photo: Victor Protasio; Prop Styling: Kay E. Clarke; Food Styling: Torie Cox


Sugared Cranberries and Whipped Crème Fraîche are just the embellishments transparent pie needs to give it an elegant finish.


Morgan Hunt Glaze; Food Stylist: Chelsea Zimmer; Prop Stylist: Christine Keely


No baking is required to pull together this ice cream cake, just make sure to allow plenty of time for freezing.


Caitlin Bensel; Food Styling: Torie Cox


Trust us, this homemade cheesecake is worth the extra effort.


Hector Manuel Sanchez

This cake will fool your family into thinking you spent all afternoon preparing it, when in reality you’ll need just 20 minutes of hands-on time.


Linda Pugliese, Hector Sanchez; Styling: Heather Chadduck Hillegas, Buffy Hargett Miller

Both the chocolate mousse and white chocolate mousse for these brownie stacks come together in the microwave. Plus, they can be made up to 24 hours in advance and stored in the refrigerator until you’re ready to serve.


Classic Raspberry Pie Recipe | The Recipe Critic

Classic Raspberry Pie Recipe | The Recipe Critic

This website may contain affiliate links and advertising so that we can provide recipes to you. Read my privacy policy.

Raspberry pie is a timeless dessert that has been enjoyed for generations, and for good reason. With its flaky, buttery crust and tangy-sweet filling bursting with fresh, juicy raspberries, it’s the perfect balance of flavors and textures. And while store-bought options are convenient, nothing beats making it from scratch!

Love a good homemade pie? You’re in the right place! Here are a few more of my favorite recipes to try: strawberry rhubarb pie, cranberry apple pie, or bourbon pecan pie if you want to switch things up a little bit!

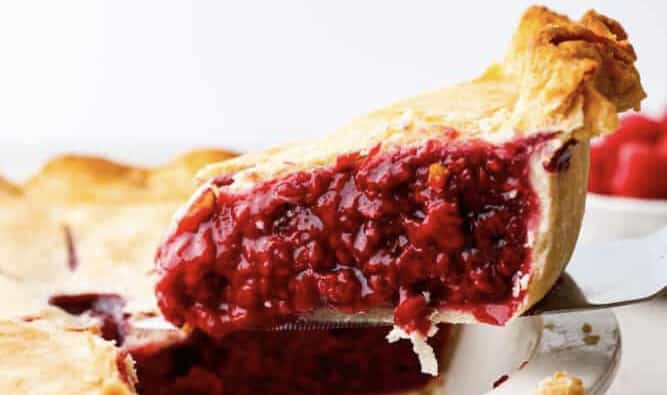
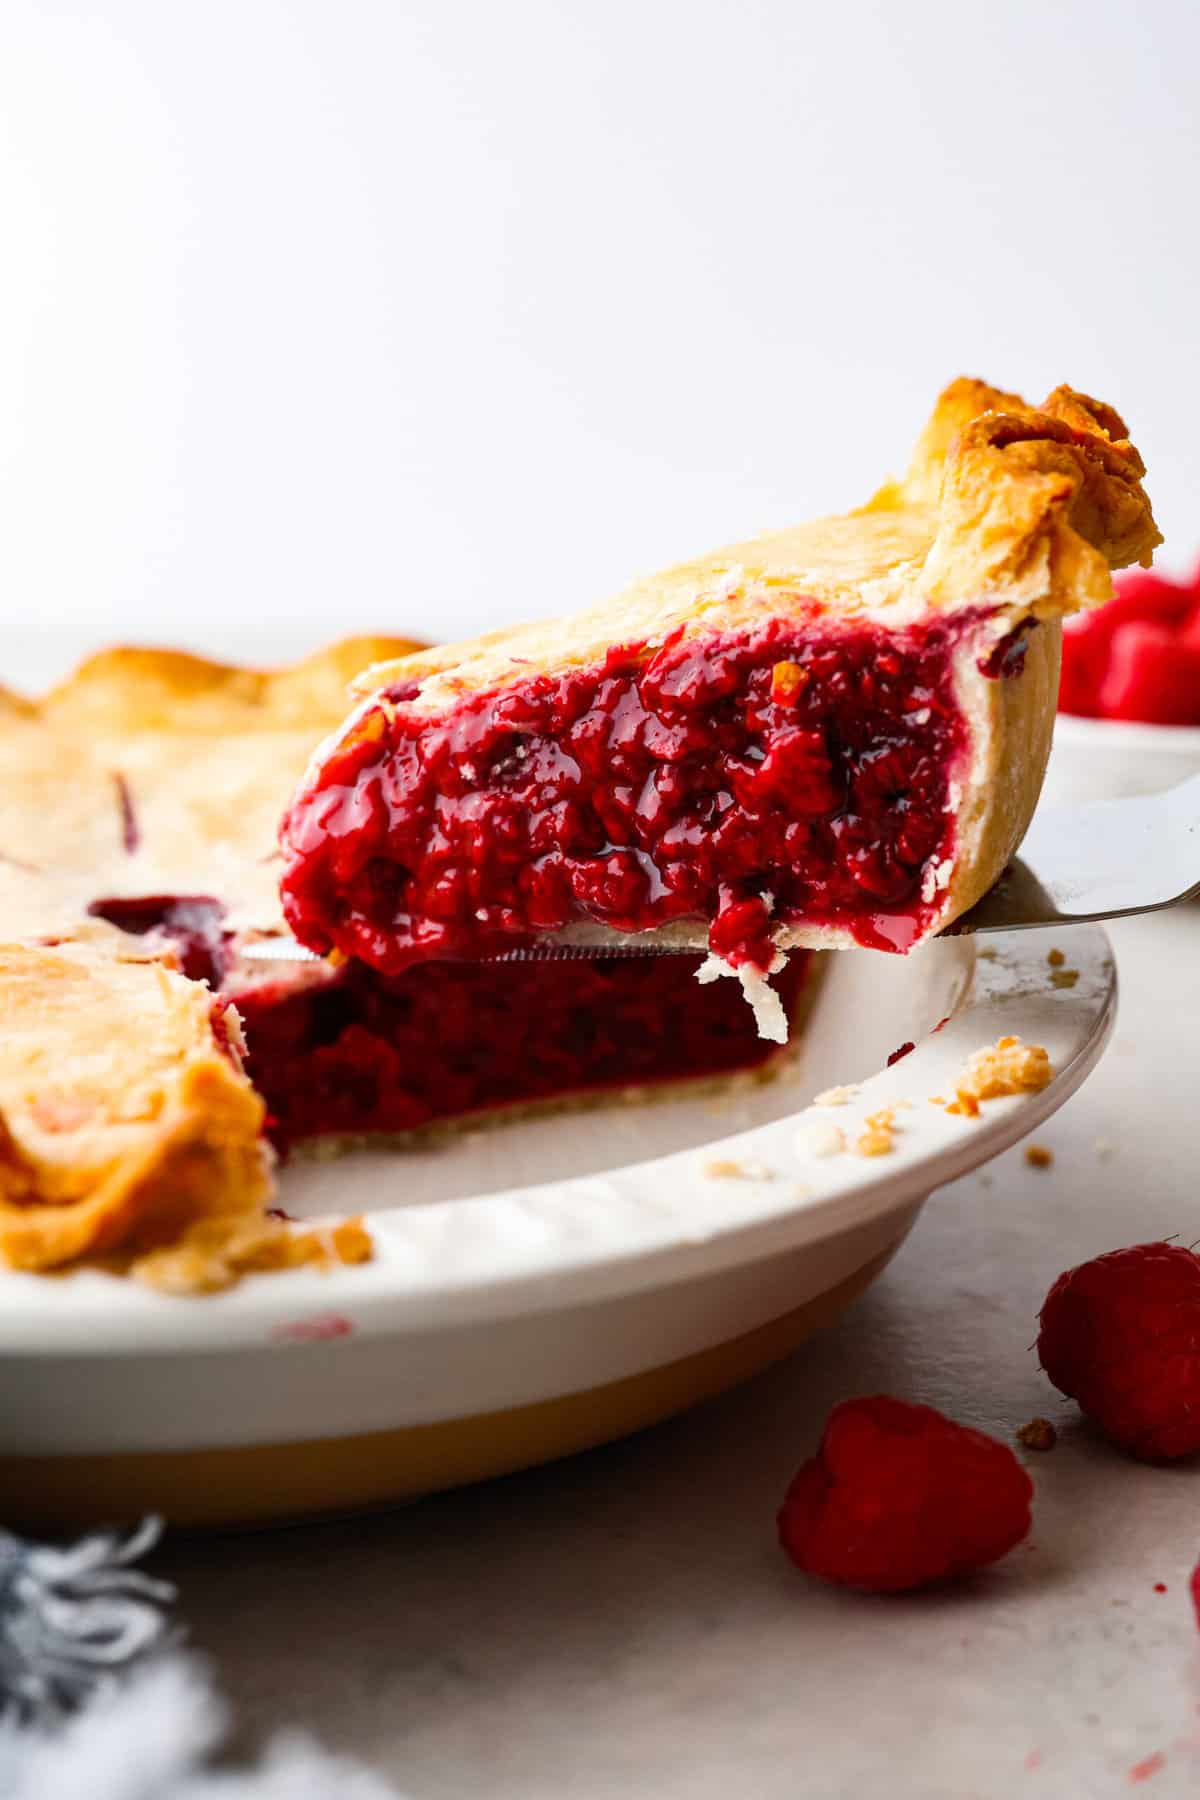
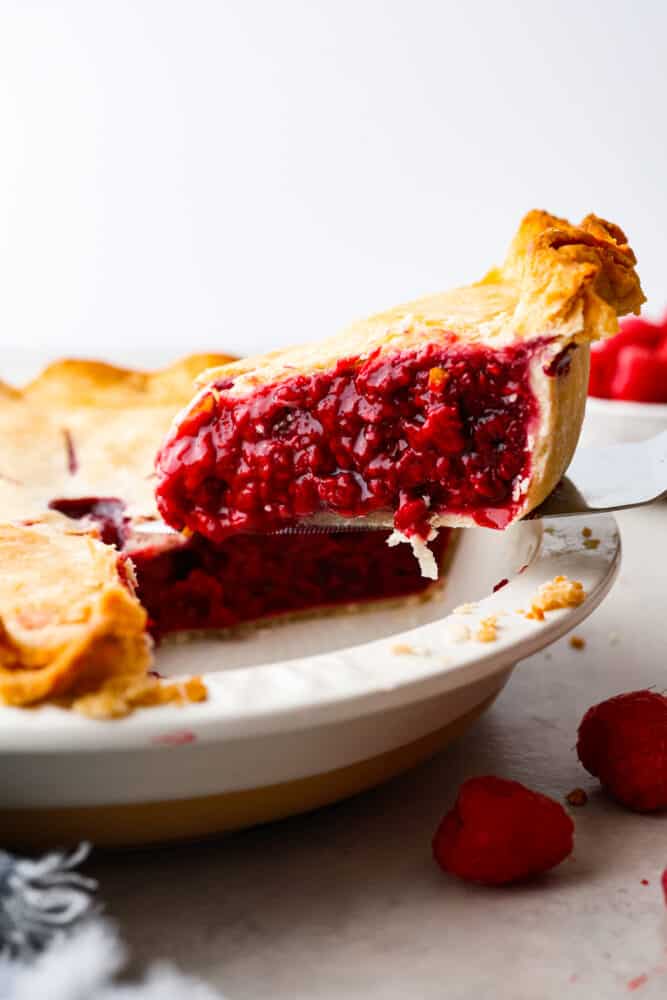
A slice of pie being served with a cake spatula.

Juicy Raspberry Pie

Mmm, raspberries. There is something about them that is so irresistible. Whether I’m eating a handful of them or they’re baked into a buttery crust, I can never get enough! This recipe for raspberry pie is quickly rising through the ranks as my favorite fruit pie. Anything on my grandma’s pie crust is delicious, but this filling is seriously the best. It’s so simple but so sweet and juicy! The great thing is, you can use either fresh or frozen raspberries so it’s the perfect recipe for whatever you have on hand.

If you’ve never had a slice of raspberry pie with a homemade crust, then you’re missing out on one of life’s simple pleasures! The combination of the juicy, slightly tart raspberries with the buttery, flaky crust is a match made in dessert heaven. The texture of the filling is perfect, not too runny and not too thick, while the crust adds a satisfying crunch with each bite. Whether you’re celebrating a special occasion (it’s perfect for Mother’s Day!) or just craving a sweet treat, this pie is the answer! So go ahead and indulge in a slice (or two) of this delicious dessert, add a scoop of vanilla ice cream if you want, and see for yourself why it’s a classic that will never go out of style!

Ingredients Needed

  • Double Crust Pie Crust: You can’t have a delicious raspberry pie without a sturdy and flaky crust to hold it all together! A double crust pie crust means you’ll have a bottom crust and a top crust, making each bite a perfect balance of filling and crust. You can use store-bought pie crusts for easy prep, or make your own for the best flavor! My grandma’s pie crust and butter pie crust recipes are both great options!
  • Raspberries: Whether you’re using fresh or frozen raspberries (just make sure to thaw them if you go the frozen route!), these berries are the star of the show. Raspberries add a sweet and tart flavor that perfectly complements the buttery crust. Plus, their vibrant red color makes for a beautiful presentation. You could also add blueberries or blackberries into the mix if you’d like!
  • Fresh Lemon Juice: A little bit of acidity can go a long way in a dessert, and that’s where the fresh lemon juice comes in. It adds a bright and tangy flavor that helps cut through the sweetness of the raspberries and sugar, creating a well-balanced filling.
  • Granulated Sugar: Adds the perfect amount of sweetness to the raspberry pie filling without overpowering the natural tartness of the berries.
  • Cornstarch: Thickens the filling. I like using cornstarch because it thickens up the filling without making it too gummy or starchy, creating a smooth and velvety texture.
  • Salt: Just a pinch is all you need to balance out the sweetness in your pie!
  • Large Egg and Water: The egg and water are used to create an egg wash that gives the pie crust a shiny, bakery-worthy finish. It’s the cherry on top of an already delicious dessert!

Is Cornstarch or Flour Better to Thicken a Fruit Pie?

If you want a glossy, more jelly-like filling, use cornstarch. While flour may be a common choice, it can leave your filling tasting a little bit thick and starchy. Cornstarch, on the other hand, creates a smooth and velvety texture without any added taste. Plus, it’s a more efficient thickener, meaning you won’t need to use as much of it as you would flour.

All About the Crust

We all know that the crust is just as important as the pie itself. I don’t blame you if you go the store-bought route, but if you’re up for the challenge, try making your crust at home! From blind baking to making a lattice, here are a few more recipes to help you on your pie-making journey. And if you have scraps left over from your pie dough… these pie crust cookies are a must-make.

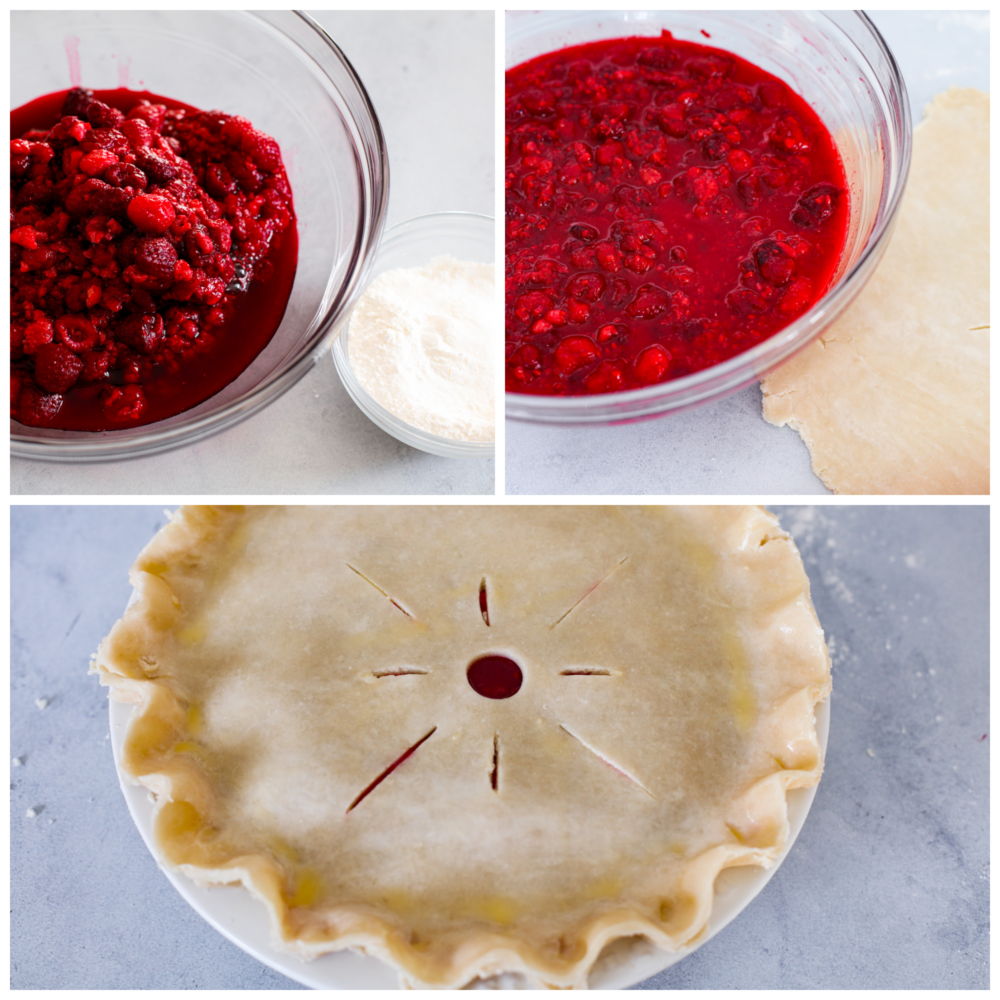
3-photo collage of raspberry filling and pie crust being prepared.

How to Make Homemade Raspberry Pie

Raspberry pie is actually super easy to make, especially if you’re using a store-bought crust. It’s the perfect dessert to make as the temperatures warm up. I know I’ll be making this all summer long! I can’t wait for barbecues and potlucks to start up again, because I’m definitely going to be bringing one of these bad boys.

  1. Preheat Oven, Prepare Dough: Preheat the oven to 400 degrees Fahrenheit. Then roll out half of the pie crust and form the bottom crust in a 9-inch pie pan.
  2. Mix Raspberries and Lemon Juice: In a large bowl, combine the raspberries and lemon juice.
  3. Dry Ingredients: In a small bowl, whisk together the sugar, cornstarch, and salt.
  4. Combine: Add the sugar mixture to the raspberries and mix thoroughly.
  5. Add to Crust, Layer With Top Crust : Pour the raspberry filling to the pie pan and roll out the top crust. Then place the top crust on and crimp the edges. Cut your desired design into the crust, or simply cut a few vents for steam to escape.
  6. Add Egg Wash: Combine the egg with water and brush over the top crust.
  7. Bake: Bake for 40-50 minutes, until the crust is golden brown and the filling is bubbling.
  8. Cool: Let cool completely before slicing. Chilling in the fridge for a few hours will help the filling set up further.
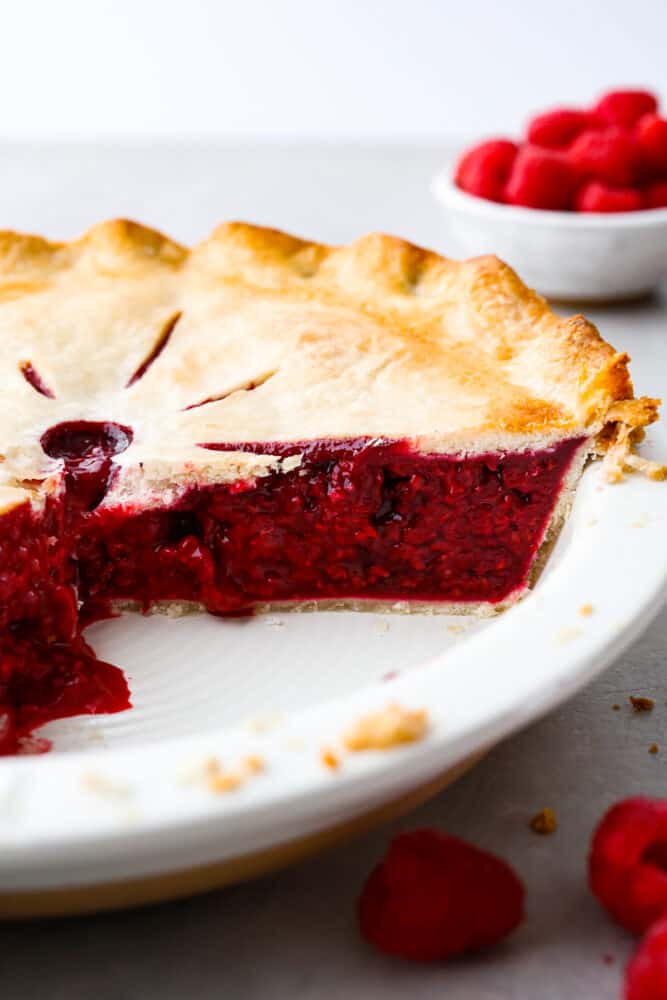
A whole pie cut into so the filling can be seen.

Tips and Tricks

If you’re new to making homemade pies, here are a few tips to help make sure yours turns out perfectly! So grab your ingredients, preheat that oven, and get ready to impress your friends and family with the best raspberry pie they’ve ever tasted – you got this!

  • Check Your Raspberries: Use fresh or thawed frozen raspberries for the best flavor. No one likes a mushy filling!
  • Use Cornstarch: Use cornstarch instead of flour to thicken the filling. Cornstarch creates a smooth and velvety texture without any added taste, and it’s more efficient than flour, so you won’t need to use as much.
  • Let Your Pie Cool: Let the pie cool completely before slicing. This can be the hardest part, but it’s worth it! Letting the pie cool allows the filling to set and makes for easier slicing.
  • My Filling is Still Runny After Baking, What Do I Do? Give your pie a chance to cool after it bakes. This will allow the filling to set. If it’s still runny after that, you may need to pop your pie back in the oven to cook off some of the liquid.
  • Serve à la Mode: Serve with a dollop of whipped cream or a scoop of vanilla ice cream. Raspberry pie is delicious on its own, but a little whipped cream or ice cream never hurt anyone. Plus, it makes for a picture-perfect presentation!

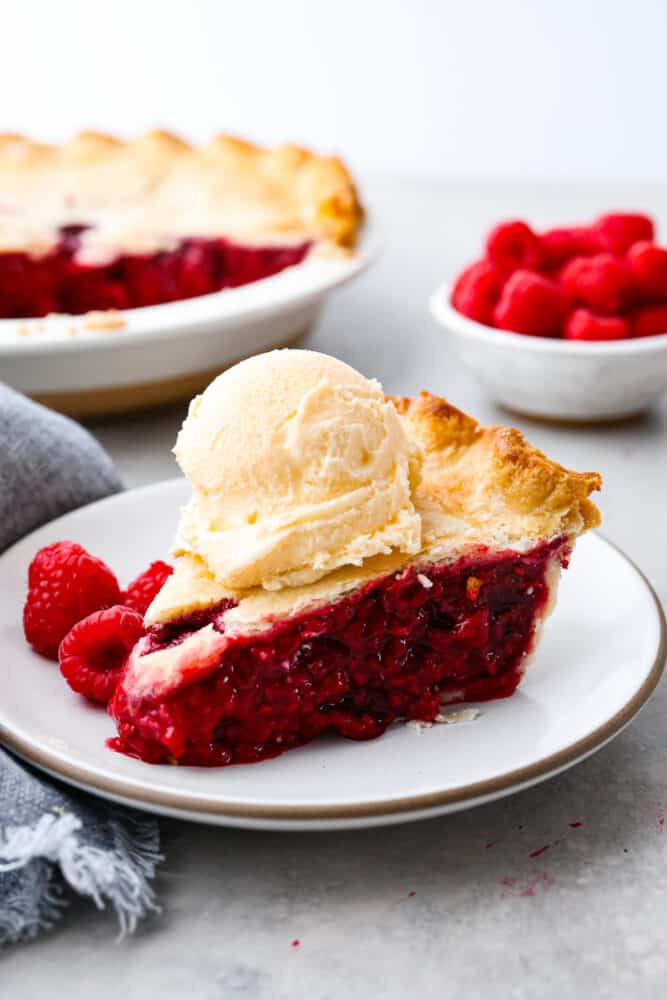
A slice of raspberry pie on a stoneware plate served with a scoop of vanilla ice cream on top.

Storing Leftovers

Alright, you’ve made the perfect raspberry pie, but what do you do with the leftovers? Here are some tips on how to store your delicious dessert:

  • In the Refrigerator: The easiest and most obvious way to store leftover raspberry pie is to cover it with plastic wrap or foil and pop it in the fridge. (It’s even better if you have a pie pan with a lid!) This will help keep it fresh and prevent it from drying out. Store for up to 4 days.
  • In the Freezer: If you have a lot of leftover raspberry pie, you can freeze it for up to a month. Wrap it tightly in plastic wrap and then place in a large freezer bag. Let it thaw in the fridge overnight before serving!

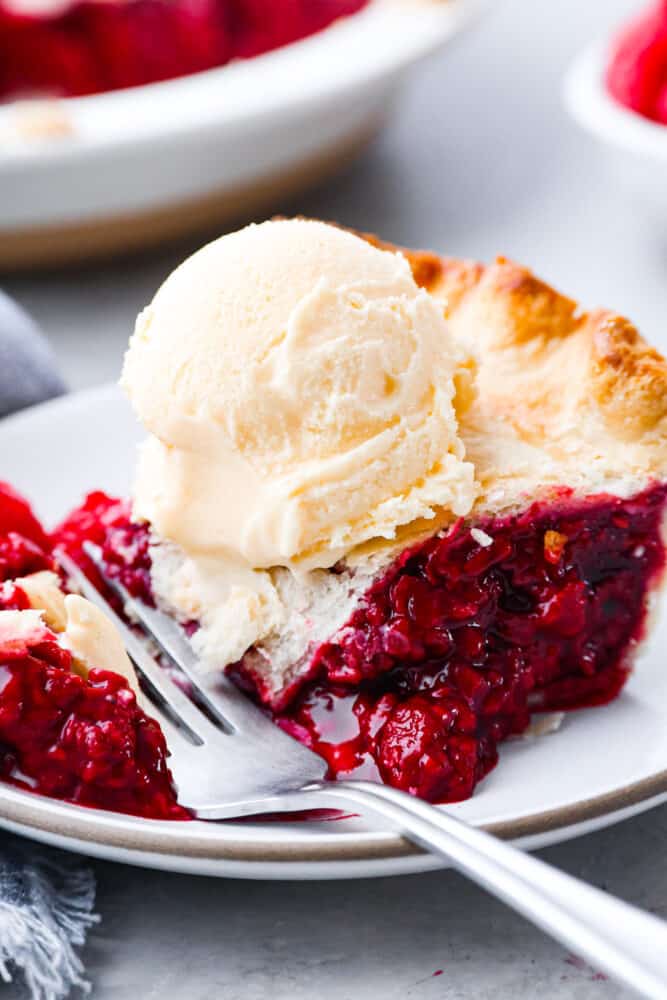
Closeup of slice with a bite taken out of it.


  • Preheat the oven to 400 degrees Fahrenheit. Roll out half of the pie crust and form the bottom crust in an 8-9 inch pie pan.

  • In a large bowl, combine the raspberries and lemon juice.

  • In a small bowl, whisk together the sugar, cornstarch, and salt.

  • Add the sugar mixture to the raspberries and mix thoroughly.

  • Pour the raspberry filling to the pie pan and roll out the top crust. Place the top crust on and crimp the edges. Cut your desired design into the crust, or simply cut a few vents for steam to escape.

  • Combine the egg with water and brush over the top crust.

  • Bake for 40-50 minutes, until the crust is golden brown and the filling is bubbling.

  • Let cool completely before slicing. Chilling in the fridge for a few hours will help the filling set up further.


Serves: 8

Calories206kcal (10{d2b09b03d44633acb673e8080360919f91e60962656af8ade0305d5d8b7e4889})Carbohydrates35g (12{d2b09b03d44633acb673e8080360919f91e60962656af8ade0305d5d8b7e4889})Protein3g (6{d2b09b03d44633acb673e8080360919f91e60962656af8ade0305d5d8b7e4889})Fat7g (11{d2b09b03d44633acb673e8080360919f91e60962656af8ade0305d5d8b7e4889})Saturated Fat2g (10{d2b09b03d44633acb673e8080360919f91e60962656af8ade0305d5d8b7e4889})Polyunsaturated Fat1gMonounsaturated Fat3gTrans Fat0.003gCholesterol20mg (7{d2b09b03d44633acb673e8080360919f91e60962656af8ade0305d5d8b7e4889})Sodium169mg (7{d2b09b03d44633acb673e8080360919f91e60962656af8ade0305d5d8b7e4889})Potassium142mg (4{d2b09b03d44633acb673e8080360919f91e60962656af8ade0305d5d8b7e4889})Fiber5g (20{d2b09b03d44633acb673e8080360919f91e60962656af8ade0305d5d8b7e4889})Sugar16g (18{d2b09b03d44633acb673e8080360919f91e60962656af8ade0305d5d8b7e4889})Vitamin A55IU (1{d2b09b03d44633acb673e8080360919f91e60962656af8ade0305d5d8b7e4889})Vitamin C20mg (24{d2b09b03d44633acb673e8080360919f91e60962656af8ade0305d5d8b7e4889})Calcium26mg (3{d2b09b03d44633acb673e8080360919f91e60962656af8ade0305d5d8b7e4889})Iron1mg (6{d2b09b03d44633acb673e8080360919f91e60962656af8ade0305d5d8b7e4889})

All nutritional information is based on third party calculations and is only an estimate. Each recipe and nutritional value will vary depending on the brands you use, measuring methods and portion sizes per household.

Course Dessert

Cuisine American

Keyword homemade raspberry pie, raspberry pie, raspberry pie recipe

Why Flavored Water Recipes Are Trending on TikTok

Why Flavored Water Recipes Are Trending on TikTok

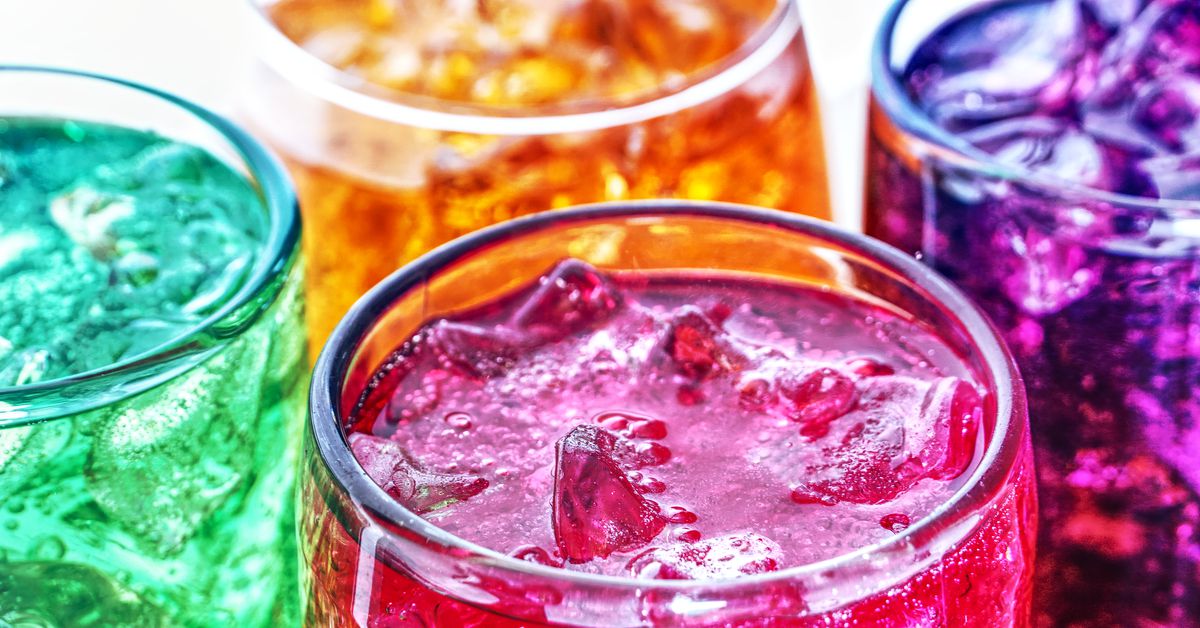
If you spend any amount of time on TikTok, you have almost assuredly been lured by the algorithm into a particularly weird niche of beverage videos in recent days. You’ve likely seen a woman, probably a thin woman, smiling as she fills her giant Stanley tumbler with crushed ice and purified water. That all seems perfectly normal, but then the woman pulls out an arsenal of syrups, powders, and liquid flavor enhancers that transform her boring glass of H2O into “birthday cake water” or “peach ring water.” Welcome to #watertok.

In this hydration-obsessed corner of TikTok, where videos hashtagged with #watertok have been viewed more than 84 million times, creators present a slew of “recipes” for spicing up water, that beverage we all need to survive. A particularly prolific creator in the trend is a woman named Tonya, who uses the handle @takingmylifebackat42. Since 2022, she’s racked up millions of views on videos in which she makes a wide range of low-calorie foods, but her water recipes are especially popular. She has recipes for bubblegum water, banana split water, unicorn cotton candy water and, of course, she has an affiliate code where you can purchase syrups to make your own flavored waters (and help her make a little bit of cash).

The people who post #watertok videos receive tons of comments, and some of these dismissively insist that what these creators are making is actually juice, or glorified Kool-Aid, or soda. But while I can’t really get worked up about whether or not these gross-sounding beverages can be reasonably called water, what’s actually upsetting is that #watertok is yet another diet culture fad that has gone mainstream via social media.

The recipes for lemon cake water and strawberry Starburst water didn’t spring fully formed out of the ether. The key thing that most of these water additives, which include sugar-free flavor packets made by brands like Hawaiian Punch and Crystal Light, have in common is that they’re made with artificial sweeteners, and thus, have zero or very few calories. Drinks like these have long been popular in the bariatric surgery community, where people who have undergone surgery are restricted to extremely low calorie diets.

In this context, it’s easy to see why something that tastes like a dessert but doesn’t have any calories has mainstream appeal right now, considering how many people, celebrities and regular folks alike, are taking semaglutide drugs originally intended to treat diabetes to lose weight. If thin is back in, as many cultural experts have observed in recent months, then so are the modern versions of Snackwell’s diet desserts. There is also likely some connection to the “loaded tea” phenomenon, where sugar-free drinks originally made with products from the multi-level marketing company Herbalife have achieved popularity on social media and in small towns across the country. But because it’s 2023, when nothing garners more “likes” and eyeballs than a ridiculous recipe, the popularity of #watertok also has a lot to do with creators packing drinks with an over-the-top number of additives solely for the purpose of driving views.

On some level, I get it. I’m a Stanley tumbler girlie, and an unabashed beverage girlie. I am not surprised that TikTok served this content to me, because I can’t get enough of a weird recipe trend. And for people who hate the taste of plain water, and there are many, the idea of getting hydrated while not drinking a beverage you loathe must be pretty enticing. But good grief, unless you have an actual medical need, just throw a slice of lemon in there or something.

This Is Amitabh Bachchans Favourite Dessert And We Have The Recipe

This Is Amitabh Bachchans Favourite Dessert And We Have The Recipe

Amitabh Bachchan once took to social media to talk about his favourite dessert, and in no time, the dish made headlines across India. He shared a post on Twitter featuring archival footage where he was seen discussing the dish with his late father and poet, Dr Harivansh Rai Bachchan. But that’s not all. Later, on his 80th birthday, his wife and actor, Jaya Bachchan, was also seen treating Amitabh Bachchan with delicacy on the sets of his reality show. Can you guess what the dish was? It’s the humble lapsi. Made with broken wheat (or dalia), lapsi is a popular sweet dish from the regions of Uttar Pradesh and Bihar.

Also Read: Best Non-Veg Dishes From Lucknow You Must Try For A Slice Of Royalty

About Lapsi – Amitabh Bachchan’s Favourite Dessert from Uttar Pradesh:

According to several reports, lapsi is one of the iconic dishes of Uttar Pradesh. The word lapsi (or laapsi) is derived from the Sanskrit word “Lapsika,” which means “prepared food.” It is a one-pot meal usually made with dalia, roasted in ghee, and then cooked with water (or milk) and jaggery. You can also replace dalia with atta, sooji, moong greens, besan, and almond flour. Lapsi has a porridge-like consistency and is considered a wholesome meal that can be easily digested. Therefore, it is often a part of children’s and older adults’ diets.

Lapsi Vs Halwa: What Is The Difference Between The Two?

People often confuse lapsi with the classic halwa as both are popular desserts in India. However, there are some striking differences between the two. Let’s take a look.

Ingredients:
Halwa can be made with literally anything. Besides the classic suji ka halwa and besan ka halwa, you can also find people preparing the dish with carrots, potatoes, and gourd, to name a few. However, the lapsi recipe strictly restricts the usage of grains and flour.

Consistency:
Halwa has a drier consistency, while lapsi is more porridge-like, making it easy to digest for all.

Serving method:
You can enjoy halwa both hot and cold, but lapsi is usually served hot, just after preparation.

Also Read: 7 Classic Veg Recipes From Uttar Pradesh That’ll Win You Over

How To Make Up-style Lapsi At Home:

As mentioned earlier, lapsi can be prepared with different types of grains and flour. However, the most popular remains dalia lapsi. Here, we bring you a quick and easy dalia lapsi recipe that can be a part of your everyday diet. You can have lapsi as breakfast, dessert, or a quick meal during busy days.

All you need to do is roast some dalia in ghee and boil it well in water or milk. Then add some jaggery as a sweetener and cook until you get the desired consistency. Finally, garnish it with some nuts and serve hot. That’s it! Click here for the detailed recipe.

Why not recreate Amitabh Bachchan’s wholesome dessert at home and indulge in a delicious treat? Don’t forget to share your feedback with us!