

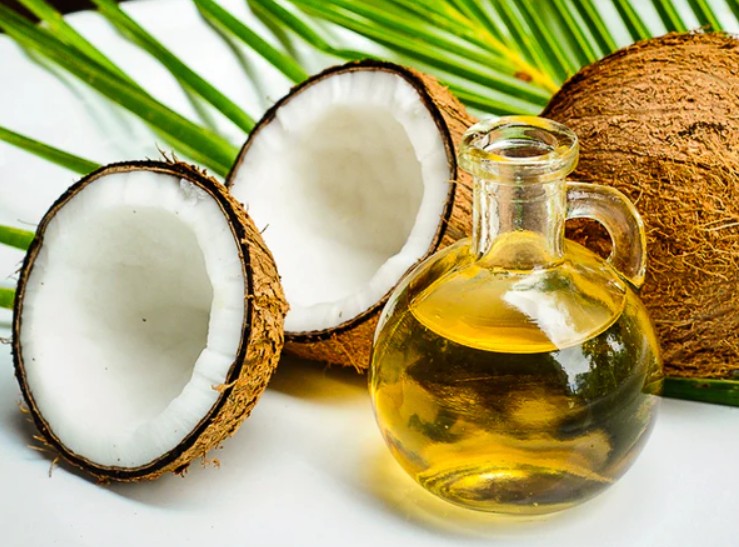
10 Amazing Health Benefits of Cooking with Coconut Oil

10 Amazing Health Benefits of Cooking with Coconut Oil

Introduction

Coconut oil has become one of the most talked-about ingredients in kitchens around the world, and for good reason. Once considered just a tropical cooking fat, it has now gained recognition as a superfood thanks to its wide range of health-boosting properties. From its rich aroma to its versatility in cooking, coconut oil is much more than just a flavorful addition to your meals—it’s also packed with nutrients that can positively impact your overall well-being.

What makes coconut oil stand out from other oils is its unique composition. Unlike vegetable oils that are high in long-chain fatty acids, coconut oil is primarily made up of medium-chain triglycerides (MCTs), which the body processes differently. These MCTs are quickly absorbed, converted into energy, and even linked to various metabolic and cognitive benefits. On top of that, coconut oil contains lauric acid, a compound known for its antimicrobial properties, and a host of antioxidants that support long-term health.

In this article, we’ll explore the 10 amazing health benefits of cooking with coconut oil, from boosting metabolism and improving heart health to supporting brain function and even enhancing beauty from within. Whether you’re health-conscious, following a specific diet like keto, or simply curious about adding new flavors and nutrition to your meals, you’ll discover why coconut oil deserves a permanent spot in your pantry.

What Makes Coconut Oil Unique?

Coconut oil isn’t just another cooking fat you pick up at the grocery store—it’s a powerhouse with a composition that sets it apart from the rest. While many oils are made up of long-chain fatty acids, coconut oil is predominantly composed of medium-chain triglycerides (MCTs). This difference in structure changes how your body digests and uses the fat.

The Power of Medium-Chain Triglycerides (MCTs)

MCTs are digested more efficiently than long-chain fatty acids. Instead of being stored in fat cells, they go directly to the liver, where they are quickly converted into energy. This makes coconut oil a favorite among athletes, fitness enthusiasts, and people following the keto diet, as it provides a fast, clean fuel source for both the body and the brain.

Virgin vs. Refined Coconut Oil

Not all coconut oils are the same, and understanding the differences helps you choose the best one for your needs:

  • Virgin Coconut Oil (VCO): Extracted from fresh coconut meat without chemical processing. It retains more nutrients, antioxidants, and that natural coconut aroma and flavor.
  • Refined Coconut Oil: Made from dried coconut (copra) and often goes through bleaching and deodorizing. It has a neutral taste and a higher smoke point, making it great for high-heat cooking but slightly lower in antioxidants.
  • Extra Virgin Coconut Oil: Though often used interchangeably with virgin coconut oil, the term “extra virgin” isn’t officially regulated in the coconut industry. Most often, it’s simply a marketing label for high-quality virgin oil.

A Heat-Stable and Versatile Oil

Another feature that makes coconut oil unique is its high smoke point, especially when refined. Unlike oils such as flaxseed or some vegetable oils that break down at high temperatures, coconut oil stays stable, making it ideal for frying, roasting, and sautéing. Its natural resistance to oxidation also means it has a longer shelf life compared to many other oils.

In short, coconut oil’s unique fatty acid profile, versatility in cooking, and variety of processing options make it a one-of-a-kind ingredient. Understanding these qualities is the first step to appreciating the powerful health benefits it can bring to your meals and lifestyle.

Top 10 Health Benefits of Cooking with Coconut Oil

Coconut oil is more than just a cooking fat—it’s a nutritional powerhouse with benefits that go far beyond the kitchen. From fueling your body with quick energy to supporting long-term wellness, coconut oil can make a meaningful difference in your diet and lifestyle. Let’s break down the 10 amazing health benefits of coconut oil for cooking that you should know.

  1. Boosts Metabolism and Energy Levels

Coconut oil is rich in medium-chain triglycerides (MCTs), which are metabolized differently from other fats. Instead of being stored, they are rapidly converted into energy by the liver. This quick energy boost can enhance daily performance, making coconut oil an excellent choice for athletes, busy professionals, or anyone needing sustained stamina throughout the day.

  1. Supports Weight Management

The MCTs in coconut oil are also linked to increased satiety, meaning you feel fuller for longer after meals. This can naturally reduce calorie intake and support weight management. Some studies suggest that replacing other fats with coconut oil may help reduce belly fat over time.

  1. Promotes Heart Health

Although coconut oil contains saturated fat, not all saturated fats are harmful. Lauric acid in coconut oil has been shown to raise good HDL cholesterol levels, which play a protective role in cardiovascular health. Balanced consumption may support a healthier cholesterol ratio and improved heart function.

  1. Enhances Brain Function

The brain thrives on energy, and MCTs provide a fast and efficient fuel source. Research indicates that MCTs may benefit brain function, particularly in older adults or individuals with mild memory challenges. Coconut oil’s quick-converting fats make it a natural brain booster.

  1. Strengthens the Immune System

Coconut oil is naturally antimicrobial thanks to compounds like lauric acid, capric acid, and caprylic acid. These substances can help fight off harmful bacteria, viruses, and fungi. Incorporating it into your diet may strengthen your immune defense and reduce the risk of common infections.

  1. Improves Digestion and Gut Health

Cooking with coconut oil can support smoother digestion. Its healthy fats aid in the absorption of fat-soluble vitamins (A, D, E, and K) and essential minerals. Meanwhile, its antimicrobial qualities may help balance gut bacteria, promoting a healthier digestive environment.

  1. Provides Antioxidant Protection

Coconut oil contains powerful antioxidants, including polyphenols, that help fight oxidative stress and inflammation. By neutralizing harmful free radicals, antioxidants reduce the risk of chronic diseases and support overall wellness.

  1. Stabilizes Blood Sugar Levels

Healthy fats like coconut oil can help regulate blood sugar by slowing digestion and improving insulin sensitivity. This makes it particularly beneficial for people looking to maintain steady energy levels or those managing conditions such as type 2 diabetes.

  1. Enhances Skin and Hair from Within

What you eat affects how you look. Regularly including coconut oil in your diet can provide essential nutrients that promote healthy skin and shiny hair. Its fats and antioxidants nourish the body from the inside out, giving you a natural glow and stronger strands.

  1. Versatile and Heat-Stable for Cooking

Finally, coconut oil is highly versatile in the kitchen. Thanks to its high smoke point, it remains stable even at high cooking temperatures. Whether you’re frying, sautéing, roasting, or baking, coconut oil maintains its beneficial properties while adding a subtle, delicious flavor to your dishes.

Cooking with coconut oil isn’t just about taste—it’s about tapping into a wide array of health benefits that can transform the way you eat, feel, and live. By replacing other oils with coconut oil in your recipes, you can enjoy both culinary delight and lasting wellness.

How to Use Coconut Oil in Everyday Cooking

One of the best things about coconut oil is its versatility in the kitchen. Whether you’re frying, baking, or simply spreading it on toast, coconut oil adds a subtle tropical flavor while delivering numerous health benefits. The key is knowing how and when to use it so you can enjoy both its taste and nutritional value.

Use It as a Butter Substitute

Coconut oil can easily replace butter or margarine in your recipes. Whether you’re spreading it on warm toast, melting it over steamed vegetables, or using it in pancake batter, it offers a dairy-free alternative that’s just as satisfying. For vegans or people with lactose intolerance, it’s a fantastic swap.

Perfect for Frying and Sautéing

Thanks to its high smoke point, coconut oil is excellent for frying and sautéing. It remains stable at higher temperatures, which means it won’t break down into harmful compounds as some vegetable oils do. Try using it to stir-fry vegetables, sear meats, or make crispy fried eggs.

Baking with Coconut Oil

Coconut oil is also great for baking. You can replace traditional fats like butter or vegetable oil with coconut oil in cakes, cookies, and muffins. It not only makes baked goods moist but also adds a delicate hint of coconut flavor that pairs beautifully with chocolate, banana, or tropical fruits.

Add It to Smoothies and Coffee

For an extra energy boost, blend a spoonful of coconut oil into your morning smoothie or coffee. Many people following the keto diet enjoy “bulletproof coffee” made with coconut oil or MCT oil for sustained energy and mental clarity throughout the day.

Use in Salad Dressings and Sauces

While coconut oil solidifies at cooler temperatures, it can still be used in dressings and sauces when melted. Combine it with lemon juice, vinegar, and herbs for a unique twist on your usual salad dressing.

Drizzle on Popcorn or Vegetables

Instead of butter, melt coconut oil and drizzle it over freshly popped popcorn or roasted vegetables. It creates a delicious, guilt-free snack that’s both healthy and satisfying.

Tips for Using Coconut Oil in Cooking

  • Measure properly: Replace butter or oil with coconut oil at a 1:1 ratio.
  • Mind the flavor: Virgin coconut oil has a stronger coconut taste, while refined coconut oil has a neutral flavor for savory dishes.
  • Store correctly: Keep your coconut oil in a cool, dry place. It naturally solidifies below 76°F (24°C) but melts easily when heated.

Incorporating coconut oil into your cooking routine is simple and rewarding. Whether you use it in small ways, like adding it to your morning coffee, or in bigger ways, like replacing your everyday cooking oils, coconut oil offers both delicious flavor and health benefits with every spoonful.

Choosing the Right Coconut Oil

With so many options on the shelves, picking the right coconut oil can feel overwhelming. Should you go for virgin, extra virgin, refined, or cold-pressed? Each type of coconut oil has unique qualities, and the best choice depends on your cooking style, health goals, and personal preference. Here’s a guide to help you make the right decision.

Virgin Coconut Oil (VCO)

Virgin coconut oil is made from fresh coconut meat without undergoing chemical refining or bleaching. It retains more of its natural nutrients, antioxidants, and distinctive coconut flavor. This makes it ideal for people who value purity and want the maximum health benefits. It’s especially popular in smoothies, baking, or sautéing dishes where the tropical flavor enhances the recipe.

Extra Virgin Coconut Oil

Unlike olive oil, where the term “extra virgin” is officially regulated, in the coconut oil industry, there’s no strict standard. Most brands label high-quality virgin oil as “extra virgin.” Essentially, it’s the same as virgin coconut oil—freshly extracted, nutrient-rich, and aromatic. If you see “extra virgin” on the label, treat it as a premium virgin coconut oil.

Refined Coconut Oil

Refined coconut oil is produced from dried coconut (copra) and undergoes processes like bleaching and deodorizing. While it has fewer antioxidants than virgin coconut oil, it comes with a neutral flavor and a higher smoke point. This makes it better suited for frying, roasting, or cooking savory dishes where you don’t want the coconut taste to dominate.

Cold-Pressed Coconut Oil

Cold-pressed coconut oil is extracted mechanically at lower temperatures, which helps preserve its natural nutrients and antioxidants. Often, this oil is also virgin. If you’re looking for the purest form of coconut oil with maximum nutritional value, cold-pressed is the way to go.

What to Look for on Labels

When buying coconut oil, always check for:

  • 100{36502ecb9dfd8c6508eac6900de71d8290510556705cb946c268dfdc9ae47000} pure and unrefined for maximum health benefits.
  • Organic certification, which ensures no harmful chemicals were used during processing.
  • Non-hydrogenated and free from trans fats.
  • Packaging in glass jars or BPA-free containers to maintain freshness.

Which One Should You Choose?

  • Choose virgin or extra virgin if you want maximum health benefits and enjoy the natural coconut aroma.
  • Opt for refined coconut oil if you need a neutral taste for everyday frying and high-heat cooking.
  • Go for cold-pressed if you want a nutrient-rich oil for health-conscious recipes.

By understanding the differences and knowing what to look for, you can confidently choose the coconut oil that best fits your cooking style and lifestyle needs.

Precautions and Things to Consider

While coconut oil offers an impressive range of health benefits, it’s important to remember that no single food is a magic bullet. Like all fats, coconut oil should be consumed in moderation and used as part of a balanced diet. Here are some key precautions and considerations to keep in mind before making it a staple in your kitchen.

Watch Your Intake

Coconut oil is calorie-dense, with about 120 calories per tablespoon. Eating too much can quickly add excess calories to your diet, potentially leading to unwanted weight gain. Most health experts recommend limiting consumption to 1–2 tablespoons per day, especially if you’re already consuming other sources of fat.

Saturated Fat Content

Although the saturated fat in coconut oil is different from that in animal products, it’s still high—making up about 90{36502ecb9dfd8c6508eac6900de71d8290510556705cb946c268dfdc9ae47000} of its total fat content. Some studies suggest that excessive saturated fat intake may contribute to cardiovascular issues in certain individuals. If you have a history of heart disease or high cholesterol, consult with your healthcare provider before significantly increasing your intake.

Not a Cure-All

Coconut oil has been widely promoted as a “superfood,” but it’s not a cure-all. While it can support heart, brain, and digestive health, it should not replace a varied diet rich in fruits, vegetables, whole grains, lean proteins, and other healthy fats such as olive oil or avocado. Think of it as a valuable addition, not a sole solution.

Choose Quality Over Quantity

Not all coconut oils are created equal. Poorly processed oils may contain chemicals or lack the nutrients found in virgin or cold-pressed varieties. Always choose organic, unrefined, non-hydrogenated coconut oil for the best health benefits and fewer potential risks.

Individual Health Considerations

  • Digestive issues: Some people may experience mild stomach discomfort or loose stools when first introducing coconut oil. Start with small amounts and increase gradually.
  • Allergies: Though rare, coconut allergies do exist. If you experience itching, swelling, or difficulty breathing after consuming coconut products, seek medical attention immediately.
  • Medical conditions: Those with metabolic disorders, heart conditions, or who are on specific medications should speak to their doctor before making coconut oil a daily habit.

Balance is Key

The best approach to coconut oil is balance. Combine it with other healthy fats—such as olive oil, flaxseed oil, or avocado—to ensure you’re getting a variety of nutrients. By using it wisely, you can enjoy its benefits without overloading your diet.

Conclusion

Coconut oil has rightfully earned its place as one of the most versatile and health-supporting ingredients in modern kitchens. From boosting metabolism and improving brain function to supporting heart health and even enhancing your skin and hair, its benefits extend far beyond simple cooking. What makes it truly special is its unique composition of medium-chain triglycerides (MCTs) and lauric acid, giving it properties that few other oils can match.

That said, the key to getting the most out of coconut oil is balance and mindful use. Incorporating 1–2 tablespoons a day into your meals—whether in frying, baking, or even your morning coffee—can be a simple yet powerful step toward better health. But remember, no single food can do it all. Pair coconut oil with a diverse, nutrient-rich diet to reap the greatest rewards.

So, whether you’re a health enthusiast, a foodie looking for new flavors, or someone on a journey toward better nutrition, coconut oil deserves a spot in your pantry. Start experimenting with it in your favorite recipes, and you’ll soon discover that cooking with coconut oil doesn’t just make your meals more delicious—it makes your lifestyle healthier too.

Frequently Asked Questions About Cooking with Coconut Oil

  1. Is coconut oil safe for frying?

Yes, coconut oil is safe for frying because of its high smoke point (around 350°F/175°C for virgin and up to 400°F/204°C for refined). This means it stays stable at higher temperatures, unlike some vegetable oils that break down and release harmful compounds. Refined coconut oil is the best choice for deep frying or high-heat cooking since it has a more neutral flavor.

  1. How much coconut oil should I eat daily?

Most health experts recommend consuming 1–2 tablespoons per day as part of a balanced diet. While coconut oil has many health benefits, it is still calorie-dense, so moderation is key. Pairing it with other healthy fats like olive oil or avocado ensures a well-rounded intake of essential fatty acids.

  1. What’s the difference between virgin and refined coconut oil?
  • Virgin Coconut Oil (VCO): Extracted from fresh coconut meat without chemical processing. It retains a natural coconut aroma, flavor, and more antioxidants.
  • Refined Coconut Oil: Made from dried coconut (copra), deodorized, and bleached. It has a neutral taste and higher smoke point, making it ideal for frying and savory dishes.
    Both can be healthy, but your choice depends on whether you prefer flavor and nutrients (virgin) or cooking versatility (refined).
  1. Can I use coconut oil for baking?

Absolutely! Coconut oil works wonderfully in baking. You can replace butter or vegetable oil at a 1:1 ratio in cakes, cookies, or muffins. It gives baked goods a moist texture and a mild coconut flavor that pairs well with chocolate, banana, and tropical fruits. If you prefer a neutral flavor, opt for refined coconut oil.

  1. Does coconut oil help with weight loss?

Coconut oil isn’t a miracle fat burner, but it may support weight management when used wisely. The medium-chain triglycerides (MCTs) in coconut oil are digested quickly, providing energy and promoting satiety, which can help reduce overeating. Combined with a healthy diet and exercise, coconut oil can play a supportive role in maintaining a healthy weight.

  1. Is coconut oil good for people with diabetes?

Coconut oil may help regulate blood sugar by improving insulin sensitivity and slowing digestion, which prevents sudden spikes in glucose levels. However, people with diabetes should consult their healthcare provider before adding it regularly, as overall diet and lifestyle play a larger role in blood sugar control.

  1. How should I store coconut oil?

Coconut oil should be stored in a cool, dry place away from direct sunlight. It naturally solidifies below 76°F (24°C) and liquefies when warmer, but this does not affect its quality. Make sure to keep it in a sealed glass jar or BPA-free container to maintain freshness and prevent contamination.


This recipe for coconut meringue cake may really be the ‘world’s best’

This recipe for coconut meringue cake may really be the ‘world’s best’

Coconut Meringue Layer Cake

Active time:1 hour

Total time:3 hours, plus chilling time

Servings:8-10

Active time:1 hour

Total time:3 hours, plus chilling time

Servings:8-10

Comment

I first stumbled upon an old-fashioned blitz torte, a German layer cake traditionally filled with custard and topped with meringue, when researching recipes for my second cookbook, “The Vintage Baker.”

It’s the kind of cake alchemy of my dreams: A glossy, sweet meringue spread over cake batter and baked together until the meringue is bronzed and crisp while the cake reaches optimum moistness and fluffiness. Then it’s finished with a creamy, cool layer of custard, pastry or whipped cream sandwiched between the layers, taking this cake to the realm of otherworldly.

It’s no surprise that the cake is known as “Verdens beste,” or the “world’s best.” It’s officially called Kvaefjordkake, named after the Norwegian municipality of Kvaefjord, and is considered Norway’s national cake.

Lucky Norway. But also, lucky you.

The blitz torte is not difficult to assemble, and I’ve made it even easier. This version is assembled in a bowl with a whisk (no heavy equipment needed), and the filling is a simple whipped cream — no need to cook a custard or assemble a pastry cream. Plus, I have a few tips, tricks and substitutions for making this your best-ever cake, too.

Why coconut oil? Traditionally, a blitz torte’s batter is assembled in a stand mixer with softened butter. To streamline the process, this version calls for melted coconut oil. A liquid fat such as this one makes prep a breeze, as all you need is a bowl and a whisk to incorporate a liquid fat into your other ingredients. Unrefined coconut oil has a stronger coconut flavor than refined and is recommended here.

How do I melt coconut oil? Coconut oil is a solid fat at room temperature and is usually packaged in a glass container. To melt the oil, place the uncovered glass container in the microwave and cook on high power in 30-second bursts, stirring after each. Alternatively, you can place the uncovered jar in a small pot with about an inch of water and simmer the water over low heat until the oil melts. (The remaining coconut oil will resolidify as it returns to room temperature.)

Swirled brownies make a simple dessert even better

What can substitute for coconut oil? If you don’t have coconut oil in the pantry and don’t want to buy it, you can make this cake with vegetable oil or melted butter.

Double down on coconut: A blitz torte traditionally calls for whole milk, but full-fat coconut milk works beautifully in this coconut version. Be sure to stir the coconut milk solids into the liquid before measuring and adding to the batter.

What can substitute for coconut milk? If you don’t have coconut milk in the pantry and don’t want to buy it, you can substitute whole milk, perhaps with 3/4 teaspoon or so of coconut extract.

More coconut! Shredded and flaked: Two kinds of dried coconut make an appearance in this torte, each playing a different role. Sweetened shredded adds moisture, texture and coconut flavor to the layers, whereas the toasted and flaked, sprinkled atop the cake, contributes to the cake’s good looks and hides any meringue imperfections. If you don’t want to buy two different kinds of coconut, use shredded in the layers, then toast some and sprinkle it over the top of the cake as well.

A surprisingly unfussy addition to this cake, the meringue layers pack both a textural and visual punch. Whisking the whites just until they reach soft peaks will guarantee a meringue with enough volume to create a chewy, yet soft texture once baked.

What are soft peaks? A soft peak is reached when the meringue gently flops over at its tippity-top, creating a little downward, pointed curve. You can check this by stopping the mixer, detaching the whisk attachment or beater and turning it upside down: If the meringue droops down just at the top, you’re good to go.

Pastry cream or custard is traditional in a blitz torte, but whipped cream is a simpler, lighter alternative, making it a wonderful contrast to the rich, yolk-filled cake and sweet meringue. The coconut extract in the cream further pops the cake’s coconut flavor, but vanilla extract would also work, as would almond extract (which can be surprisingly neutral in flavor when added in small amounts, providing more of a nostalgic flavor than anything truly nutty). If using almond, reduce the extract to 1/2 teaspoon.

How to test for doneness: When testing the cake for doneness, you’ll need to poke a tester (preferably a long wooden skewer, as its rough edges will easily grab batter and/or crumbs) into the cake somewhat aggressively. Because you need to poke through the meringue layer to get to the cake, don’t be afraid to twist the tester a bit in the cake, to make sure you get an accurate sense of whether it is fully baked (a moist crumb or two on the tester indicates it’s ready).

Chocolate pretzel peanut ice cream bars reimagine a childhood favorite

How to remove the cake from the pan: Wait 20 minutes before removing the cake layers from their pans. If you try to remove them too soon, the meringue topping will stick when you invert them (been there, done that). If the meringue sticks despite your best efforts — perhaps because of humidity — attempt to remove the layers from the pan with two large spatulas. And if you do end up with any imperfections on the surface of the cake, they’re easy enough to hide. Just toast a little coconut — either flaked or shredded — and sprinkle it over the top layer of the cake. In addition to hiding any minor flaws, it adds a little toasty color that works beautifully with the oven-baked meringue, adding nice texture.

Despite the meringue bells and whipped cream whistles of a blitz torte, it’s a surprisingly easy cake to assemble and one that’s as much fun to make as it is to eat.

Coconut Meringue Layer Cake

If you prefer a more neutral flavor in the cake, use refined coconut oil, and for a more pronounced vibe — unrefined.

To toast the coconut, spread it on a baking sheet and place it in a 350-degree oven for 5 minutes after the cake layers are removed. Or, heat a medium skillet over medium heat and add the coconut. Toast it, stirring frequently, until it is light brown and crisp. Transfer to a plate to cool.

If you do not want to make your own sling, you can buy parchment rounds with tabs that hang over the sides of the pan for easy lifting.

Storage: The cake is best the day it’s made but can be lightly wrapped and refrigerated for up to 3 days. Remove leftovers about 30 minutes before serving.

Want to save this recipe? Click the bookmark icon at the top of this page, then go to Saved Stories in My Post.

Scale this recipe and get a printer-friendly, desktop version here.

  • Nonstick cooking spray
  • 1/2 cup plus 2 tablespoons (131 grams) coconut oil, melted (see note above)
  • 1 cup (200 grams) granulated sugar
  • 2 teaspoons vanilla extract
  • 4 large egg yolks, at room temperature
  • 2/3 cup (161 grams) unsweetened full-fat coconut milk, at room temperature
  • 1 1/2 teaspoons baking powder
  • 3/4 teaspoon fine salt
  • 1 1/2 cups (187 grams) all-purpose flour
  • 2/3 cup (57 grams) shredded sweetened coconut (optional)
  • 4 large egg whites, at room temperature
  • 1/4 teaspoon cream of tartar
  • 1/8 teaspoon fine salt
  • 3/4 cup (150 grams) granulated sugar
  • 1 1/4 cups (284 grams) heavy cream
  • 3 tablespoons confectioners’ sugar
  • 1 teaspoon coconut extract (optional)
  • 1 cup (170 grams) mixed berries, for serving (optional)
  • Toasted flaked coconut, for sprinkling (optional; see note above)

Make the cake batter: Position a rack in the middle of the oven and remove the racks above it; preheat to 350 degrees. Generously grease the sides and bottoms of two 8-inch cake pans with the cooking spray. Line the bottoms with parchment paper.

In a large bowl, whisk together the oil, sugar and vanilla until combined. Whisk in the egg yolks until the mixture looks thick, yellow and well-combined. Whisk in the coconut milk. Sprinkle the baking powder and salt over the bowl one at a time, whisking vigorously after each. Fold in the flour and shredded coconut, if using, just until the last streaks of flour disappear. Evenly divide the batter between the two pans — each pan should get about 360 grams of batter. Using a small offset spatula or a butter knife, smooth out the tops.

Make the meringue: In the bowl of a stand mixer fitted with the whisk attachment, or using a large bowl and a handheld mixer, beat together on medium speed the egg whites, cream of tartar and salt until frothy. Slowly pour in the sugar, increase the mixer speed to medium-high and beat until soft, thick, glossy peaks form (the peaks should bend a little at the top), 5 to 8 minutes. Divide the meringue between the two cake pans and, using a small offset spatula or butter knife, smooth it out over the batter.

Bake for about 30 minutes, or until the meringue has risen considerably (it will deflate, don’t worry) and is lightly browned, and a cake tester inserted into the cake comes out with a few moist crumbs. Testing the cake underneath the meringue is a little tricky, but you can be aggressive in searching for a few moist crumbs with at least one of the cakes, as it will be topped with the other.

As soon as the cakes are pulled from the oven, run a butter knife or a small offset spatula around the edges of the pans to release the meringue before it hardens and sticks.

Let the cakes cool in the pans on a wire rack for 20 minutes, before inverting them and then turning them right side up and letting them cool completely. If it’s humid, the meringue may stick a bit when you flip the cakes upside down — just sprinkle whichever layer becomes the top of the cake with toasted flaked coconut, and no one will be the wiser.

Make the whipped cream: In the bowl of a stand mixer fitted with the whisk attachment, or using a large bowl and a handheld mixer, beat the cream, confectioners’ sugar and coconut extract on medium-high speed until medium peaks form, about 5 minutes.

Spread the whipped cream over the meringue on the less-attractive layer (we know you love them both, but just pick one), sprinkle with the berries, if using, and top with the second layer. The meringue should be on top.

Press down very lightly on the top of the cake and sprinkle with toasted coconut to cover any meringue imperfections. Slice with a large serrated knife, wiping the blade between slices, and serve.

Spread the whipped cream over the meringue on the less-attractive layer (we know you love them both, but just pick one), sprinkle with the berries, if using, and top with the second layer. The meringue should be on top.

Press down very lightly on the top of the cake and sprinkle with toasted coconut to cover any meringue imperfections. Slice with a large serrated knife, wiping the blade between slices, and serve.

Calories: 492; Total Fat: 30 g; Saturated Fat: 22 g; Cholesterol: 115 mg; Sodium: 300 mg; Carbohydrates: 54 g; Dietary Fiber: 1 g; Sugar: 38 g; Protein: 5 g

This analysis is an estimate based on available ingredients and this preparation. It should not substitute for a dietitian’s or nutritionist’s advice.

From cookbook author Jessie Sheehan.

Tested by Suzy Leonard and Ann Maloney; email questions to voraciously@washpost.com.

Scale this recipe and get a printer-friendly, desktop version here.

Browse our Recipe Finder for more than 10,000 Post-tested recipes.

Did you make this recipe? Take a photo and tag us on Instagram with #eatvoraciously.

All Boba Tea recipes in Disney Dreamlight Valley: Coconut, Raspberry & more

All Boba Tea recipes in Disney Dreamlight Valley: Coconut, Raspberry & more

Published: 2022-12-14T14:16:09

Updated: 2022-12-14T14:16:24

Disney Dreamlight Valley is filled with delicious recipes for players to make. One such recipe is Boba Tea, a recent addition during the Toy Story update. So, we’ve compiled all the Boba Tea recipes in Disney Dreamlight Valley including how to make Coconut Boba Tea and Raspberry Boba Tea.

Disney Dreamlight Valley is a fantastic game for budding chefs. It includes over 170 unique recipes where you’re tasked with finding the ingredients and creating your favorite foods. While it’s exciting to create new ideas, finding out the ingredients for these recipes can be a little frustrating.

We’ve compiled all the Boba Tea recipes in Disney Dreamlight Valley so you can get back to drinking your favorite drink without needing to hunt around for the ingredients or the recipe.

Article continues after ad

If you’re looking for more recipes in Disney Dreamlight Valley we have a guide detailing all the ingredients you need.

How to make Boba Tea in Disney Dreamlight Valley

Disney Dreamligt Valley how to make Boba teaDisney / Gameloft

You’ll need Milk, Sugarcane and a flavoring to make a three-star Boba Tea.

The base ingredients surrounding Boba Tea in Disney Dreamlight Valley are thankfully relatively easy to get hold of. You’ll only need two ingredients to make the base Boba Tea then the respective additional flavoring for the three-star drinks. For example, a Dreamlight Valley Raspberry Boba tea will need the normal ingredients with one raspberry added in.

To make a normal Boba Tea you’ll need:

You can find Milk in Chez Remy and it’ll cost you 230 Star Coins each. Then the Sugarcane can be brought at Dazzle Beach. The Sugarcane itself is 29 Star Coins while the seeds are only 5 Star Coins. Due to the growth time being only seven minutes, we recommend buying the seeds and growing them.

Article continues after ad

All Boba Tea recipes in Disney Dreamlight Valley

We’ve compiled all five of the current Boba Tea recipes in Disney Dreamlight Valley so you can get to drinking your tea as soon as possible. The recipes, their ingredients, and how much they sell for are below:

That’s all the Boba Tea recipes in Disney Dreamlight Valley along with how you can make this delicious drink. While waiting for your Sugarcane to grow, take a look at some of our other handy Disney Dreamlight Valley guides:

Lost Diaries locations in Disney Dreamlight Valley | How to upgrade your house in Disney Dreamlight Valley | All flowers in Disney Dreamlight Valley | All Realms in Disney Dreamlight Valley | How to unlock all characters in Disney Dreamlight Valley | Disney Dreamlight Valley Emeralds guide | Is Disney Dreamlight Valley multiplayer? | How to feed animals in Disney Dreamlight Valley | How to redeem the Golden Potato code | All Disney Dreamlight Valley recipes | Current Disney Dreamlight Valley Star Path | When is the next Disney Dreamlight Valley update? | Disney Dreamlight Valley crop growth times

Article continues after ad

A recipe for Jamaican gizzada cookie bars that is loaded with coconut

A recipe for Jamaican gizzada cookie bars that is loaded with coconut

Jamaican Gizzada Cookie Bars

Active time:45 mins

Total time:1 hour 45 mins

Servings:Makes 20 bars (one 8-inch square slab)

Active time:45 mins

Total time:1 hour 45 mins

Servings:Makes 20 bars (one 8-inch square slab)

Comment

When I was diagnosed with latent autoimmune diabetes in adults, the first thing a dietitian told me was that I wouldn’t be able to eat baked goods much anymore. I’m pretty stubborn, so it led me to find alternatives that would allow room for sweet treats.

Learning to bake with sugar substitutes has become a joy, and making delicious, blood sugar-friendly recipes such as my Jamaican Gizzada Cookie Bars has always been important to me. I know firsthand that living with diabetes doesn’t mean a life of bland foods.

13 holiday cookie recipes to bring color and joy to the season

I grew up eating gizzada, and it was one of the first dessert recipes my mother taught me to bake. When she passed away a few months ago, I was grateful to be working on this recipe — it gave me a way to remember our times in the kitchen making these little pastries.

The aromas of coconut, cinnamon, allspice, nutmeg and butter filled my kitchen and instantly unlocked some core memories — like my mom at the stove making the filling and me on pastry duty at our kitchen island with messy fingers and a tiny face dusted in flour. My mom and I didn’t bake together often, but making gizzada is one of those memories from my childhood that I’ll cherish forever now.

In Jamaica, gizzada is also called a “pinch-me-round” because this spice-forward pastry is usually made with the filling baked in a tiny crimped pastry shell. But even nostalgia deserves a twist sometimes.

For this recipe, I swapped out the pastry shell in favor of a shortbread crust made with almond flour and all-purpose flour. The extra fat in the almond flour helps slow blood sugar spikes, but also makes for a crumbly and nutty shortbread.

As for the filling, the traditional is too good to change, but I did swap regular brown sugar for Truvia Sweet Complete, a stevia-based alternative. It lowers the sugar content for those watching blood glucose.

Jamaican Gizzada Cookie Bars

While this recipe is designed to be a better option for those with diabetes, it does contain some added sugar and carbohydrates. We have included the nutrition data to help you decide how it might fit into your diet. Please consult a medical professional for guidance if you have questions or concerns.

These cookies are quite sweet, so we cut them into small pieces.

Be sure to use unsweetened coconut or your filling will be unpleasantly sweet and you’ll greatly increase the sugar content.

Because of the almond flour in the shortbread, it’s important to wait for the bars to cool completely before slicing into them. This shortbread is hearty, but when warm, it’s delicate and crumbly.

Storage: Refrigerate the bars in an airtight container between layers of parchment for up to 1 month, or freeze for up to 3 months.

Where to Buy: Truvia Sweet Complete sugars are available at some grocery stores and online.

Want to save this recipe? Click the bookmark icon below the serving size at the top of this page, then go to Saved Stories in My Post.

Scale this recipe and get a printer-friendly, desktop version here.

  • Nonstick cooking spray
  • 3/4 cup (94 grams) all-purpose flour
  • 1/4 cup plus 2 tablespoons (38 grams) confectioners’ sugar alternative, such as Truvia Sweet Complete or Swerve
  • Rounded 1/4 teaspoon fine salt
  • 3/4 cup (86 grams) almond flour or meal
  • 6 tablespoons (3/4 stick/85 grams) unsalted butter, softened
  • 3/4 teaspoon vanilla extract
  • 2 cups (6 ounces/170 grams) unsweetened shredded coconut (preferably not finely shredded)
  • 1 1/2 cups (360 milliliters/430 grams) cream of coconut, such as Coco Real brand
  • 1/2 cup (95 grams) packed brown sugar substitute, such as Truvia Sweet Complete or Swerve
  • 2 tablespoons unsalted butter
  • 1 tablespoon vanilla extract
  • 1 teaspoon fine salt
  • 1 teaspoon minced fresh ginger
  • 1 teaspoon ground cinnamon
  • 1/2 teaspoon ground allspice
  • 1/2 teaspoon ground nutmeg

Make the shortbread: Position a rack in the middle of the oven and preheat to 350 degrees. Spray an 8-inch square baking dish or pan with nonstick cooking spray, then line it with two crisscrossed pieces of parchment paper long enough to have a generous overhang on all sides.

Set a mesh sieve over the bowl of a stand mixer or, if using a hand mixer, a large bowl. Into it, sift together the all-purpose flour, confectioners’ sugar alternative and salt to remove any lumps. Whisk in the almond flour or meal and break up any clumps. Add the butter and vanilla. Using the paddle attachment of the stand mixer or a hand mixer, beat on low until the ingredients start to come together and resemble sand in texture, then increase the speed to medium and beat until the dough comes together in larger clumps, about 3 minutes.

Transfer the dough to the baking dish and press it into an even layer, pushing it slightly up the sides of the pan at the edges. Using the tines of a fork, dock the dough all over to allow any steam to escape. Bake for 15 minutes, or until the dough is golden around the edges and mostly pale, but dry in the center.

Remove from the oven and let cool on a wire rack; keep the oven on.

Make the topping: While the shortbread bakes, in a wide skillet over medium heat, toast the shredded coconut, stirring often, until it turns a light golden color, 5 to 7 minutes. (Pay attention, as it can scorch quickly.) Remove from the heat and transfer to a bowl.

Return the skillet to medium heat and add the cream of coconut, brown sugar substitute, butter, vanilla, salt, ginger, cinnamon, allspice and nutmeg, stirring until the sugar substitute dissolves. Bring the mixture to a simmer and cook, stirring constantly, until it thickens, 5 to 7 minutes. Remove from the heat and stir in the toasted coconut.

Pour the topping over the shortbread, spreading it in an even layer with an offset spatula. Return the pan to the oven and bake for 18 to 20 minutes, or until the filling is bubbly all over and fragrant. The filling will be slightly wobbly in the center but will set as it cools — better to under- than overbake, to keep the bars soft.

Let cool on a wire rack for 30 minutes, then refrigerate for at least 2 hours so the slab can set. Remove the pan from the refrigerator and use the parchment overhang to transfer the square to a cutting board. Slice the bars into 16 to 20 pieces with a sharp knife and serve.

Calories: 221; Total Fat: 15 g; Saturated Fat: 11 g; Cholesterol: 12 mg; Sodium: 159 mg; Carbohydrates: 31 g; Dietary Fiber: 2 g; Sugar: 13 g; Protein: 2 g

This analysis is an estimate based on available ingredients and this preparation. It should not substitute for a dietitian’s or nutritionist’s advice.

From Mila Clarke Buckley of the blog Hangry Woman.

Tested by Jim Webster and Becky Krystal; email questions to voraciously@washpost.com.

Scale this recipe and get a printer-friendly, desktop version here.

Browse our Recipe Finder for more than 9,900 Post-tested recipes.

Did you make this recipe? Take a photo and tag us on Instagram with #eatvoraciously.