
Chocolate Chip Cookie Recipe: The Homemade Method That Finally Worked for Me

Chocolate Chip Cookie Recipe: The Homemade Method That Finally Worked for Me

Introduction: My Long Journey to the Perfect Chocolate Chip Cookie

I’ll admit something right away — my first batch of chocolate chip cookies was a complete disaster. The cookies spread into one giant sheet on the baking tray. They were thin, greasy, and honestly kinda sad looking.
At the time I thought baking cookies would be simple. You mix ingredients, bake them, and boom… cookies. Turns out there’s a little more science involved than I expected.
Over the years I’ve tested different chocolate chip cookie recipes, experimented with baking temperatures, changed sugar ratios, and even ruined a few batches along the way. But eventually I found a method that consistently produces cookies that are soft in the center, slightly crispy on the edges, and packed with chocolate flavor.
This recipe is the one I come back to again and again. It’s reliable, simple, and doesn’t require fancy baking skills. If you follow a few small tricks — which I learned the hard way — you’ll end up with cookies that taste like they came from a bakery.

Ingredients for Classic Chocolate Chip Cookies

The beauty of chocolate chip cookies is that the ingredients are simple and easy to find.

Main Ingredients

Here’s what you’ll need for one batch:
• 2 1/4 cups all-purpose flour
• 1 teaspoon baking soda
• 1 teaspoon salt
• 3/4 cup unsalted butter (softened)
• 3/4 cup brown sugar
• 1/2 cup granulated sugar
• 2 large eggs
• 2 teaspoons vanilla extract
• 2 cups semi-sweet chocolate chips
Optional ingredients that I sometimes add:
• 1 cup chopped walnuts or pecans
• 1/2 teaspoon cinnamon for extra warmth
• A sprinkle of flaky sea salt on top
One thing I learned the hard way: using room-temperature ingredients makes mixing much easier.

Step-by-Step Chocolate Chip Cookie Instructions

The process is simple, but small details can make a big difference in texture and flavor.

Step 1: Prepare the Dry Ingredients

In a medium bowl, combine:
• Flour
• Baking soda
• Salt
Whisk these together until evenly mixed.
This step might seem unnecessary, but it helps distribute the baking soda evenly through the dough. Skipping this once gave me cookies that baked unevenly.

Step 2: Cream the Butter and Sugars

In a large mixing bowl, beat together:
• Softened butter
• Brown sugar
• Granulated sugar
Mix until the texture becomes light and fluffy. This usually takes about 2–3 minutes with an electric mixer.
Creaming the butter properly helps create cookies that are soft rather than dense.

Step 3: Add Eggs and Vanilla

Next, add the eggs one at a time, mixing well after each addition.
Then stir in the vanilla extract.
At this point the mixture should look smooth and slightly creamy.

Step 4: Combine Wet and Dry Ingredients

Gradually add the flour mixture to the wet ingredients.
Mix slowly until the dough forms.
Avoid overmixing here. I used to stir the dough forever thinking it would make things better. Instead it made the cookies tougher.

Step 5: Add the Chocolate Chips

Now fold in the chocolate chips.
Make sure they’re evenly distributed throughout the dough.
Sometimes I sneak in a few extra chocolate chips because… well, more chocolate never hurts.

Chilling the Dough (A Trick That Makes Better Cookies)

This step changed everything for me.

Why You Should Chill Cookie Dough

Once the dough is mixed, cover it and place it in the refrigerator for at least 30 minutes.
Chilling helps:
• Prevent cookies from spreading too much
• Improve flavor
• Create thicker, chewier cookies
The first time I tried chilling dough I noticed a huge difference. The cookies baked taller and had better texture.
Some bakers chill dough overnight, which can make the flavor even richer.

Baking the Cookies

Now the fun part begins.

Step 1: Preheat the Oven

Set your oven to 350°F (175°C).
Line a baking sheet with parchment paper or a silicone baking mat.
This prevents cookies from sticking and makes cleanup easier.

Step 2: Scoop the Dough

Use a cookie scoop or tablespoon to portion dough balls.
Place them about 2 inches apart on the baking sheet.
Cookies spread as they bake, so spacing matters.

Step 3: Bake the Cookies

Bake for 10–12 minutes.
The edges should look golden brown, while the centers may still look slightly soft.
This is normal. Cookies continue cooking slightly after being removed from the oven.
I used to overbake cookies because I thought they looked underdone. Turns out that’s how you accidentally make crunchy cookies instead of soft ones.

Cooling the Cookies Properly

Let the cookies cool on the baking sheet for about 5 minutes.
Then transfer them to a wire rack to cool completely.
Cooling allows the cookies to set and develop their final texture.
And honestly… waiting for them to cool is probably the hardest part.
The smell of freshly baked cookies makes patience very difficult.

Tips That Help Make the Best Chocolate Chip Cookies

After many batches, I picked up a few tricks that consistently improve results.

Use Brown Sugar for Moisture

Brown sugar contains molasses, which helps keep cookies soft and chewy.
That’s why many recipes use more brown sugar than white sugar.

Measure Flour Correctly

Too much flour can make cookies dry.
Instead of scooping flour directly from the bag, spoon it into the measuring cup and level it off.
It sounds picky, but it actually makes a difference.

Try Different Chocolate Chips

Chocolate chips come in many varieties:
• Semi-sweet
• Dark chocolate
• Milk chocolate
• White chocolate
Sometimes I mix two types together for a more interesting flavor.

Fun Variations of Chocolate Chip Cookies

Once you master the classic recipe, you can try different variations.

Chocolate Chip Walnut Cookies

Adding chopped walnuts introduces a crunchy texture that pairs nicely with the soft cookie base.
Just fold about 1 cup of chopped walnuts into the dough.

Sea Salt Chocolate Chip Cookies

Sprinkle a small pinch of flaky sea salt on top of each cookie before baking.
The salty-sweet combination tastes amazing.

Double Chocolate Chip Cookies

Replace 1/4 cup of flour with cocoa powder to create a chocolate cookie base.
Then add chocolate chips for extra richness.
These cookies are incredibly chocolatey.

Common Mistakes When Baking Chocolate Chip Cookies

Even experienced bakers run into problems sometimes.

Cookies Spread Too Much

This can happen if:
• Butter is too soft
• Dough wasn’t chilled
• Too little flour was used
Chilling the dough usually solves this problem.

Cookies Turn Out Hard

Hard cookies are often caused by:
• Overbaking
• Too much flour
• Overmixing the dough
Removing cookies from the oven when the centers still look slightly soft usually fixes this.

Final Thoughts: Why Homemade Cookies Are Always Worth It

Baking chocolate chip cookies at home is one of those small pleasures that never gets old.
The smell alone can fill an entire kitchen with warmth. And the first bite of a soft, warm cookie fresh from the oven? That’s hard to beat.
Sure, it might take a few tries to get the recipe just right. My early attempts were far from perfect.
But once you learn a few key techniques — like chilling the dough and measuring ingredients carefully — making great cookies becomes surprisingly easy.
And before long, you might find yourself baking them again and again… just because the house feels a little happier when cookies are in the oven.

Ridiculous Revel Bars Recipe: If Oatmeal Cookies, Fudge & Brownies Had a Baby | Desserts

Ridiculous Revel Bars Recipe: If Oatmeal Cookies, Fudge & Brownies Had a Baby | Desserts


What’s a revel bar? A revel bar is an oatmeal cookie bar that has a chocolatey, fudgy filling in the middle. I think it’s more like if brownies, fudge and oatmeal cookies had a sweet delicious baby. It’s said these bars are called revel bars because people revel in delight after eating them. I definitely believe that!


The oatmeal cookie layer is made with butter, brown sugar, eggs, vanilla, quick oats, flour, baking soda and a pinch of salt. The batter is used as the base of the bars and as the crumble topping. The chocolate layer is made with sweetened condensed milk, chocolate chips, butter, salt, vanilla and chopped nuts.

<Macro 'tip'>


You can use your favorite chocolate chips for this
dessert recipe, but semisweet are my favorite. Make these cookie bars gluten-free by using gluten-free flour. If you don’t like nuts, leave them out! If you do use nuts and have the time, give them a quick toast in a dry skillet to bring out even more flavor.


Cuisine: American

Prep Time: 10 minutes

Cook Time: 35 minutes


Total Time: 45 minutes


Servings: 12+


Ingredients


Oatmeal Bar


  • 1 cup (2 sticks) butter, softened
  • 2 cups packed brown sugar 
  • 2 eggs, at room temperature
  • 2 teaspoons vanilla
  • 3 cups quick oats
  • 2 1/2 cups flour
  • 1 teaspoon baking soda
  • big pinch of salt


Filling


  • 1 can (14 ounces) sweetened condensed milk
  • 1 bag (12 ounces) chocolate chips
  • 3 tablespoons butter
  • 1 teaspoon salt
  • 2 teaspoons vanilla 
  • 1/3 cup chopped pecans or walnuts


Here’s how to make it: 


  1. Cream the butter and brown sugar together with an electric mixer. Add the eggs and vanilla. Mix well. Stir in the baking soda, salt, oats and flour until combined. Put about 2/3 of the mixture into a greased 13×9-inch baking pan. Press down to cover the bottom of the pan. 
  2. To make the chocolate layer, put the sweetened condensed milk, chocolate chips, butter and salt into a saucepot. Cook over low heat, stirring, until smooth. Stir in the vanilla and nuts. Remove from the heat. Spoon the filling over the oatmeal layer, spreading to cover the entire top. 
  3. Sprinkle the remaining 1/3 oatmeal mixture over the top. 
  4. Bake in a preheated 350-degree F oven for about 30 minutes or until the top is golden brown. 


Note: 30Seconds is a participant in the Amazon affiliate advertising program and this post contains affiliate links, which means we may earn a commission or fees if you make a purchase via those links.


Recipe cooking times and servings are approximate. Need to convert cooking and baking measurements? Here are some kitchen conversion charts. Here’s how to submit your recipes to 30Seconds.


Take 30 seconds and join the 30Seconds community, and follow us on Facebook to get recipes in your newsfeed daily.


Related Products on Amazon We Think You May Like:

30Second Mobile, Inc. is a participant in the Amazon Services LLC Associates Program, an affiliate advertising program designed to provide a means for us to earn fees by linking to Amazon.com and affiliated sites.

Chicken schnitzel, idli and cookies: Yotam Ottolenghi’s recipes for cooking with semolina | Food

Chicken schnitzel, idli and cookies: Yotam Ottolenghi’s recipes for cooking with semolina | Food

Many of my favourite comfort foods are connected by one ingredient: semolina. Whether it’s the gnocchi my Italian grandmother made for us or the syrup-drenched cakes, dumplings and couscous of my childhood in Jerusalem, it’s often semolina at work. Its texture is distinct: somehow glutinous and gritty in the likes of those gnocchi, but also light and sandy in cakes and cookies. Semolina, which is halfway between wheat and flour, is also a really effective way to bring a welcome crunch to two other great comfort foods: roast potatoes, which benefit hugely from being rolled in a little semolina after they’ve been parboiled, and chicken schnitzel. In fact, it’s a bit of a miracle ingredient.

Mustardy chicken schnitzel with braised peas and pea salsa (pictured top)

Here, semolina makes a light and crisp crust for a comforting schnitzel. Both the braised peas and the pea salsa can be made the day before.

Prep 15 min
Cook 45 min
Serves 2

For the salsa
90ml olive oil
1 tsp black mustard seeds
80g frozen peas or petit pois
, plus 150g extra for the braised peas
Fine sea salt and black pepper

For the braised peas
60g unsalted butter
2 large shallots
, peeled, halved and roughly chopped (110g)
1 baby gem lettuce, cut into 6 wedges
2 anchovy fillets in oil, drained and roughly chopped
50g plain flour, plus 1 tbsp extra
200ml chicken stock

For the schnitzels
150g fine semolina
1 medium egg
, beaten
2 tbsp dijon mustard, plus extra to serve
2 tbsp wasabi paste
2 chicken breasts, skinless (400g)
10g mint leaves, roughly chopped

Put two teaspoons of oil in a medium saucepan on a medium heat, add the mustard seeds and cook for two minutes, until they start to pop. Take off the heat, stir in 80g of the peas and leave to cook in the residual heat. Transfer to a mortar, add a quarter-teaspoon of salt, then crush gently and put to one side.

For the braised peas, return the saucepan to a medium heat and add the butter. Once it’s melted, add the shallots and half a teaspoon of salt and cook, stirring occasionally, for two minutes, until slightly softened. Add the remaining 150g peas, the lettuce wedges and the anchovies, and cook for a further five minutes, until softened. Add a tablespoon of flour, stir for a minute, then pour in the stock. Turn the heat to low and leave to braise for 10 minutes, until nicely thickened. Set aside.

Put the remaining 80ml olive oil in a large frying pan on a medium-high heat. Put the flour and semolina in two separate wide, shallow bowls. Mix the egg, mustard and wasabi in a third shallow bowl. Put the chicken breasts on a board and, using a meat mallet (or the base of a small heavy saucepan), gently bash them to about 2cm thick. Sprinkle lightly with salt and pepper, then, one by one, coat first in flour, then in the egg mixture and finally in the semolina, shaking off the excess as you go.

Carefully lay one piece of chicken in the hot oil, fry, turning once halfway, for three minutes, until nicely browned all over. Transfer to a plate lined with kitchen paper to drain, then and repeat with the second coated chicken breast. Leave to rest for a minute or two, then cut each breast in half.

Stir two-thirds of the mint into the braised peas, then pour into a lipped platter and arrange the chicken on top. Garnish with the salsa, sprinkle over the remaining mint and serve with extra dijon mustard on the side.

Semolina idli with coconut chutney and spiced oil

Yotam Ottolenghi’s semolina idli with coconut chutney and spiced oil.

Idli are soft, pillowy cakes from south India that are often made with lentils or rice flour, though this one features semolina. They’re usually made in specially designed moulds, but I use a cake tin to make life easier; you could also use lightly oiled round moulds or ramekins. Serve as a snack, for breakfast or as part of a larger spread at any time of day.

Prep 25 min
Cook 30 min
Serves 4-6

For the idli
200g fine semolina
30g desiccated coconut
250g Greek-style yoghurt
3 tbsp fresh lemon juice
(ie, from 1-2 lemons)
Fine sea salt

½ tsp bicarbonate of soda

For the chutney
115g fresh coconut, roughly chopped
30g fresh coriander
120g Greek-style yoghurt
1 garlic clove
, peeled and crushed
1 green chilli (10g), roughly chopped (remove and discard the pith and seeds if you prefer less heat)
1 tbsp fresh lime juice (ie, from 1 lime)

For the spiced oil
3 tbsp olive oil, plus 1 tbsp extra for greasing
20g pine nuts
10g white sesame seeds
10 fresh curry leaves
1 tsp black mustard seeds
1½ tsp aleppo chilli flakes
, or mild chilli flakes
¼ tsp ground kashmiri chilli

First, make the idli batter. Put the semolina, desiccated coconut, yoghurt, lemon juice and 210ml cold water in a medium bowl, add three-quarters of a teaspoon of salt, mix well, cover with a plate and leave for 10 minutes.

Meanwhile, make the chutney. Put the fresh coconut, coriander, yoghurt, garlic, green chilli, lime juice and a third of a teaspoon of salt in the small bowl of a food processor, blitz until almost smooth and vibrant green, then scrape into a small bowl.

Grease a 22cm round cake tin and line it with baking paper. Half-fill a steamer with water and bring to a rolling boil. Quickly stir the bicarb into the batter, then pour it into the tin, put it in the steamer and cover (the batter will start to bubble, so make sure you work quickly). Turn down the heat to medium and steam for 22-24 minutes, until the middle of the idli is set. Take off the heat, uncover and set aside forfive minutes. The top of the idli will initially look rather wet, but it will steam dry very quickly.

To make the spiced oil, pour the oil into a small frying pan on a medium heat, add the pine nuts and sesame seeds, and fry, stirring now and then, for two to three minutes, until lightly toasted. Stir in the curry leaves, cook for 30 seconds to a minute, until the leaves turn translucent, then take off the heat and stir in the mustard seeds, the chilli flakes and ground chilli, and an eighth of a teaspoon of salt.

Run a knife all around the edge of the idli and put a large plate on top. Quickly invert to release the idli from the tin, then cut into eight wedges. Spoon over half the oil and serve with the rest of the oil and the chutney in bowls on the side for dipping.

Lemony semolina and almond cookies

Yotam Ottolenghi’s lemony semolina and almond cookies.

These biscuits showcase the texture of semolina when it’s used in baking: they’re somehow light but weighty all at the same time. Once made, they’ll keep in the biscuit tin for up to a week.

Prep 5-10 min
Cook 30 min
Makes 19

50g flaked almonds, lightly broken in a mortar
85g golden caster sugar
100g room-temperature unsalted butter
, cut into 1cm cubes
1 tbsp soured cream
1 egg
1 tsp vanilla bean paste
1 tsp lemon zest
140g fine semolina
75g ground almonds
2 tbsp cacao nibs

Fine sea salt

Heat the oven to 180C (160C fan)/350F/gas 4, and put the bashed flaked almonds in a medium bowl.

Put the sugar and butter in the bowl of a stand mixer fitted with the paddle attachment, then beat for 30 seconds, until pale and fluffy. Add the soured cream, egg, vanilla and lemon zest, and mix for a few seconds until well incorporated – don’t worry if it seems split: that’s all part of the plan.

Mix in the semolina, ground almonds, cacao nibs and a quarter-teaspoon of salt, and work with your hands until it comes together into a dough, taking care not to overwork it. Divide the dough and work it into 19 small balls weighing roughly 25g each. Working one by one, lightly roll each ball through the broken almonds, so they stick to the outside, then arrange them 2cm apart on a large oven tray lined with greaseproof paper. Bake for 22 minutes, until lightly golden and slightly firmed, then remove and transfer to a rack to cool completely.

Want to bake the best chocolate chip cookies ever? Reach for salty, savory white miso

Want to bake the best chocolate chip cookies ever? Reach for salty, savory white miso

A couple months ago, I threw a solution ingredient into my typical chocolate chip cookie dough and then ever-so-marginally undercooked the cookie. When I took them out of the oven, I failed to love how they appeared, but at the time they cooled a little bit and I took a bite — I was blown away. These were being the best cookies I’d created in several years and I was super fired up to share them.

What is this elusive, secret ingredient, you inquire? Miso!

Again in the day, Christina Tosi’s Milk Bar sold a miso-butterscotch chai, which I always believed was one of the most outrageously mouth watering sounding beverages to at any time exist. Ever given that, I’ve grow to be a accurate miso adherent — as evidenced by the fact that lots of of my recipes include white miso. 

I adore miso’s flexibility, savoriness, umami notes and depth of taste. It is a great dessert component, by the way — do not be spooked into pondering that it only belongs in savory food stuff.


Want far more great food items producing and recipes? Subscribe to Salon Food’s e-newsletter, The Bite.


I added miso to my cookie dough after striving a miso-sesame cookie from a regional (legitimately stellar) temaki restaurant. I didn’t really like the crunch of the sesame seeds, which extra a distinctive taste element, but I was definitely fond of the flavor that the miso additional. 

And while that component does a large amount of the heavy lifting, but the brown butter, the cinnamon and the shorter cook-time aids these cookies turn into one thing exclusive and entirely distinctive. 

Alas, I present to you: your new favored cookie!

Miso-brown butter chocolate chunk cookies

Components

2 sticks unsalted butter

1 1/4 cup dim brown sugar

1/4 cup granulated sugar

2 significant eggs

3 tablespoons white miso

1 tablespoon vanilla extract or paste

1/4 teaspoon maple extract

1 3/4 cups all-function flour

1 teaspoon baking soda

1/2 teaspoon baking powder

2 teaspoons kosher salt

1 teaspoon floor cinnamon

1/2 cup oats, pulverized, optional

10 ounces chocolate (chips, bars, chunks)

Flaky salt


Instructions

  1. Preheat oven to 350 levels Fahrenheit. Line 2 huge cookie sheets with silpat, parchment or spray with cooking spray.

  2. Over medium-low warmth, brown your butter. Take away from warmth when specially aromatic and bronzed, swirl or stir a number of occasions to incorporate browned bits and permit awesome marginally.

  3. Transfer cooled brown butter to stand mixer or bowl. Combine in sugars and beat very well, about 2-3 minutes, until eventually somewhat lightened and fluffy.

  4. Increase eggs, a single at a time and mix properly. 

  5. Include miso and extracts and blend until just blended.

  6. Include flour, baking soda and powder, salt, cinnamon and oats, if applying. Combine right up until mixed and there are no dry pockets of flour remaining.

  7. Increase chocolate and stir in by hand. 

  8. Part into cookie balls with a compact ice cream scoop. Location on geared up cookie sheet with a excellent inch of so between cookies (they will distribute a bit). Go on until all dough has been portioned.

  9. Transfer to oven and cook for 9-10 minutes or until finally the cookie has unfold, its edges are slightly starting to darken and they are a bit puffy.

  10. Remove from oven, sprinkle with flaky salt, permit interesting 5 minutes, then transfer to wire rack to awesome more.

  11. Try not to melt away your mouth on scorching chocolate when you dive in prior to they are thoroughly cooled. Love!


Cook’s Notes

– I’ve in no way been into the full “enable your cookie dough rest in the fridge for a couple of hours or right away” matter, so I am skipping that entirely (it’s these kinds of a lengthy move for not considerably improve in taste or regularity, at minimum in my check out). 

– If miso isn’t your favourite, try tahini as a substitute. 

-I detest a tricky, around-cooked cookie a slightly undercooked cookie is very virtually normally preferable. On top of that, the cookie will deflate a bit as it cools and cook dinner a little much more (in particular if you happen to be allowing it rest on the continue to-scorching cookie sheet), so I usually err on the facet of undercooking a little bit

-I really like heaps of vanilla extract or paste some recipes call for these kinds of a teeny tiny sum and I think that that is foolish

-I like the depth and flavor that brown butter adds, which in this case, pairs perfectly with the umami notes of the miso. I haven’t manufactured a cookie with un-browned butter in a long time, but it is really certainly an optional action! Sense to skip if you want to get all those cookies in the oven just a bit sooner. 

-I am a brown sugar dude, by means of and by way of. I enjoy veering to a ratio of substantially far more brown sugar than white sugar in my recipes. Mild or dim equally function.

– I am a silpat person, but parchment also often operates. If you’re foregoing and just inserting straight on the cookie sheet, just be mindful that it may possibly be a bit difficult tor get rid of following cooking. Cooking spray doesn’t harm, either.

– A small ice cream scoop (with a release lever) is so useful for all issues cookie dough.

– I use a stand mixer before mixing in the chocolate by hand, but this complete system could quickly be accomplished manually.

– I prefer chocolate chunks or bars about chips, any day of the 7 days. I also like hand-chopped baking chocolate. I’ve also designed the error of including an enormous total of chocolate to cookies in the earlier, which isn’t going to ever do the job out that wonderful. I like a cookie with lots of “cookie” and not all chocolate. I favor semisweet, but I’m not versus any certain type. Use whatever you like most effective (or whatever you have on hand).

-I like to toss in oats often. You can even pulverize them if you do not like the chew, but enjoy the flavor.

Salon Meals writes about stuff we believe you can expect to like. Whilst our editorial crew independently picked these products, Salon has affiliate partnerships, so creating a buy by way of our links may earn us a fee. 

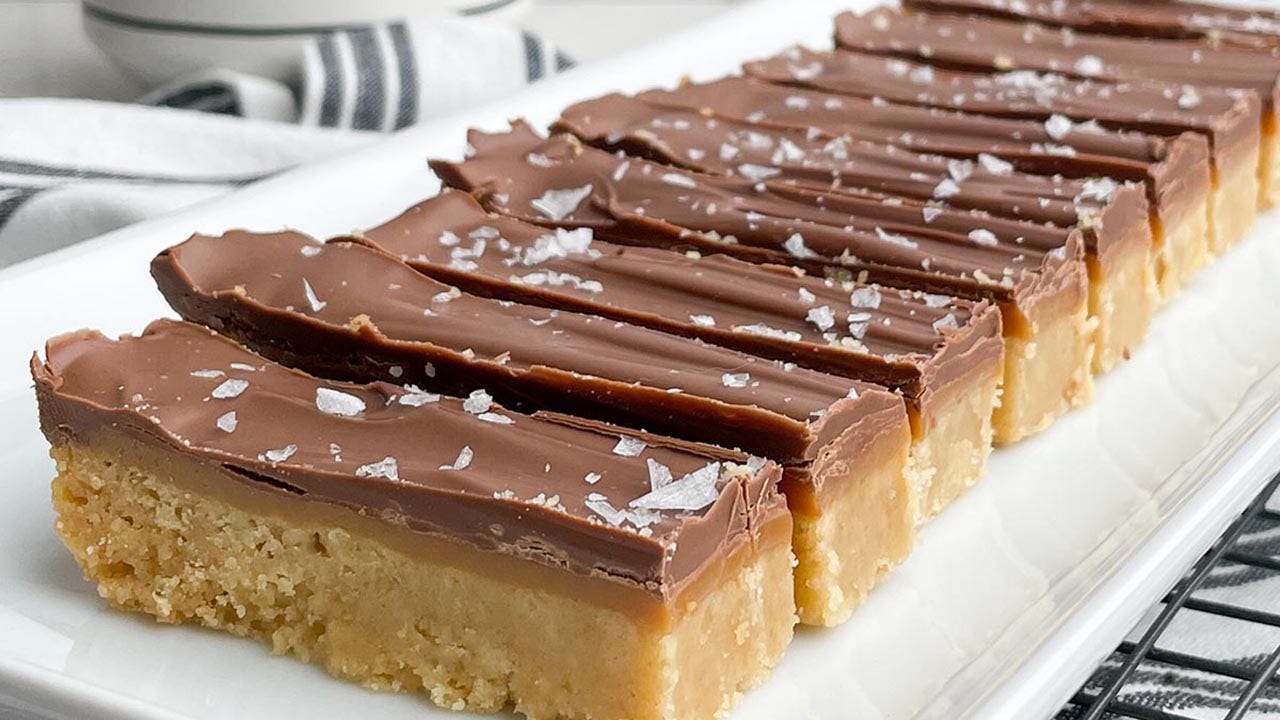
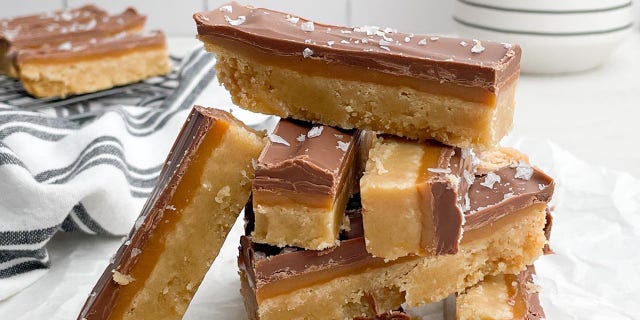
Million dollar bars: An easy dessert recipe made with chocolate, caramel and cookies

Million dollar bars: An easy dessert recipe made with chocolate, caramel and cookies

Acquired a hankering for some thing sweet?

This recipe, which calls for chocolate, caramel and cookies, is explained to be straightforward and tasty.

“These Million Greenback Bars are buttery and decadent — and ridiculously uncomplicated to make. This recipe is filled with shortcuts that make putting them jointly a cinch,” said Cara Lanz of MidwesternHomeLife.com.

PEANUT BUTTER CUP MONKEY BREAD RECIPE GOES VIRAL: ‘FAMILY FAVORITE’

Make these million dollar chocolate bars for your next dessert. 

Make these million dollar chocolate bars for your upcoming dessert. 
(midwesternhomelife.com)

Million Dollar Bars, Midwestern HomeLife

CINNABON CINNAMON ROLL COPYCAT RECIPE WITH TRADER JOE’S Ingredients GOES VIRAL

Will make 16 servings

Prep time: 10 minutes

Cook dinner time: 20 minutes

These bars are an easy dessert which combines chocolate, caramel and cookies into one. 

These bars are an simple dessert which brings together chocolate, caramel and cookies into just one. 
(midwesternhomelife.com )

Components:

WHAT CAN I USE NUTELLA WITH? SOME RECIPES FOR THE CHOCOLATY Deal with

2 ½ cups crushed shortbread cookies

7 tablespoons melted unsalted butter

2 tablespoons white sugar

1 cup caramel bits

2 teaspoons milk or almond milk

1 cup milk chocolate chips

2 teaspoons shortening

Sea salt

Directions:

1. Preheat oven to 350° F.

2. Stir the shortbread crumbs and sugar alongside one another in an 8 x 8 square baking pan. Increase the melted butter and stir to combine.

3. Pat the combination firmly into the pan. Use a spatula, your hand, or the base of a glass to press it into the pan.

4. Bake the crust for 20 minutes to a mild golden brown. Neat the crust in the refrigerator for at least 20 minutes or until it is company.

5. Melt the caramel bits and milk in the microwave in 30-next intervals, stirring in among, right until it is sleek and creamy.

6. Promptly spread the caramel combination evenly over the crust.

7. Great the caramel layer in the fridge for at minimum 20 minutes or in the freezer for 10 minutes, or until it is company.

Click on Listed here TO Sign UP FOR OUR Lifestyle Publication

8. Soften the chocolate chips and shortening in the microwave for 30 seconds, then stir. Proceed to melt in 10-2nd intervals right until it is clean and creamy. Quickly distribute the chocolate evenly in excess of the caramel layer.

9. If wished-for, sprinkle the major with flaky sea salt right after the chocolate has dried for a few of minutes.

10. Area the pan in the fridge to awesome entirely.

11. To minimize Million Greenback Bars neatly, eliminate the pan of bars from the fridge and let it sit out for about 5 minutes. This will enable the chocolate to soften just a bit, so it doesn’t crack when cut.

12. Use a sharp knife to minimize them into squares or rectangles.

Click on Right here TO GET THE FOX News App

This authentic recipe is owned by midwesternhomelife.com and was shared with Fox News Digital.

Cookies! Baking Tips, Tricks, and Recipes

Cookies! Baking Tips, Tricks, and Recipes
Sparkling Snowflake Cutout Cookies

PHOTOGRAPHY TERRY BRENNAN, FOOD STYLING LARA MIKLASEVICS

‘Tis the season for baking. Making your own holiday cookies can be rewarding and they are always welcome at get-togethers throughout the season, whether you’re hosting or arriving with a delicious plate of treats in hand. Plus, they make great homemade gifts. I have gathered tips and recipes from pros that I have highlighted so you can create with confidence not only this holiday season, but anytime the baking urge strikes throughout the year.

The following classic sugar cookie recipe by cookbook author Georgeanne Brennan will not only make beautiful snowflakes or other wintry shapes now, but you can also make treats for any occasion when you cut the cookies into a variety of other shapes. Twin Cities chef and Saint Paul College Culinary Arts instructor Jason Ross’ tips will help you turn out the cookies you are looking for. And everyone’s favorite chocolate chip cookie can be made soft and chewy or crisp if you have pastry chef and author of “The Baking Answer Book,” Lauren Chatmann’s tips and recipes on hand. Plus, elevate bars with more tricks from Chatmann below.

Cookie Do’s from Chef Jason Ross

Scrape the Bowl to Get Fully Mixed Dough: Do it after adding eggs, adding dry to wet, or wet to dry ingredients. Mixer attachments don’t quite reach the bottom and sides of the bowl, so parts are left unmixed. Use a rubber spatula to stir the unmixed parts back into the dough—and scrape the paddle attachment.

Chill Dough: It makes the batter easier to handle and gives the flour enough time to fully absorb liquid ingredients and make more cohesive dough. For the chocolate chunk cookie recipe here—and any soft cookie—bake from frozen. This will make a tender, crisp cookie that stays chewy. Keep cookie dough balls ready in the freezer during the holidays in case of a “cookie emergency.”

Finish with Salt: Just a few grains sprinkled on top of cookies will hit the palate first, bringing out a surprise flavor. Don’t use enough so you can see it—like a pretzel—rather just enough for a little salt secret.

Cool Cookies on a Rack: Cookies will continue to cook on a hot pan. Unless they are too soft or fragile to handle, lift them off the pans with a metal spatula and cool on a wire rack.

Color Cues: Pay attention to brown color, especially around the edges, and lighter color in the center. This helps determine a perfectly baked cookie. Since cookies are small, a little more or less time makes a big difference. If a few cookies on a tray are done, pull them off to cool and finish cooking the rest of the tray.

Rotate Pans Halfway Through Cooking: All ovens have hot and cool spots, so rotate pans to get even cooking across the tray. Be quick—you don’t want the oven to cool down.

Cookie Spread

The way cookies spread and thin has a big impact on crispness, softness and chewiness.

  • More creaming of butter and sugar will add more air and increase spread; less creaming, less spread and chewier cookies.
  • Lower temperature, even just a few degrees, slows cooking and gives dough more time to spread. Higher temperature will make thicker cookies since it firms up more quickly.
  • More sugar—especially syrupy sugars like honey, molasses or corn syrup—will spread more easily and make softer cookies.
  • Overmixing flour decreases spread and makes doughy cookies.

Must-Have Tools

Scoop: Use a portion control scoop instead of a spoon to avoid messy fingers and quickly and easily scoop balls the same size. Cookies will bake more evenly. Use it for ice cream too!

Digital Scale: It helps especially for measuring flour—the weight difference between cups of flour can be surprising. If you don’t have a scale, avoid compressing flour into the measuring cup; instead spoon it into the cup and level off with the straight edge of a butter knife.

Parchment Paper and Silicon Mats: These both work well and have an impact on cooking besides ease in cleanup: Cookies will spread more on a silicon mat and stay tighter on parchment. Parchment browns cookies a little more nicely, while silicon will yield slightly less crisp cookies. If I had to choose one, it would be parchment, but both have their place depending on the cookie you are baking. If using aluminum pans without either of these, try a little oil spray and possibly dust with flour if you have had trouble with cookies sticking.

More tips from Ross and use your skills with his Chocolate Chunk Cookies recipe here.

Cookie and Bar Tips and Tricks from Lauren Chattman

Tips and Tricks: Soft and Cakey Chocolate Chip Cookies
• Cream butter and sugar together. This will whip some air into the dough, so your cookies will puff up a bit in the oven.
• 1/4 teaspoon of baking powder along with the soda will provide more lift.
• Subtract an egg yolk and use an extra egg white. Egg whites contain more water than yolks which when evaporated in the oven helps cookies rise like little cakes.
• Use twice as much brown sugar as white sugar. Brown sugar, which is slightly acidic, will react with the baking soda in the recipe for a higher rise.
• Add a little extra flour—enough to add structure, but not so much that it will dilute the sweetness of the sugar.
• Chill the dough. Cold dough will spread less in the oven, creating a cakey center.
• Turn up the heat. If a recipe calls for 350°F, increase to 375°F. A hotter oven will allow the cookies to bake before spreading, resulting in cakey centers.

Tips and Tricks: Crisp and Chewy Chocolate Chip Cookies
• Use melted, not softened butter for a dense and chewy texture.
• Subtract an egg white and add an extra egg yolk. Yolks have more fat than whites, which give cookies a fudgy rather than cakey texture.
• Use twice as much white sugar as brown. White sugar, which is neutral rather than acidic like brown sugar, will cause your cookies to spread rather than rise. It will also give your cookies a nice crispness around the edges.
• Turn down the heat. A cooler oven will let the cookies spread without drying out.
• Do not overbake. Cookies will continue to firm up and dry out as they cool off, so pull them out of the oven while they still look a little damp on top.

Find more tips from Chattman and recipes for soft and cakey and crisp and chewy chocolate chip cookies here.

Plus: Elements of science combine to create your perfect treat in her Cakey or Fudgy Brownies Recipes

Sparkling Snowflake Cutout Cookies and Icing

PHOTOGRAPHY TERRY BRENNAN, FOOD STYLING LARA MIKLASEVICS

Sparkling Snowflake Cutout Cookies

Makes 2 to 3 dozen cookies

I like to make snowflake cutouts in different shapes and sizes, then ice some with white frosting and some with blue, and decorate with sparkling white and blue sprinkles. For a variation, use holly-leaf cookie cutters and green food coloring with red hot candies for berries. Like all iced, cutout cookies, these are best eaten within 1 week. —Georgeanne Brennan

For the Cookies
1¾ cups all-purpose flour
½ teaspoon baking powder
¼ teaspoon salt
²⁄³ cup unsalted butter, at room temperature
½ cup sugar
1 large egg
1 teaspoon pure vanilla extract

For the Icing
2 egg whites
4 cups powdered sugar, or more as needed
Blue food coloring or blue gel

  1. For the cookies: Heat oven to 400°F. Line a baking sheet with parchment paper.
  2. In a bowl, whisk together flour, baking powder, and salt. In a separate bowl, beat together butter and sugar until light and fluffy. Beat in egg and vanilla. Add flour mixture in three batches, mixing each time until a smooth, not sticky, ball can be formed. Divide into two balls, wrap in plastic wrap, and refrigerate 15 to 20 minutes.
  3. Flour a rolling pin and lightly flour a working surface. Roll a ball out to a generous ¹⁄8 inch thickness. Using snowflake cookie cutters, cut out several shapes and sizes. Using a metal spatula, transfer to baking sheet, spacing cookies at least ½ inch apart (they will expand as they bake). Shape remaining dough scraps into a firm ball and repeat. Repeat with second dough ball.
  4. Bake 6 to 8 minutes, until delicately browned on bottom and pale golden on top. Remove from oven and let cool on sheet at least 5 minutes. Using a metal spatula, gently loosen cookies and transfer to a flat surface to cool slightly before icing. (If cookies are warm, icing will spread more easily. However, icing when cookies are fully cooled is fine.)
  5. For the icing: In a large bowl, using an electric mixer, beat together egg whites and sugar 5 minutes, until stiff enough to spread. If too stiff, add 1 teaspoon water and beat. If too thin, continue beating and add up to ½ cup powdered sugar.
  6. Divide icing into 2 bowls. To 1 bowl, add 2 drops blue food coloring and mix well with a spoon.
  7. Using a knife or stiff spatula, gently spread icing on cookies. Add sprinkles immediately. Set aside on a flat surface to cool completely.
  8. Arrange cookies in a single layer on a platter and cover loosely with wax or parchment paper. They will keep up to 3 days at room temperature. To store in an airtight container up to 1 week, line container with wax or parchment paper. Place cookies in single layer. Top with a layer of wax or parchment paper and repeat.

A Sweet Gift: Choose a special teacup and saucer set and package it with a bag of cookies and a favorite tea to create a gift for a perfect pause, a quiet minute.

Nutrition info (per serving) Sparkling Snowflake Cutout Cookies: Calories 142 (38 From Fat); Fat 4g (Sat. 3g); Chol 17mg; Sodium 35mg; Carb 25g; Fiber 0g; Protein 1g

More Cookie Recipes

Stenciled Gingerbread Cookies Recipe

Enjoy the seasonal taste of gingerbread in grown-up style—and you don’t need to worry about whether to start with a bite of a little gingerbread fella’s feet or head. (If you want to bake ahead, these cookies can be stored carefully in an airtight container for about two weeks.)

Cranberry Macadamia Nut Cookies Recipe

Keep old cookie friends but make new ones this holiday baking season

Toffee Squares with Pretzel Topping and Hazelnut and Honey Diamonds

PHOTOGRAPHY TERRY BRENNAN, FOOD STYLING LARA MIKLASEVICS

Bars and Brownies

You may think of bar cookies as basic party fare, but if you elevate them by using delicious ingredients and attractive decorations, they make a perfect addition to holiday dessert choices. While they are easy to make, there are some guidelines that Chattman suggests for good results plus recipes.

Raise the (Dessert) Bar

Easy yet delicious and decorative, bar cookies elevate options for serving and gifting, including Toffee Squares with Pretzel Topping and Hazelnut and Honey Diamonds recipes.

Patchwork Bars

PHOTOGRAPHY TERRY BRENNAN, FOOD STYLING LARA MIKLASEVICS

Patchwork Bars Recipe Plus Top Tips for Baking Bars

Elevate easy-to-make bar cookies with festive toppings for any get-together or homemade gift this holiday season

Hungry for More?

Dark Chocolate Sea Salt Brownies Recipe
These intensely chocolate, not-too-sweet brownie bites by cookbook author Georgeanne Brennan are a tasty marriage of chocolate and a hint of savory.

Brown Butter Blondies Recipe

Celebrate with this twist from Twin Cities baker Sarah Kieffer