A one-bowl almond cake recipe that’s nutty and not too sweet

A one-bowl almond cake recipe that’s nutty and not too sweet

Almond Cake

Active time:15 mins

Total time:1 hour 10 mins

Servings:10 to 12 (makes one 9- or 10-inch cake)

Active time:15 mins

Total time:1 hour 10 mins

Servings:10 to 12 (makes one 9- or 10-inch cake)

This recipe comes from the Eat Voraciously newsletter. Sign up here to get one weeknight dinner recipe, tips for substitutions, techniques and more in your inbox Monday through Thursday.

I rarely mention sweets in this column because it’s primarily about interesting, adaptable and relatively easy dinner-appropriate recipes. But this week we’ve gone off script in honor of my one true love, pastry. To celebrate eating voraciously and as a special treat, I’m sharing one of my favorite cake recipes ever. It’s a one-bowl almond cake that comes together quickly, requires fewer than 10 ingredients and takes less than an hour to bake.

It’s a recipe I learned when I worked in restaurant kitchens in college, and I have since adapted it to be buttery and nutty but not too sweet. I make it often, for fancy dinner parties or weekend snacking, birthdays or brunches. I was reminded of it earlier this year when I tasted a similar cake at the Duck and the Peach in D.C.’s Capitol Hill neighborhood. That night, my friend and I went all in on pastry chef Rochelle Cooper’s desserts.

This is a longtime habit of mine. Whenever I go out to dinner, there’s a good chance I’ll ask my dining companion to linger a little longer at the table with me so I can order the entire dessert menu. Sometimes I’ll do it when I’m dining alone, but it’s more fun to share. I love the drama of it, the glee, the way the server at first thinks I’m joking, the way a procession of plated desserts through a dining room causes other diners to turn their heads, the way the table looks when it’s covered in cakes, tarts, custards and all sorts of sweet pastry.

This habit started in high school, continued through college and then cemented itself in my life when I went to pastry school and began working as a pastry chef in New York. My first pastry assistant job was at a Midtown restaurant that was known for its desserts. The chef and owner paid close attention to the pastry department. He (rightly!) believed that last impressions were important. When a table of his friends or investors or some other Very Important People came in to dine, he’d make sure they finished their meal with what he called a “Dessert Storm” — he would tell the server to order all of the desserts on the menu for that table and then, as the pastry department scrambled to plate everything, he’d flicker the lights in the kitchen on and off, mimicking a thunderstorm’s lightning.

On an adrenaline high, I loved the rush of sending out so much dessert, loved peeking into the dining room to see the diners murmur and gush with delight as the plates landed on the table, loved watching their lips curl into smiles as they took a bite.

At the next restaurant I worked at, the chef didn’t pay as much attention to dessert. He didn’t ask to taste our latest experiments or order rounds of dessert for his favorite tables. The servers preferred to sell cocktails and wine; dessert was an afterthought. What bummed me out the most was when I would be standing in front of my station, ready to plate dessert for the last few tables around midnight or 1 a.m., and a server would come into the kitchen to say the diners were too full for dessert. Crushed, I’d (often) have to toss all of my prep — the unbaked souffles, the freshly made pastry shells, the delicate cakes and cookies, the sauces, the ice cream and sorbet.

That’s when I realized that ordering the whole dessert menu wasn’t just fun for me and my friends. It was also a way to support pastry chefs, their creativity and their labor. So, when you’re out to dinner, especially if it’s a special occasion, if you’re physically and financially able, don’t skip dessert. There’s probably a pastry cook in the back of the kitchen hoping against hope that you’ve saved some room.

And the next time you’re in the mood for cake at home, give this almond cake recipe a try. Everyone I’ve ever made it for has loved it. Unlike a lot of almond cakes, it doesn’t sink in the center but stays evenly aloft after it cools. It needs no frosting, though you could turn it into a layer cake with vanilla buttercream and strawberry or peach jam filling. Its adaptability and plush density make it easy to love — and ensure it keeps well on your counter for a few days. A dollop of crème fraîche or whipped cream is nice on the side, though it’s not necessary. I love serving it simply with fresh, roasted, macerated or sauteed seasonal fruit.

  • This recipe will work with vegan butter, but I have not tested it with a vegan egg substitute.
  • If you can’t find almond paste >> you can make it.
  • I love this cake with fruit in every season: fresh citrus in the winter, lightly sugared berries in the spring, fresh or roasted stone fruit in the summer, and sauteed apples or pears in the fall.

Want to save this recipe? Click the bookmark icon at the top of this page, then go to Saved Stories in My Post.

Scale this recipe and get a printer-friendly, desktop version here.

  • 16 tablespoons (2 sticks/226 grams) unsalted butter, at room temperature, plus more for greasing the pan
  • 7 ounces (198 grams) almond paste, at room temperature
  • 3/4 cup plus 2 tablespoons (175 grams) granulated sugar
  • 1 teaspoon baking powder
  • 1/2 teaspoon almond extract
  • 1/4 teaspoon fine salt
  • 6 large eggs, at room temperature
  • 1 1/4 cups (155 grams) all-purpose flour, sifted
  • Powdered sugar, for serving (optional)
  • Fresh or cooked fruit, for serving (optional)

Position a rack in the middle of the oven and preheat to 325 degrees. Lightly grease a 9- or 10-inch cake pan, line the bottom with parchment and lightly grease the parchment.

In a stand mixer fitted with the paddle attachment, or using a large bowl and a handheld mixer, beat the butter, almond paste, sugar, baking powder, almond extract and salt on medium speed until well combined and smooth, about 5 minutes.

Add the eggs one at a time, beating well after each addition. Stop to scrape down the bowl a few times to ensure the batter is well combined. After you’ve added the last egg, scrape down the bowl again and beat the batter on medium speed for about 30 seconds. It will look slightly separated at this point, and that’s normal.

If using a stand mixer, unlock the bowl. Using a silicone spatula, partially fold in the flour. Relock the bowl and mix on low speed just until the batter looks smooth, about 30 seconds.

Transfer the batter to the prepared pan and, using a small offset spatula or butter knife, smooth the top. Bake for 40 to 55 minutes, or until the cake springs back when lightly pressed in the center and the top is deep golden brown. (It will take longer to bake if you use a 9-inch pan and less time in a 10-inch pan.)

Cool in the pan on a wire rack for 30 minutes, then invert the cake onto the rack, remove the parchment paper and turn right side up. Allow to cool about 20 more minutes, or until slightly warm. Serve immediately or at room temperature with powdered sugar and fresh or cooked fruit on top or on the side, if desired.

Per serving (1 slice), based on 12

Calories: 350; Total Fat: 22 g; Saturated Fat: 11 g; Cholesterol: 134 mg; Sodium: 119 mg; Carbohydrates: 33 g; Dietary Fiber: 1 g; Sugar: 21 g; Protein: 6 g.

This analysis is an estimate based on available ingredients and this preparation. It should not substitute for a dietitian’s or nutritionist’s advice.

From staff writer G. Daniela Galarza.

Tested by G. Daniela Galarza; email questions to voraciously@washpost.com.

Scale this recipe and get a printer-friendly, desktop version here.

Browse our Recipe Finder for more than 10,000 Post-tested recipes.

Did you make this recipe? Take a photo and tag us on Instagram with #eatvoraciously.

Catch up on this week’s Eat Voraciously recipes:

Monday: One-Bowl Cheesy Jumbo Muffins With Prosciutto and Chives

Tuesday: Spring Onion and Ham Tart

Wednesday: Sourdough Gruyere Popovers

More recipes from Eat Voraciously

Coffee Talk Episode 2 drink recipe list and how to unlock all special drinks in Hibiscus and Butterfly

Coffee Talk Episode 2 drink recipe list and how to unlock all special drinks in Hibiscus and Butterfly

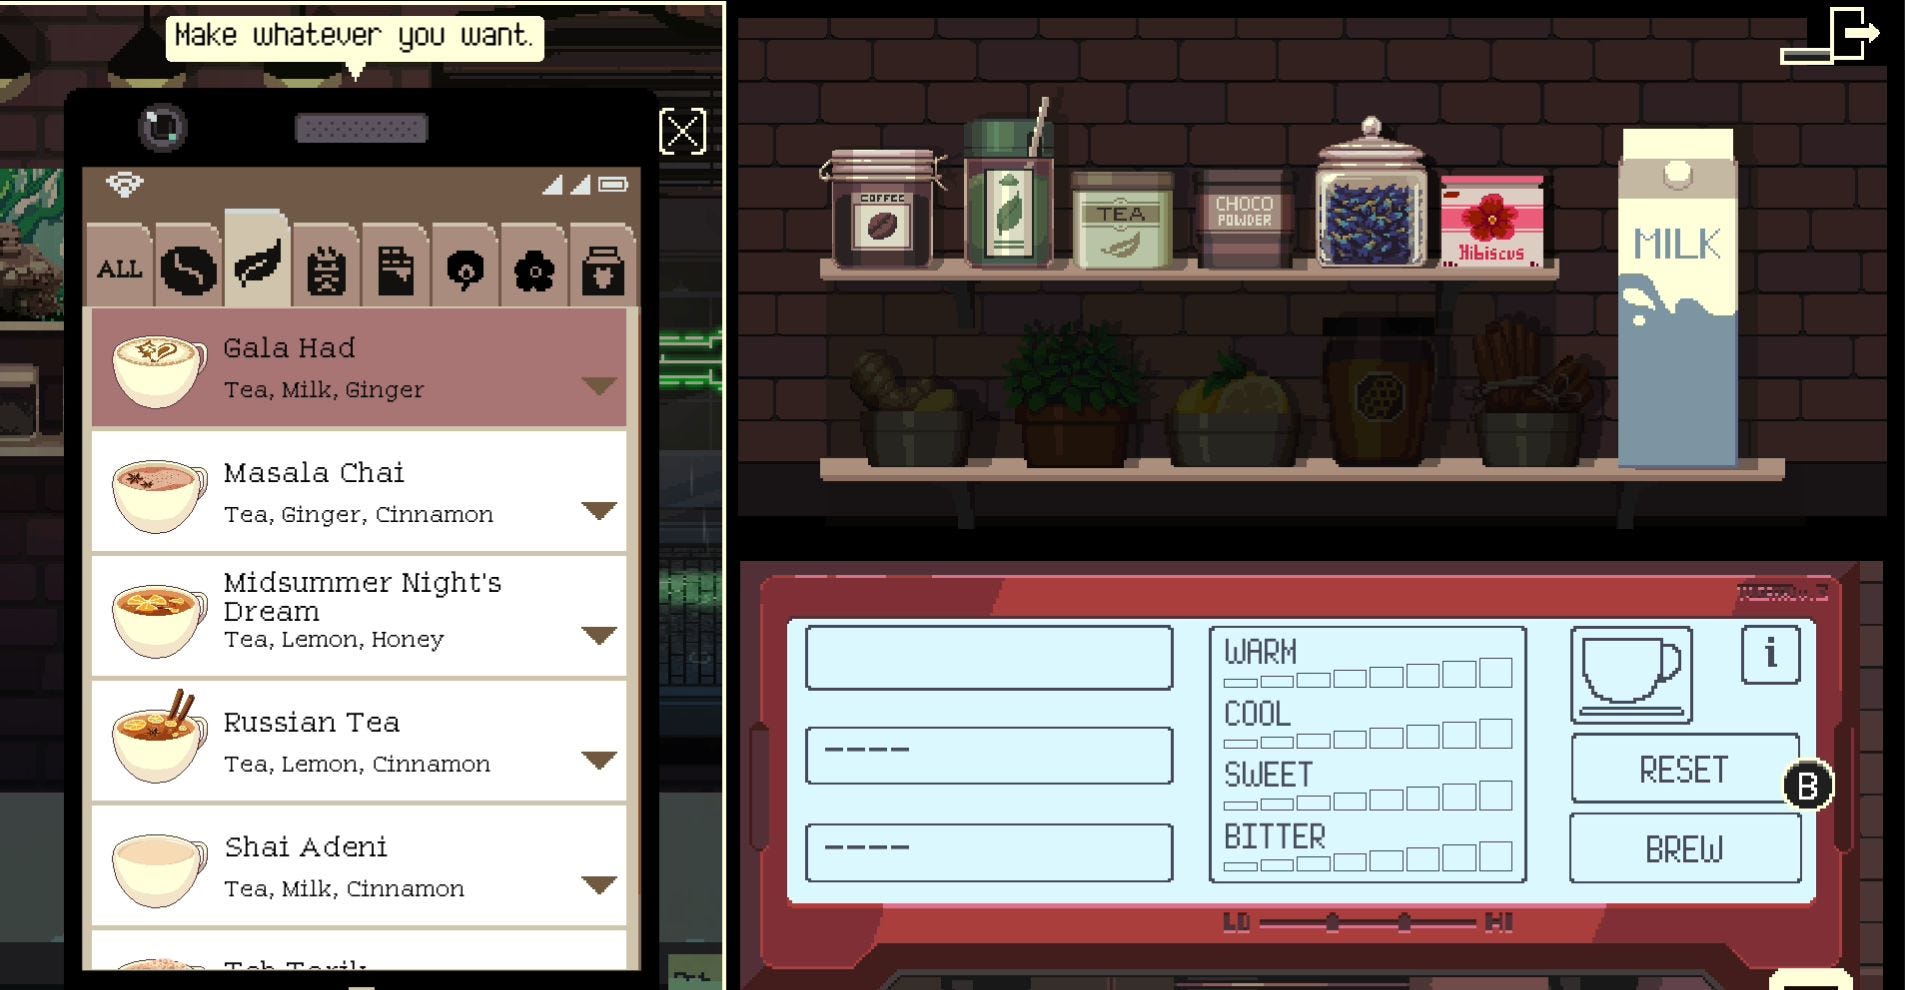
Knowing all of the drink recipes in Coffee Talk Episode 2: Hibiscus and Butterfly will help you complete the game’s storyline, as well as the Brewpad.

These special drinks not only have unique appearances, but can change pivotal plot moments in Coffee Talk Episode 2: Hibiscus and Butterfly.

Below you’ll find all of the drink recipes for the base ingredients, from Coffee to Milk, along with how to unlock all of the special drinks in Coffee Talk Episode 2 Hibiscus and Butterfly.

If you want to know where some of these special drinks appear in the story mode, then check out our Coffee Talk Episode 2 best endings walkthrough.

On this page:

Drink lists:

Coffee Talk Episode 2: Hibiscus & Butterfly – Announcement Trailer – Nintendo Switch

How to unlock all special drinks in Coffee Talk Episode 2 Hibiscus and Butterfly

Special drinks in Coffee Talk Episode 2: Hibiscus and Butterfly refers to the drink recipes recorded in your Brewpad, which require you to put three ingredients in a specific order to make. This means that standard drinks, like Honey Chocolate, do not count as a special drink as they’re not recorded in the Brewpad.


Honey Chocolate is not considered a special drink.

You’ll know when you’ve brewed a special drink, because it will usually have a distinct appearance when compared to the standard drinks and, as mentioned, its recipe will be recorded in the Brewpad.

You also only need to brew a special drink once for it to be recorded and this can be done in the Story mode and both Endless modes – Free Brew and Challenge. So, if you’re missing a special drink from your Story mode playthrough, you can easily unlock it by jumping into Free Brew and making it without affecting the storyline.


Unlocking all of the special drinks in Coffee Talk Episode 2: Hibiscus and Butterfly will unlock the Master Brewer achievement.

Coffee-based drink recipes in Coffee Talk Episode 2 Hibiscus and Butterfly

Below you’ll find every special Coffee-based drink recipe, organised by the order they appear in the Brewpad, in Coffee Talk Episode 2: Hibiscus and Butterfly:

  • Black Lemon – Coffee, Coffee, Lemon
  • Black Magic – Coffee, Mint, Honey
  • Caffé Latte – Coffee, Milk, Milk
  • Cappuccino – Coffee, Coffee, Milk
  • Espresso – Coffee, Coffee, Coffee
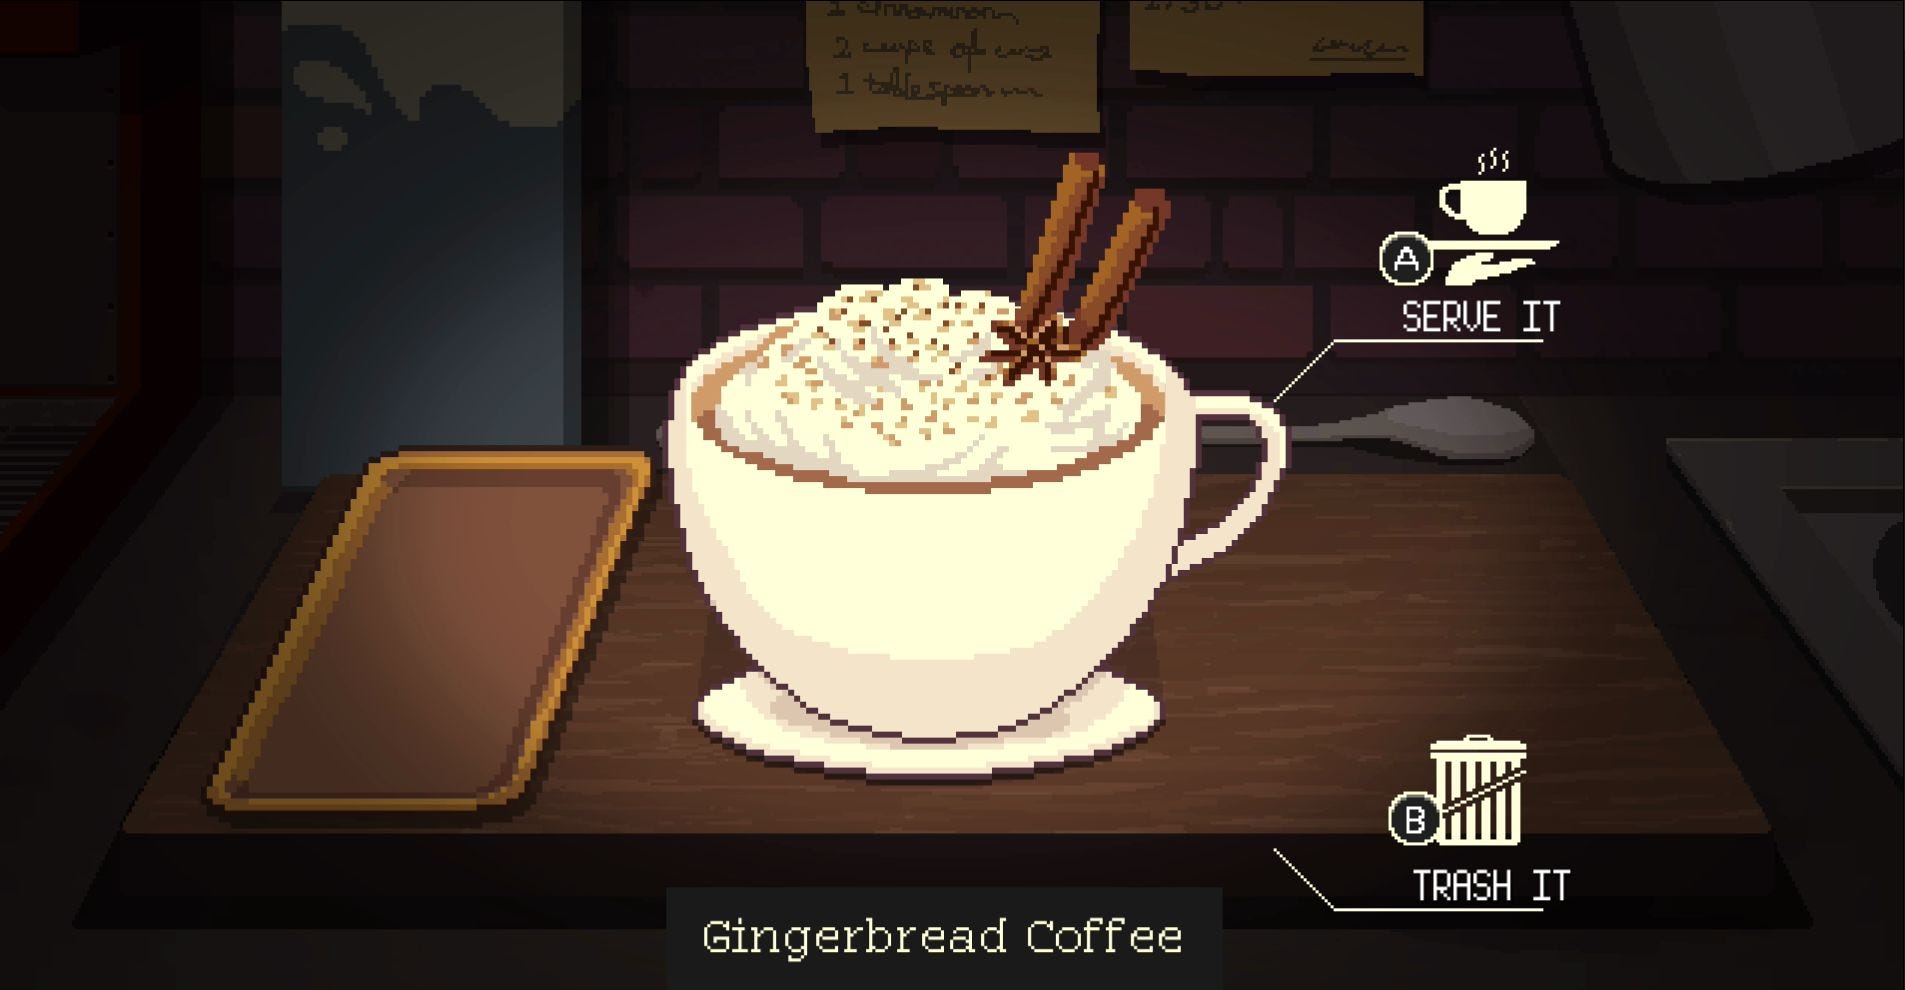
  • Gingerbread Coffee – Coffee, Ginger, Cinnamon
  • Ginger Latte – Coffee, Ginger, Milk
  • Jahe Tubruk – Coffee, Coffee, Ginger
  • Sugar and Spice – Coffee, Honey, Cinnamon
  • Bee’n Buzzy – Coffee, Honey, Milk
  • Cinnamon Latte – Coffee, Milk, Cinnamon
  • Sweet Coffee – Coffee, Coffee, Honey
  • Queimada – Coffee, Honey, Lemon
  • Jingle Bells – Coffee, Coffee, Cinnamon

Tea-based drink recipes in Coffee Talk Episode 2 Hibiscus and Butterfly

Here you’ll find every special Tea-based drink recipe in the order they appear in the Brewpad of Coffee Talk Episode 2: Hibiscus and Butterfly:

  • Gala Had – Tea, Milk, Ginger
  • Masala Chai – Tea, Ginger, Cinnamon
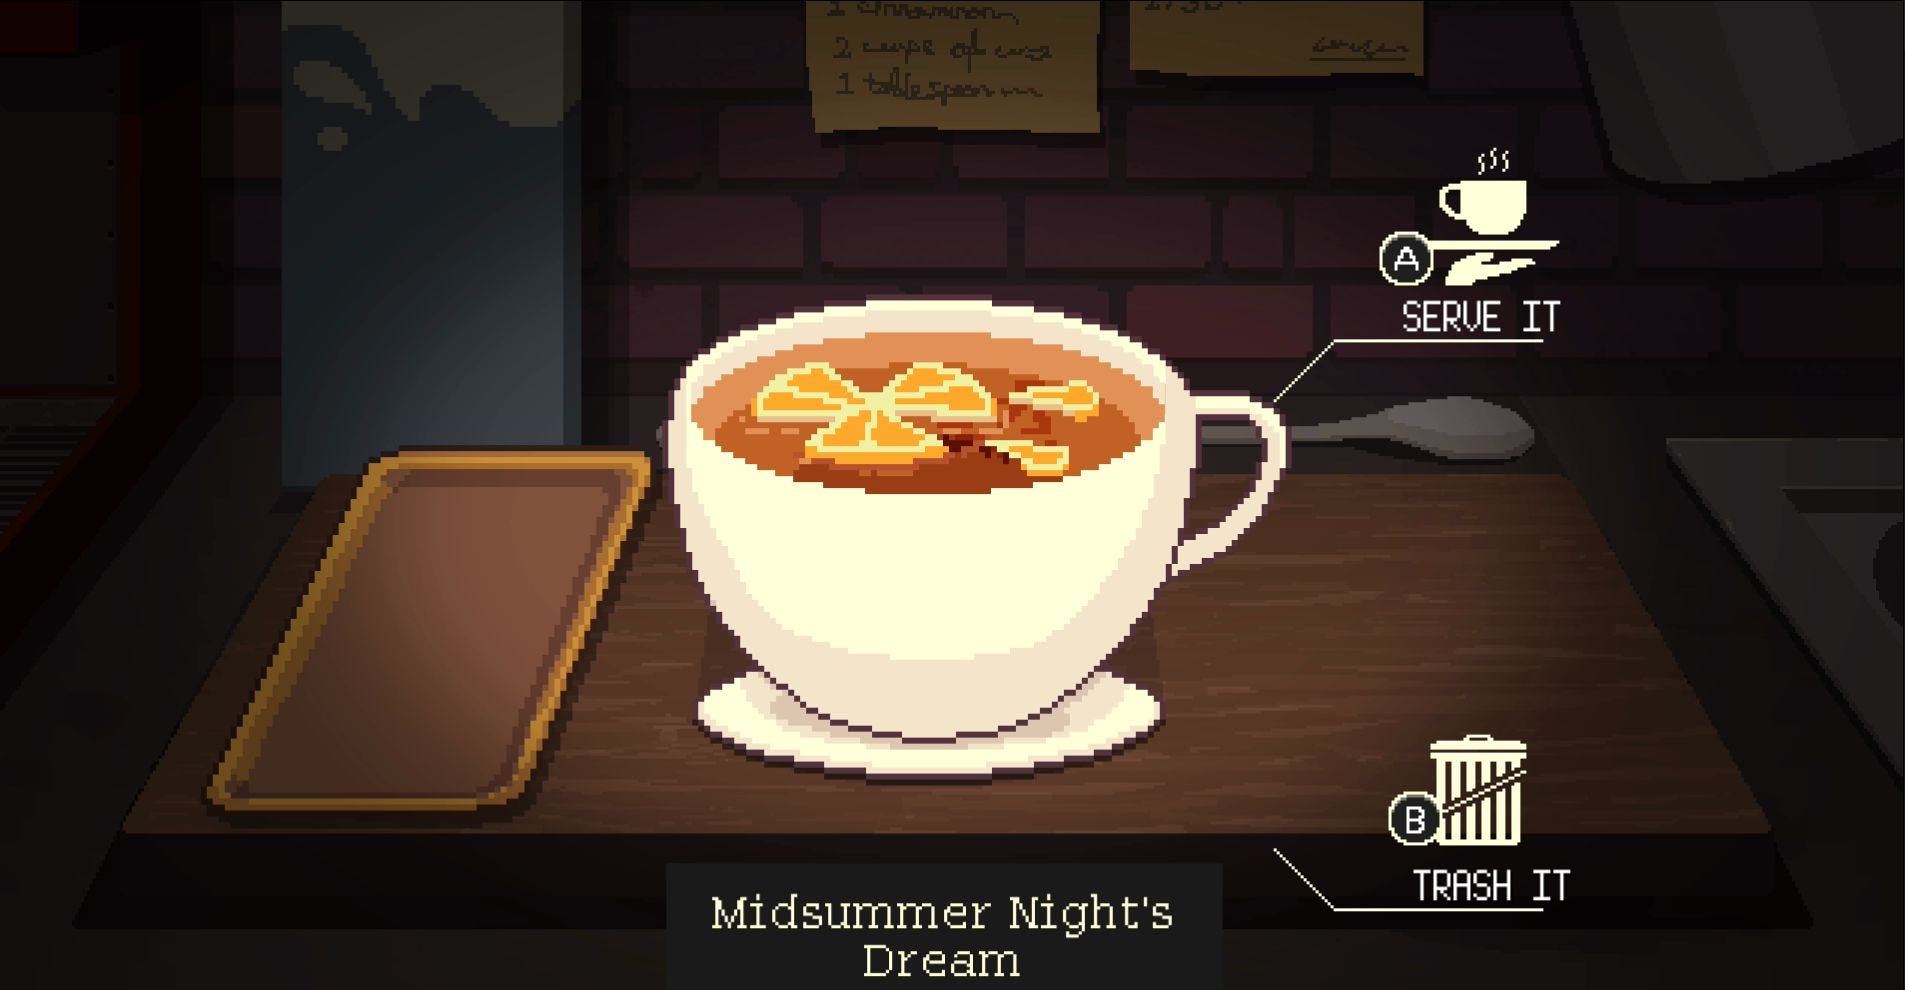
  • Midsummer Night’s Dream – Tea, Lemon, Honey
  • Russian Tea – Tea, Lemon, Cinnamon
  • Shai Adeni – Tea, Milk, Cinnamon
  • Teh Tarik – Tea, Tea, Milk

Green Tea-based drink recipes in Coffee Talk Episode 2 Hibiscus and Butterfly

Here are all of the special Green Tea-based drink recipes, listed in the order they appear in the Brewpad, in Coffee Talk Episode 2: Hibiscus and Butterfly:

  • Cough Syrup – Green Tea, Lemon, Honey
  • Green Tea Latte – Green Tea, Milk, Milk
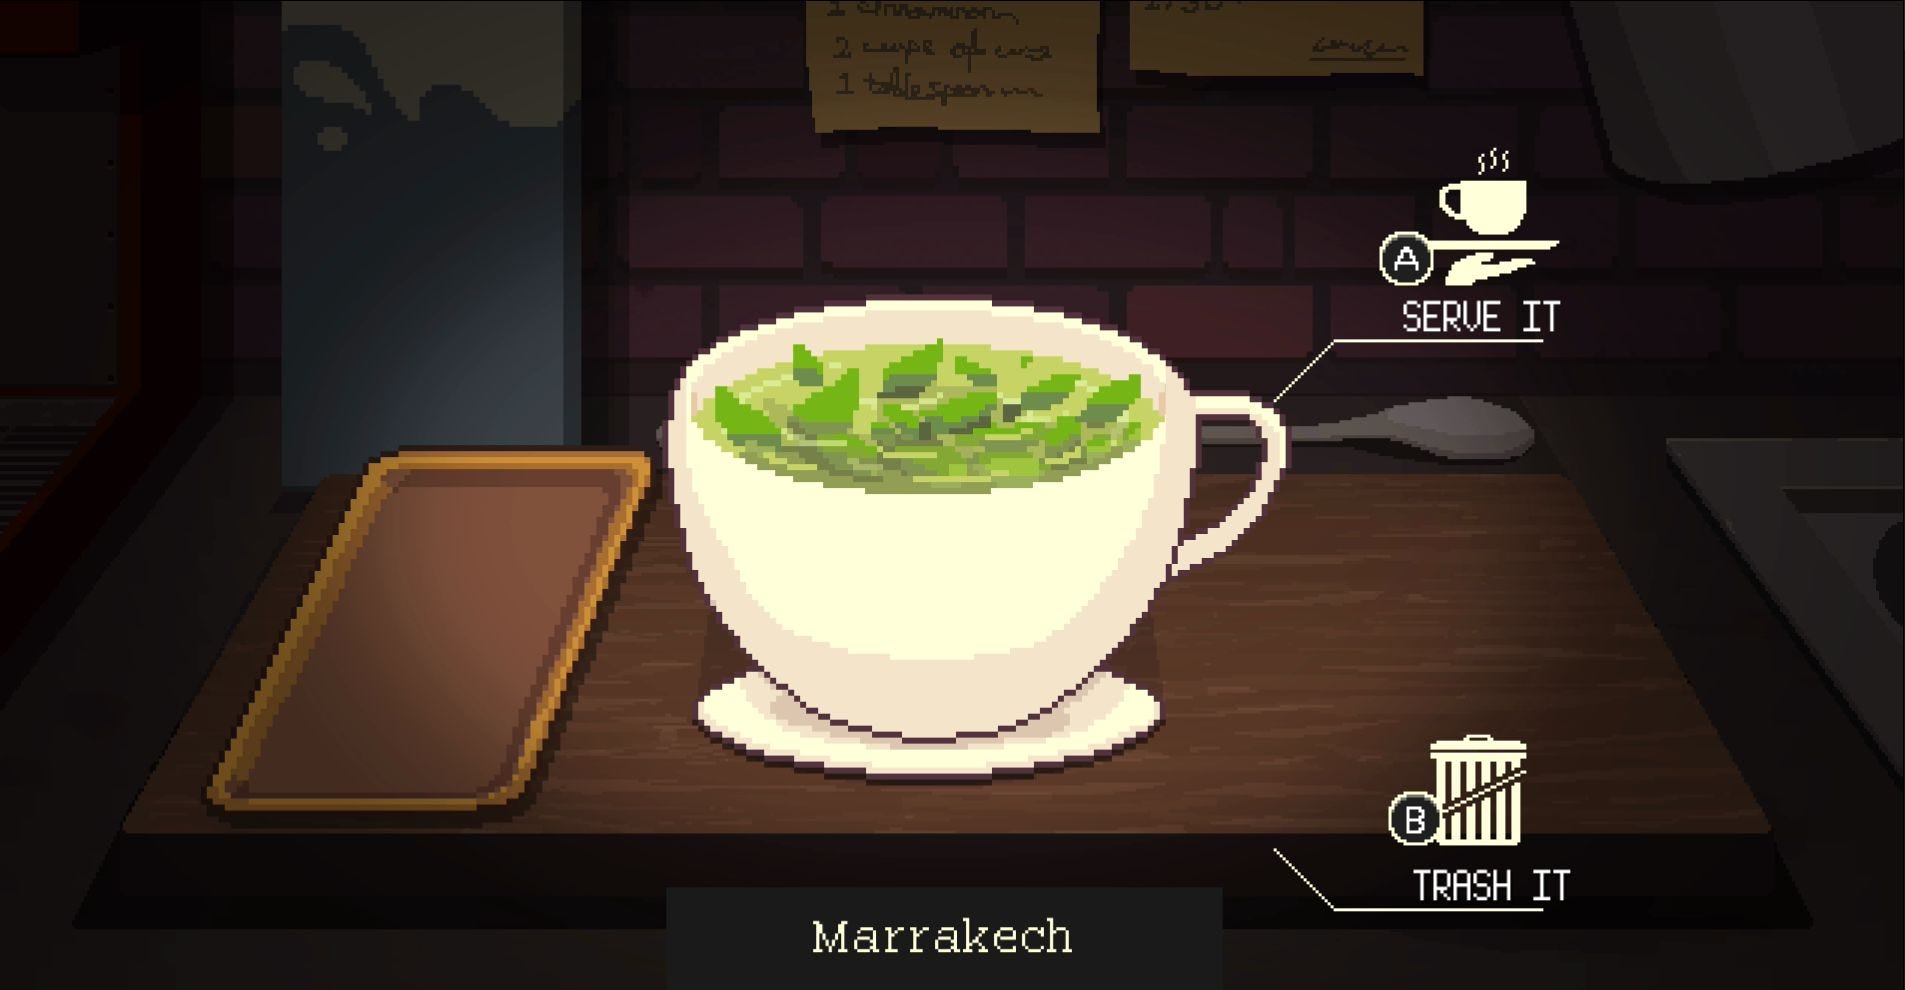
  • Marrakech – Green Tea, Mint, Mint
  • Shin Genmaicha – Green Tea, Green Tea, Ginger
  • The Grinch – Green Tea, Ginger, Cinnamon
  • Matcha – Green Tea, Green Tea, Green Tea
  • “Detox” Tea – Green Tea, Ginger, Lemon
  • “Five Stars!” – Green Tea, Honey, Milk

Chocolate-based drink recipes in Coffee Talk Episode 2 Hibiscus and Butterfly

Below lie all of the special Chocolate-based drink recipes, organised by the order they appear in the Brewpad, in Coffee Talk Episode 2: Hibiscus and Butterfly:

  • Bitter Heart – Chocolate, Ginger, Cinnamon
  • Chocobee Miruku – Chocolate, Honey, Milk
  • Dark Chocolate – Chocolate, Chocolate, Chocolate
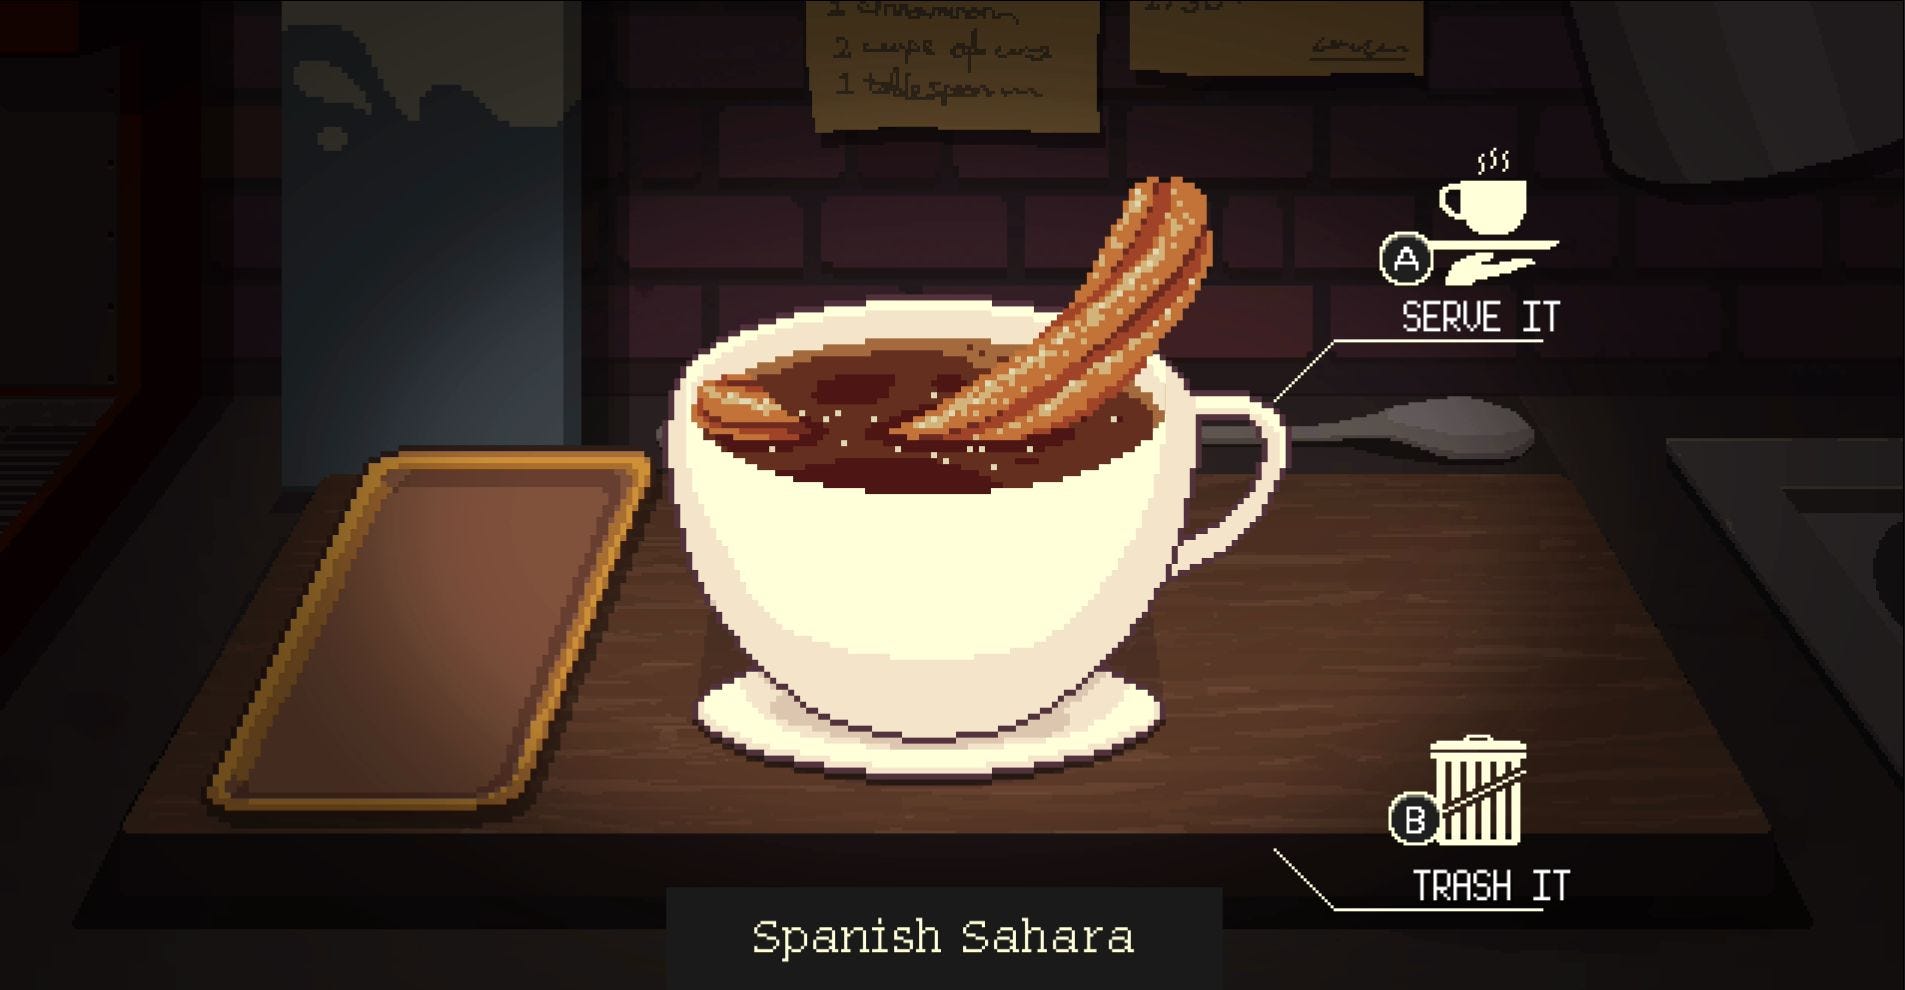
  • Spanish Sahara – Chocolate, Milk, Ginger
  • Spiced Lady – Chocolate, Milk, Cinnamon
  • 299.792.458 – Chocolate, Honey, Ginger
  • After Midnight – Chocolate, Honey, Mint

Blue Pea-based drink recipes in Coffee Talk Episode 2 Hibiscus and Butterfly

Here are all of the special Blue Pea-based drink recipes in the order they’re listed in the Brewpad of Coffee Talk Episode 2: Hibiscus and Butterfly:

  • Butterfly Pea – Blue Pea, Blue Pea, Blue Pea
  • Galaxy Mint-tea – Blue Pea, Mint, Lemon
  • Dreamin’ Blue – Blue Pea, Milk, Honey
  • Aqua’s Tranquilitea – Blue Pea, Mint, Mint
  • Blue Lightning – Blue Pea, Ginger, Ginger
  • Flowerbed – Blue Pea, Honey, Mint
  • Gala Tea – Blue Pea, Milk, Ginger
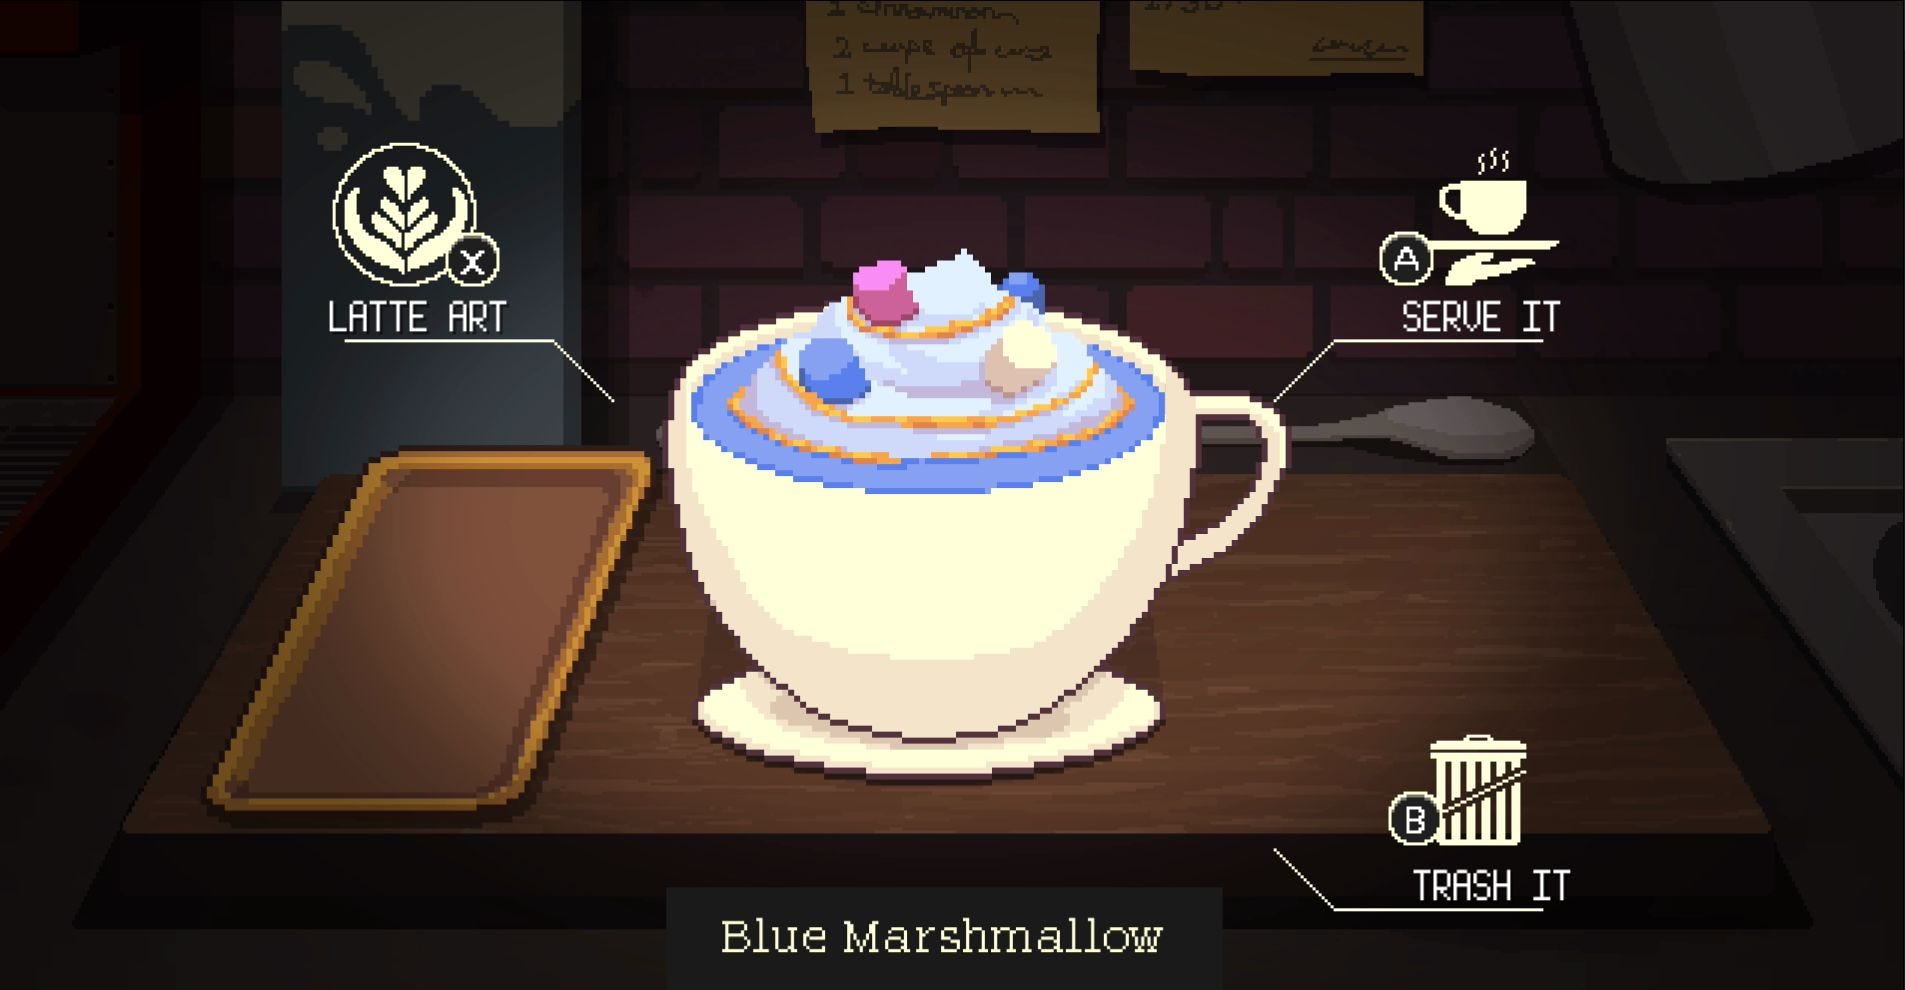
  • Blue Marshmallow – Blue Pea, Honey, Milk

Hibiscus-based drink recipes in Coffee Talk Episode 2 Hibiscus and Butterfly

Below are all of the special Hibiscus-based drink recipes, arranged in the order they appear in the Brewpad, in Coffee Talk Episode 2: Hibiscus and Butterfly:

  • Hibiscus Tea – Hibiscus, Hibiscus, Hibiscus
  • Bissap – Hibiscus, Ginger, Lemon
  • Teh Jahe Rosella – Hibiscus, Ginger, Honey
  • Sweetheart Latte – Hibiscus, Milk, Honey
  • Pink Spice – Hibiscus, Milk, Cinnamon
  • Zobo – Hibiscus, Ginger, Ginger
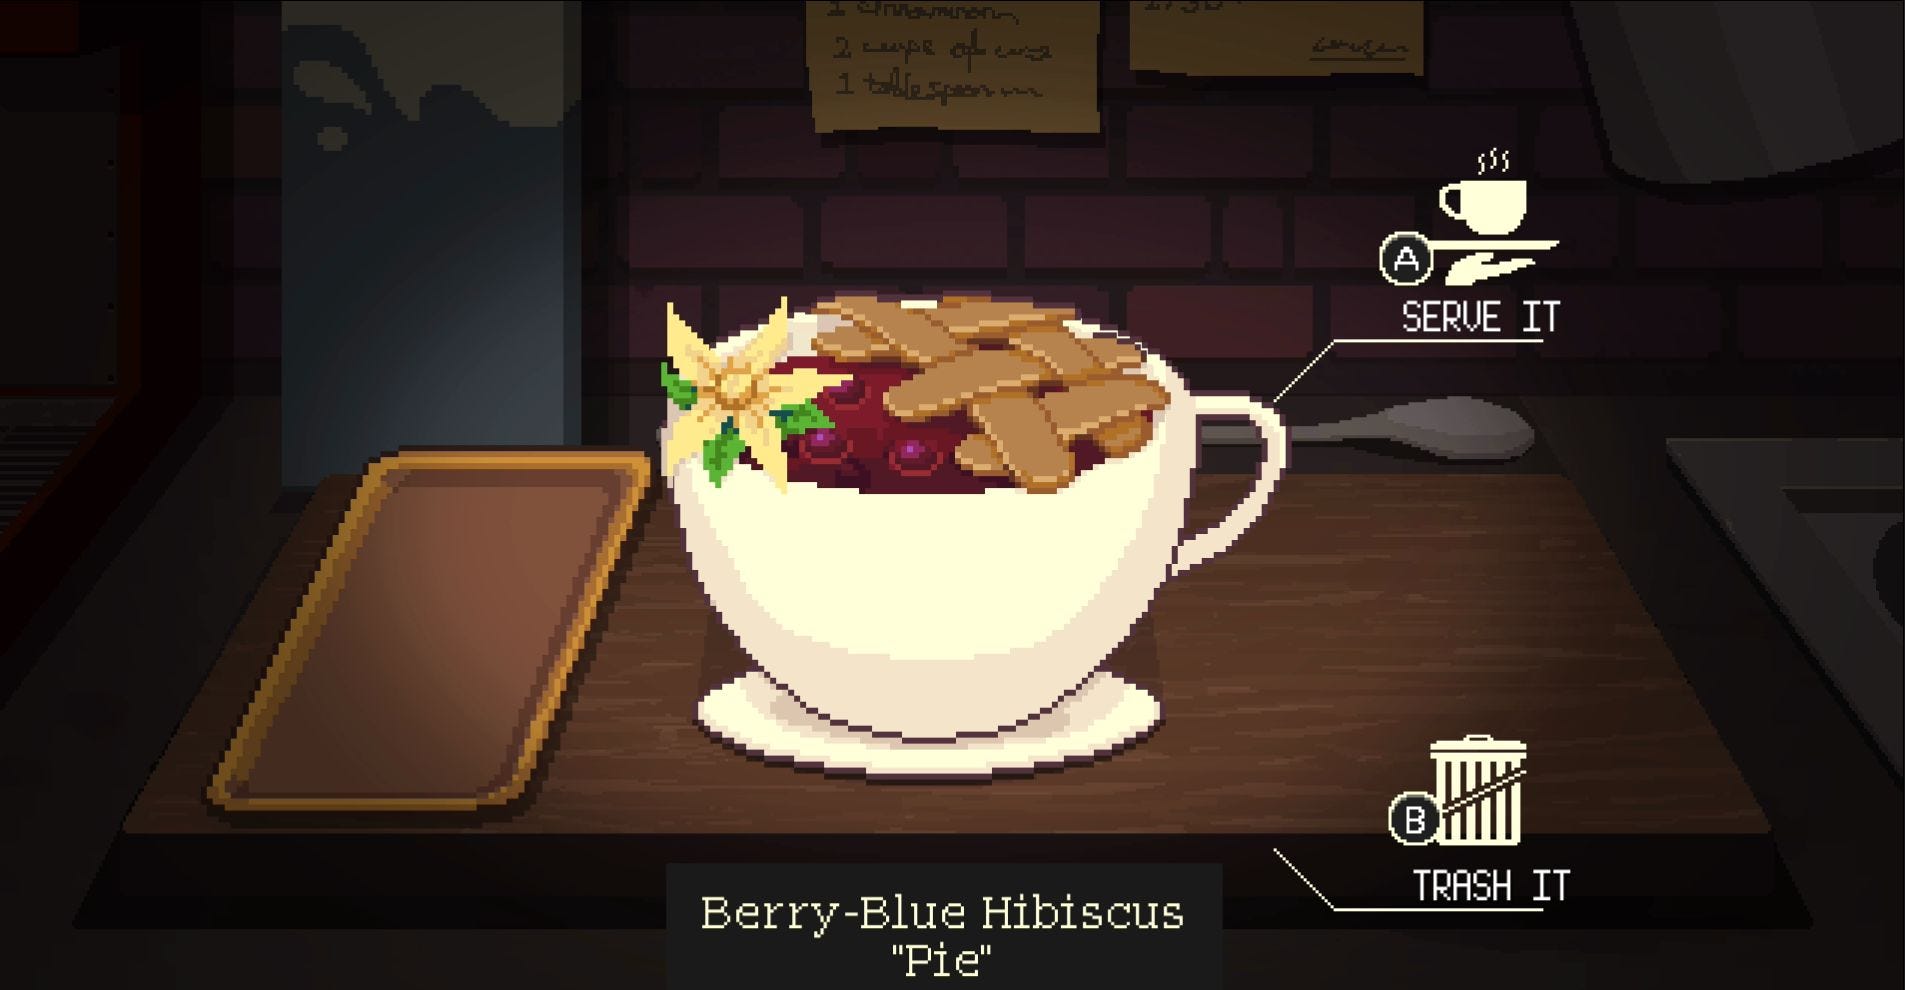
  • Berry-Blue Hibiscus “Pie” – Hibiscus, Honey, Mint

Milk-based drink recipes in Coffee Talk Episode 2 Hibiscus and Butterfly

Here are all of the special Milk-based drink recipes, arranged in their Brewpad order, in Coffee Talk Episode 2: Hibiscus and Butterfly:

  • Bedchamber – Milk, Cinnamon, Honey
  • Le Menthol – Milk, Mint, Lemon
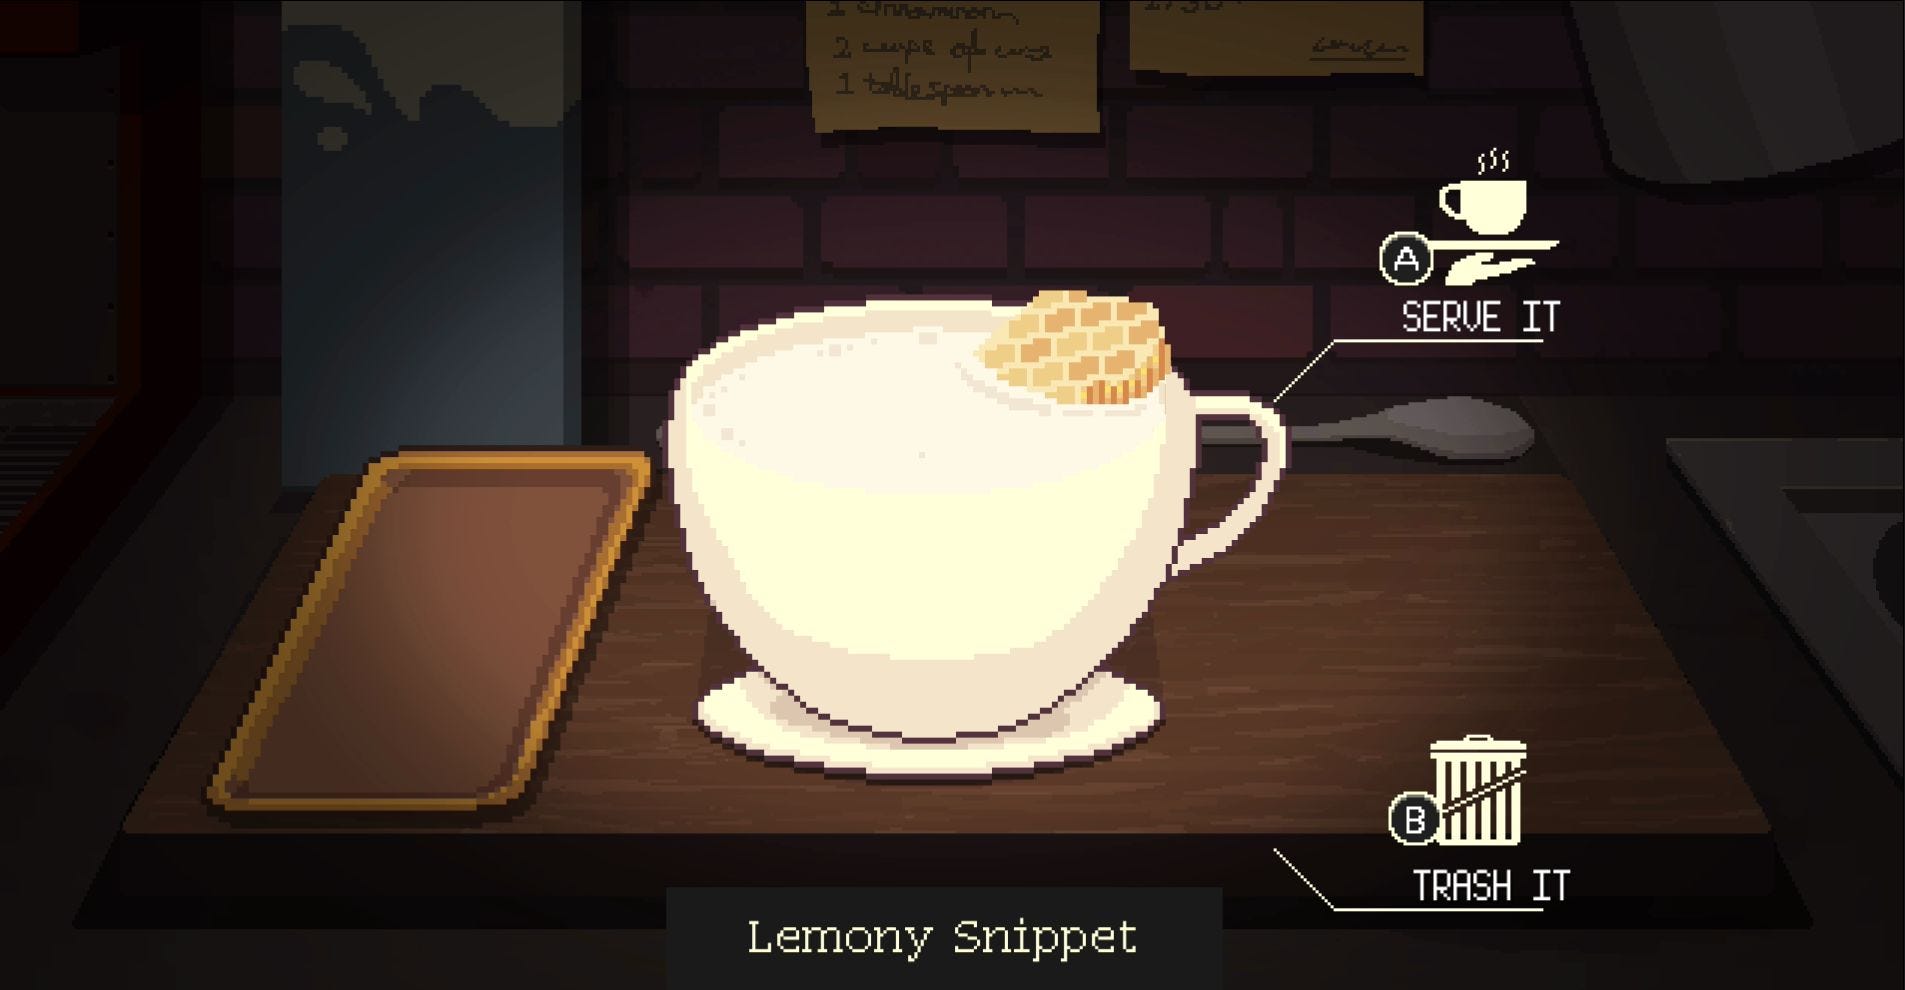
  • Lemony Snippet – Milk, Honey, Lemon
  • Milky Way – Milk, Honey, Mint
  • STMJ – Milk, Ginger, Honey

Good luck unlocking all of the special drinks in Coffee Talk Episode 2: Hibiscus and Butterfly!


Cacio e pepe mac and cheese recipe with a sweet summer granita dessert

Cacio e pepe mac and cheese recipe with a sweet summer granita dessert

Private chef and cooking host Natasha Feldman is adding author to her repertoire.

Feldman joined “Good Morning America” to talk about her new cookbook, “The Dinner Party Project,” and shared two new recipes for cooks at home.

The “Nosh with Tash” creator shared one savory and one sweet treat that will be perfect for summer.

Check out the full recipes below.

Cacio e Pepe Mac and Cheese

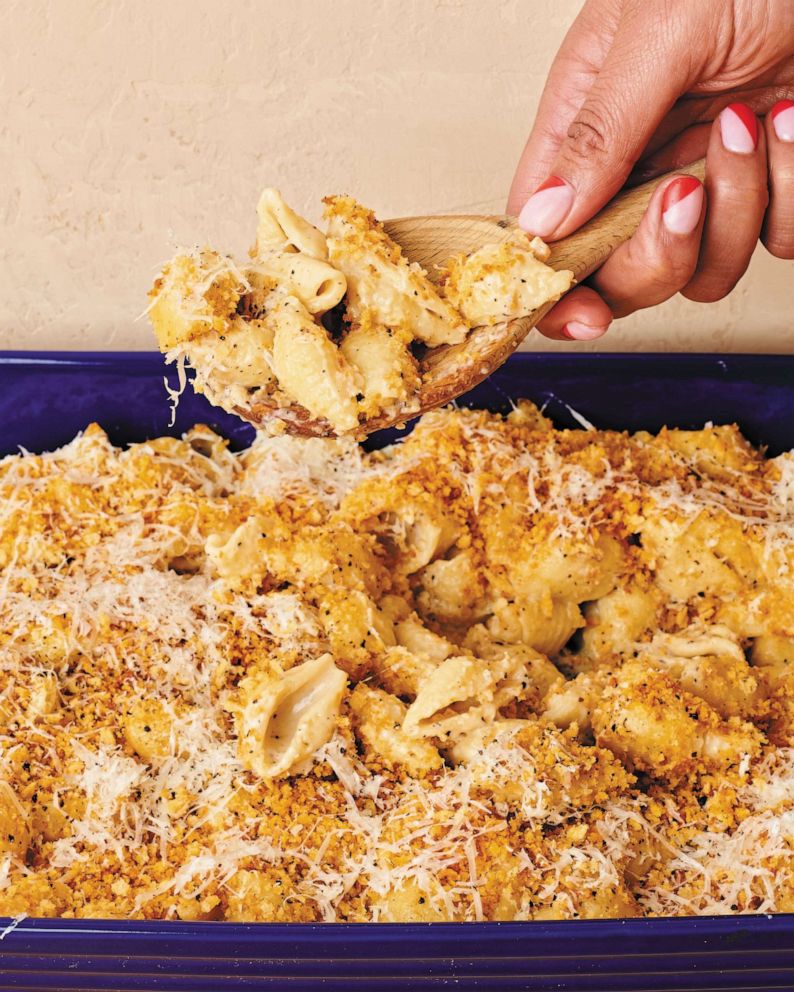
PHOTO: A baking dish of cacio e pepe mac and cheese.

Alana Kysar

A baking dish of cacio e pepe mac and cheese.

“The first time I had cacio e pepe, an Italian pasta dish aptly called ‘cheese and pepper’ because it’s made with only pasta, pecorino, and black pepper, I was skeptical,” she said. “How can so few ingredients be so impressive? Then I believe I blacked out and didn’t return until I had eaten the entire plate of pasta and also the plate. It’s magical to think about how often the best recipes, and the greatest flavors, come from simple, good ingredients. Because mac and cheese is an easy way to make a large quantity of pasta for a crowd, I wanted to bring these two friends together and I’m pretty pleased with the result. This hybrid features a basic white sauce (béchamel) loaded with fresh cracked pepper, lots of pecorino, and toasty bread crumbs to finish!”

1 tablespoon unsalted butter

4 teaspoons salt, divided

1 1/2 tablespoons freshly ground black pepper, plus extra to finish

4 tablespoons (1/2 stick) unsalted butter

4 teaspoons salt, divided

1/4 cup all-purpose flour

1 pound medium-shell pasta

2 cups grated pecorino romano cheese (1/2 pound), plus extra to finish

Preheat oven to 425 degrees.

To make the breadcrumbs: In a large pot over medium heat, melt 1 tablespoon butter. Once melted, add in ¼ teaspoon salt and 1 cup panko bread crumbs. Cook, stirring occasionally, until about half the bread crumbs are toasted a nice golden brown color, about 4 minutes. Set the bread crumbs aside.

To make the mac and cheese: Fill that same pot halfway full with water, add 3 teaspoons salt, and bring to a boil over high heat. While the pasta water is boiling, make the sauce. In a second pot over medium-low heat, add 1 1/2 tablespoons black pepper and stir just until aromatic, about 1 minute. (Yes, the pepper will become super-aromatic really fast. Yes, this is basically DIY pepper spray.) Add in 4 tablespoons butter and heat until melted. Whisk in 1/4 cup flour and 1 teaspoon salt. Slowly, while constantly whisking, add in 3½ cups milk to create a smooth, thin sauce. The sauce will get thicker before it gets thinner; just keep whisking! Crank up the heat to medium and bring the sauce to a boil, stirring occasionally.

This is probably the best time to toss your pasta into the boiling, salty water. Cook the pasta per the instructions on the package. Once the sauce is boiling, reduce the heat to medium-low and cook, whisking occasionally, until it thickens, about 6 minutes. The sauce should be thick enough to easily coat the back of a spoon. Remove the pot from the heat and whisk in 2 cups pecorino.

Once the pasta is cooked, use a slotted spoon to transfer it to the pot containing the sauce. Do not throw away the pasta water. Return the pasta⁄sauce pot to the cooktop and cook over medium-high heat, stirring constantly until all the pasta is well-coated in sauce. Season to taste with additional pasta water. (It’s salty, remember? And starchy, which will help create a sauce that will coat the pasta well. Win-win.)

Pour the mac and cheese into an ungreased 9 x 13-inch baking dish and top with the bread crumbs and a generous sprinkling of black pepper. Bake until the sauce is bubbling and the bread crumbs are a deep golden brown, 15 to 20 minutes.

Finish with some extra pecorino for good measure. Let rest for 5 to 10 minutes before serving—burnt mouths are a dinner-party bummer.

A cheesy pasta dish is always best fresh. In a pinch, you can make the sauce in advance and add pasta water to thin it out just before tossing the pasta in it. The bread crumbs can be made up to a day in advance and stored in an airtight container at room temp.

The less water you use for boiling the pasta, the starchier and more awesome your pasta water will be.

Can you use parmesan if you can’t find pecorino? Yeah, your dish will be less salty and tangy and a little nuttier . . . but still super-tasty.

This has a lot of pepper in it, obviously, so if you have a coffee grinder, that’s the most efficient way to get the quantity needed.

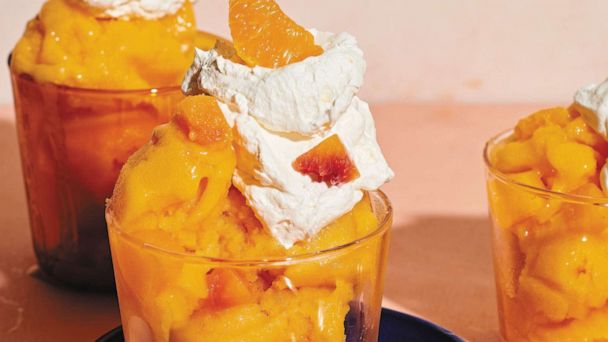
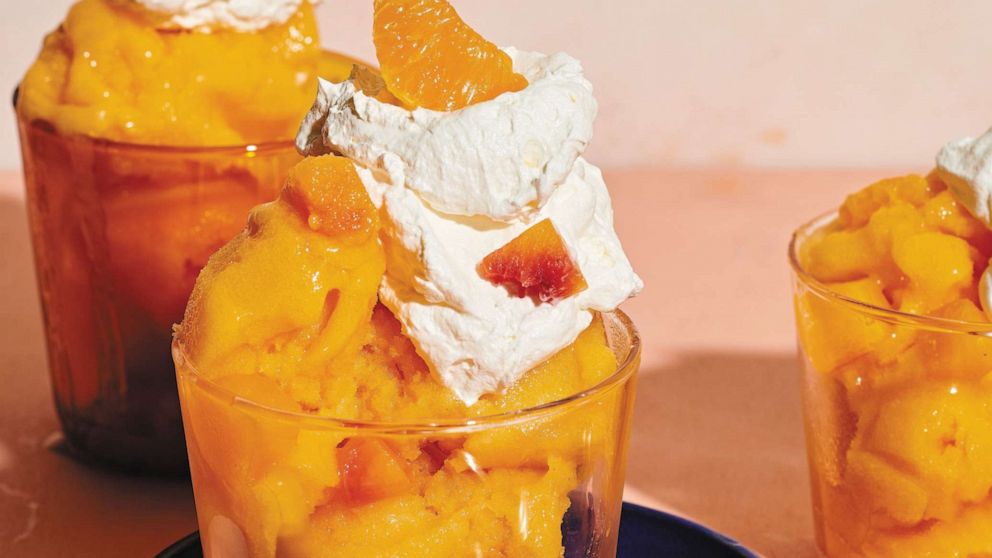
PHOTO: Natasha Feldman's orange dream granita.

Alana Kysar

Natasha Feldman’s orange dream granita.

Serves: 6
Total time: 5 hours ( includes 4¼ hours of mostly hands-off freezing time)

“Granita — an Italian shaved ice — is a miraculous thing,” she said. “It somehow strikes this perfect balance between rich and creamy and refreshing and icy. When I was testing this recipe at first, I made it with just oranges (using Orange Julius as my inspiration). But I found the recipe always remained a smidge too icy and not as exciting as I wanted. I then thought really hard about this nostalgic Orange Julius, Creamsicle flavor profile and I thought, ‘AHA! Peaches!’ and that was when the magic happened. The peaches add subtle sweetness and, more importantly, aid in creating a creamy texture — perfection.”

Ingredients
3/4 cup sugar
3/4 cup fresh orange juice (from 3 to 4 oranges)
1 teaspoon vanilla extract
1/4 teaspoon salt
2 1/4 cups chopped ripe juicy peaches (about 3 peaches)
1 large orange, peeled and seeds removed
1 tablespoon fresh lemon juice

Whipped Topping
1 cup heavy whipping cream
Fruit, like orange or peach slices, optional

To make the granita: Clear room in the freezer for a 9 x 9-inch baking dish. Leave it in there to get cold before using. In a small pot, combine ¾ cup sugar, ¾ cup orange juice, 1 teaspoon vanilla, and ¼ teaspoon salt over medium heat. Stir until the sugar dissolves, about 3 minutes. Set aside. In a blender or food processor, whiz up the peaches and orange with 1 tablespoon lemon juice until smooth, about a minute. Add the sugar mixture from the pot into the blender and blend again.

Pour the granita mixture into the frozen baking dish. Once every hour over the course of about 4 hours (or until the granita is firmly frozen), stir/scrape the mixture with a fork, reaching all the way to the bottom of the dish, to create small shavings.
Optional (but heavenly): Before serving, scoop the granita into a blender or food processor and process it until really smooth and almost tacky, like sorbet. Divide the granita among 6 cups and put the cups in the freezer for 5 to 30 minutes before serving.

To make the whipped topping: Whip the cup of cream to medium peaks using a hand mixer—no sugar needed. Divide the cream evenly over the granita. Top with fruit for flair as desired, and serve.

Tips and Timing
Make the granita up to a week in advance and store in an airtight container in the freezer. Make sure it is fully fluffed before tucking it into bed for the week. Whip the cream up to 4 hours before serving and store in the fridge in a bowl covered with plastic wrap.
If it’s not peach season, use frozen peaches!

Recipe reprinted with permission from “The Dinner Party Project” by Natasha Feldman. Copyright © 2023 by Natasha Feldman. Reprinted by permission of Harvest, an imprint of HarperCollins Publishers.

Classic Raspberry Pie Recipe | The Recipe Critic

Classic Raspberry Pie Recipe | The Recipe Critic

This website may contain affiliate links and advertising so that we can provide recipes to you. Read my privacy policy.

Raspberry pie is a timeless dessert that has been enjoyed for generations, and for good reason. With its flaky, buttery crust and tangy-sweet filling bursting with fresh, juicy raspberries, it’s the perfect balance of flavors and textures. And while store-bought options are convenient, nothing beats making it from scratch!

Love a good homemade pie? You’re in the right place! Here are a few more of my favorite recipes to try: strawberry rhubarb pie, cranberry apple pie, or bourbon pecan pie if you want to switch things up a little bit!

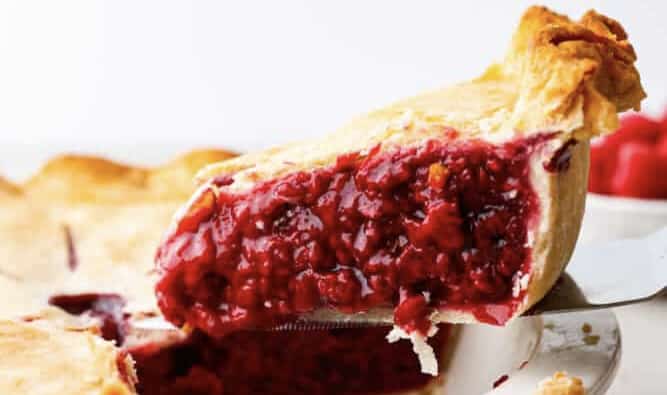
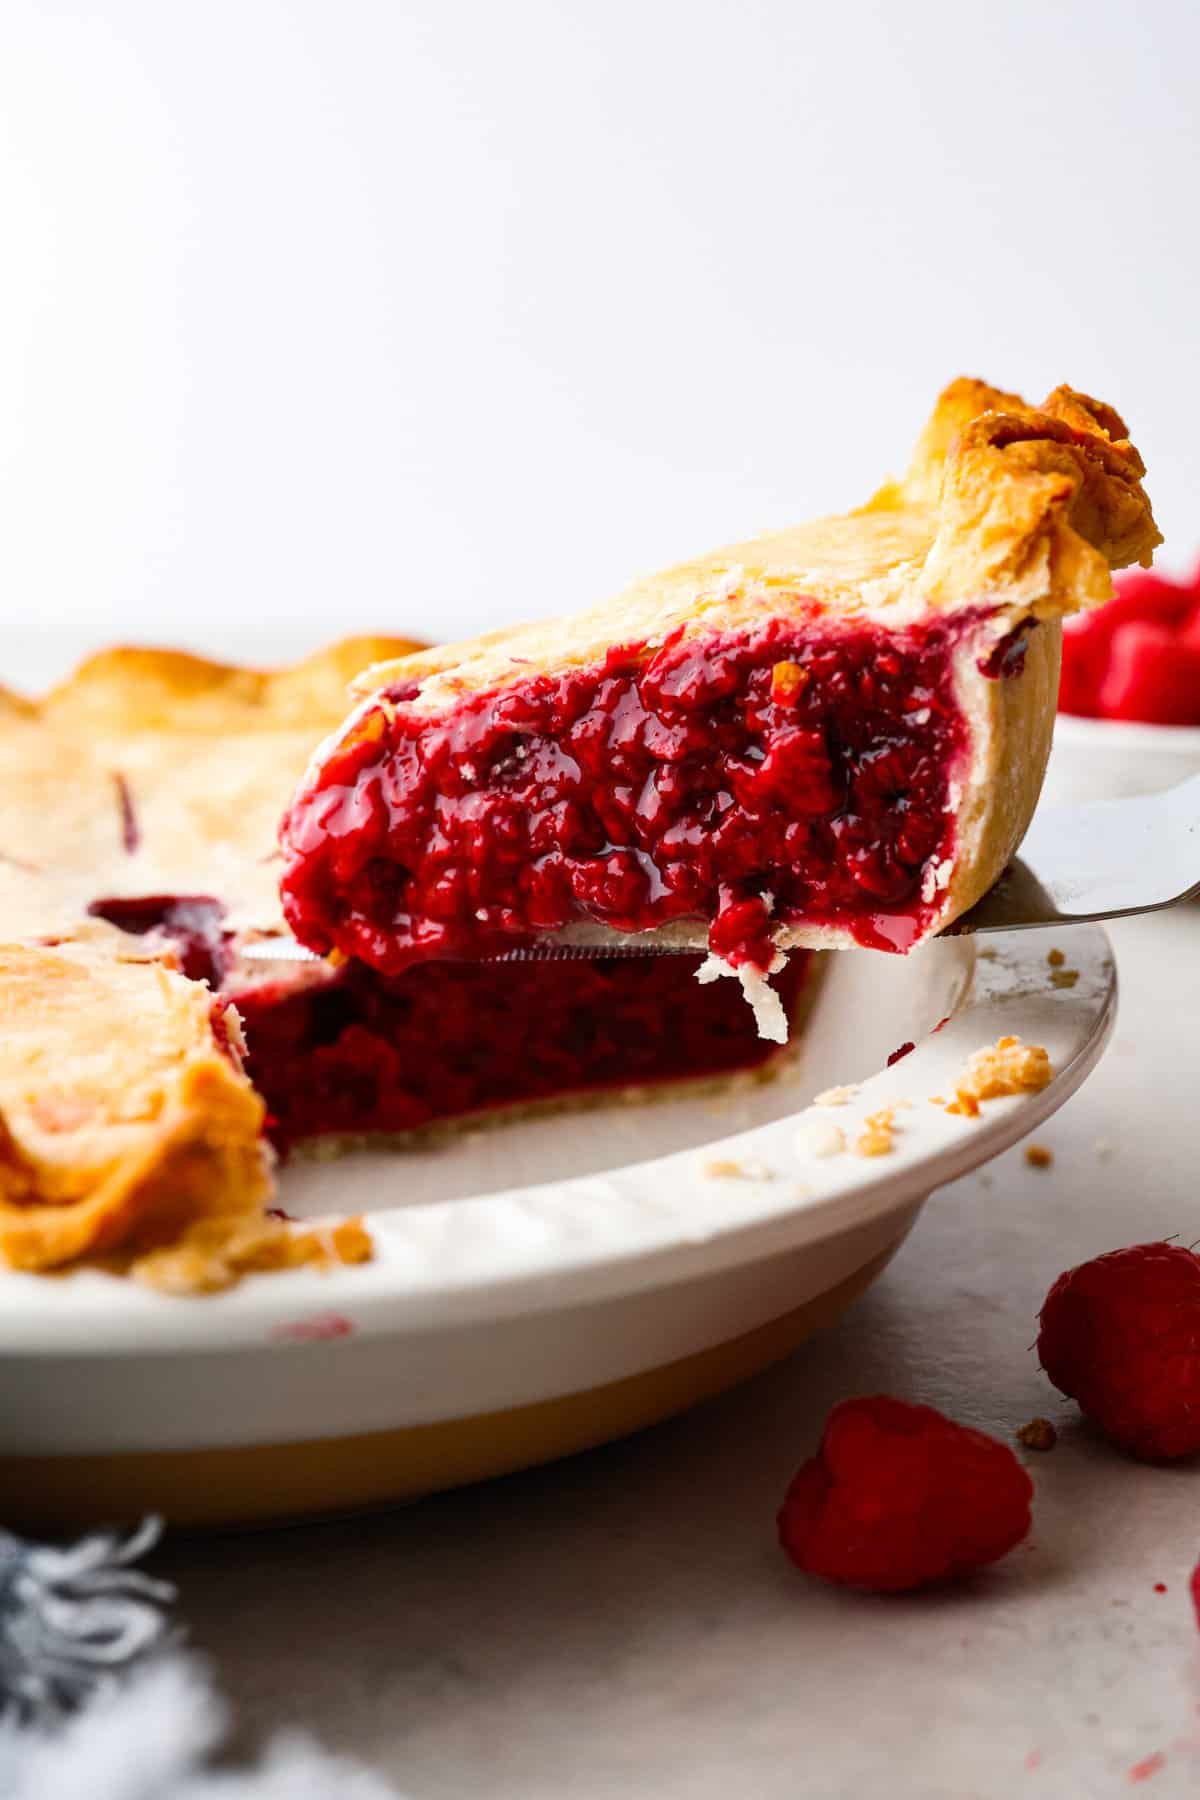
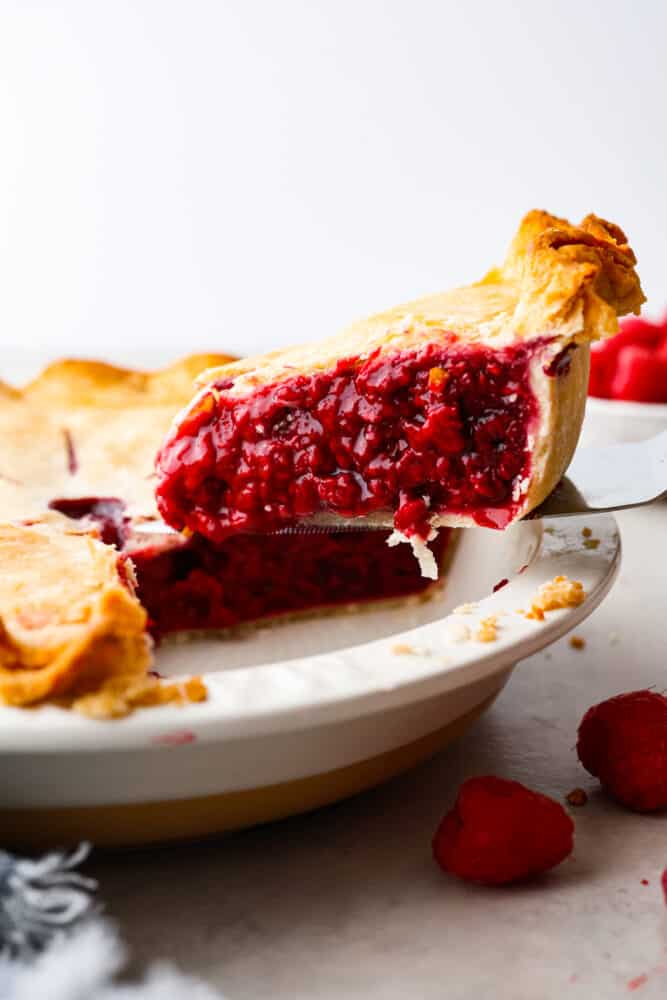
A slice of pie being served with a cake spatula.

Juicy Raspberry Pie

Mmm, raspberries. There is something about them that is so irresistible. Whether I’m eating a handful of them or they’re baked into a buttery crust, I can never get enough! This recipe for raspberry pie is quickly rising through the ranks as my favorite fruit pie. Anything on my grandma’s pie crust is delicious, but this filling is seriously the best. It’s so simple but so sweet and juicy! The great thing is, you can use either fresh or frozen raspberries so it’s the perfect recipe for whatever you have on hand.

If you’ve never had a slice of raspberry pie with a homemade crust, then you’re missing out on one of life’s simple pleasures! The combination of the juicy, slightly tart raspberries with the buttery, flaky crust is a match made in dessert heaven. The texture of the filling is perfect, not too runny and not too thick, while the crust adds a satisfying crunch with each bite. Whether you’re celebrating a special occasion (it’s perfect for Mother’s Day!) or just craving a sweet treat, this pie is the answer! So go ahead and indulge in a slice (or two) of this delicious dessert, add a scoop of vanilla ice cream if you want, and see for yourself why it’s a classic that will never go out of style!

Ingredients Needed

  • Double Crust Pie Crust: You can’t have a delicious raspberry pie without a sturdy and flaky crust to hold it all together! A double crust pie crust means you’ll have a bottom crust and a top crust, making each bite a perfect balance of filling and crust. You can use store-bought pie crusts for easy prep, or make your own for the best flavor! My grandma’s pie crust and butter pie crust recipes are both great options!
  • Raspberries: Whether you’re using fresh or frozen raspberries (just make sure to thaw them if you go the frozen route!), these berries are the star of the show. Raspberries add a sweet and tart flavor that perfectly complements the buttery crust. Plus, their vibrant red color makes for a beautiful presentation. You could also add blueberries or blackberries into the mix if you’d like!
  • Fresh Lemon Juice: A little bit of acidity can go a long way in a dessert, and that’s where the fresh lemon juice comes in. It adds a bright and tangy flavor that helps cut through the sweetness of the raspberries and sugar, creating a well-balanced filling.
  • Granulated Sugar: Adds the perfect amount of sweetness to the raspberry pie filling without overpowering the natural tartness of the berries.
  • Cornstarch: Thickens the filling. I like using cornstarch because it thickens up the filling without making it too gummy or starchy, creating a smooth and velvety texture.
  • Salt: Just a pinch is all you need to balance out the sweetness in your pie!
  • Large Egg and Water: The egg and water are used to create an egg wash that gives the pie crust a shiny, bakery-worthy finish. It’s the cherry on top of an already delicious dessert!

Is Cornstarch or Flour Better to Thicken a Fruit Pie?

If you want a glossy, more jelly-like filling, use cornstarch. While flour may be a common choice, it can leave your filling tasting a little bit thick and starchy. Cornstarch, on the other hand, creates a smooth and velvety texture without any added taste. Plus, it’s a more efficient thickener, meaning you won’t need to use as much of it as you would flour.

All About the Crust

We all know that the crust is just as important as the pie itself. I don’t blame you if you go the store-bought route, but if you’re up for the challenge, try making your crust at home! From blind baking to making a lattice, here are a few more recipes to help you on your pie-making journey. And if you have scraps left over from your pie dough… these pie crust cookies are a must-make.

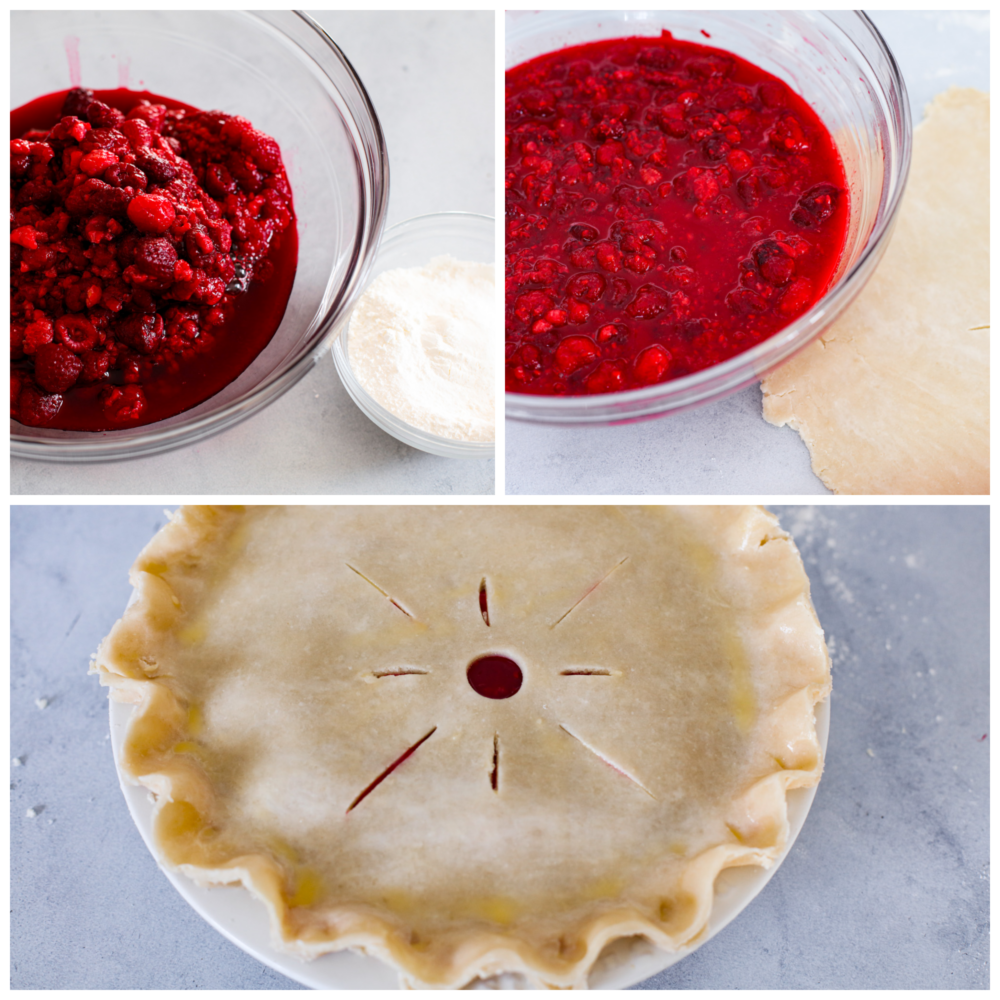
3-photo collage of raspberry filling and pie crust being prepared.

How to Make Homemade Raspberry Pie

Raspberry pie is actually super easy to make, especially if you’re using a store-bought crust. It’s the perfect dessert to make as the temperatures warm up. I know I’ll be making this all summer long! I can’t wait for barbecues and potlucks to start up again, because I’m definitely going to be bringing one of these bad boys.

  1. Preheat Oven, Prepare Dough: Preheat the oven to 400 degrees Fahrenheit. Then roll out half of the pie crust and form the bottom crust in a 9-inch pie pan.
  2. Mix Raspberries and Lemon Juice: In a large bowl, combine the raspberries and lemon juice.
  3. Dry Ingredients: In a small bowl, whisk together the sugar, cornstarch, and salt.
  4. Combine: Add the sugar mixture to the raspberries and mix thoroughly.
  5. Add to Crust, Layer With Top Crust : Pour the raspberry filling to the pie pan and roll out the top crust. Then place the top crust on and crimp the edges. Cut your desired design into the crust, or simply cut a few vents for steam to escape.
  6. Add Egg Wash: Combine the egg with water and brush over the top crust.
  7. Bake: Bake for 40-50 minutes, until the crust is golden brown and the filling is bubbling.
  8. Cool: Let cool completely before slicing. Chilling in the fridge for a few hours will help the filling set up further.
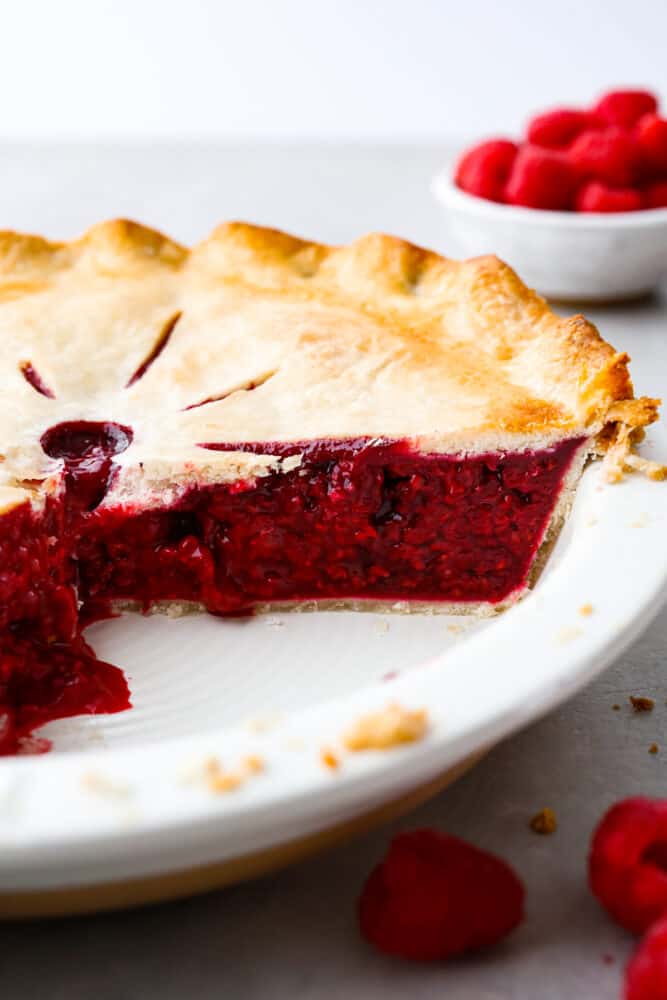
A whole pie cut into so the filling can be seen.

Tips and Tricks

If you’re new to making homemade pies, here are a few tips to help make sure yours turns out perfectly! So grab your ingredients, preheat that oven, and get ready to impress your friends and family with the best raspberry pie they’ve ever tasted – you got this!

  • Check Your Raspberries: Use fresh or thawed frozen raspberries for the best flavor. No one likes a mushy filling!
  • Use Cornstarch: Use cornstarch instead of flour to thicken the filling. Cornstarch creates a smooth and velvety texture without any added taste, and it’s more efficient than flour, so you won’t need to use as much.
  • Let Your Pie Cool: Let the pie cool completely before slicing. This can be the hardest part, but it’s worth it! Letting the pie cool allows the filling to set and makes for easier slicing.
  • My Filling is Still Runny After Baking, What Do I Do? Give your pie a chance to cool after it bakes. This will allow the filling to set. If it’s still runny after that, you may need to pop your pie back in the oven to cook off some of the liquid.
  • Serve à la Mode: Serve with a dollop of whipped cream or a scoop of vanilla ice cream. Raspberry pie is delicious on its own, but a little whipped cream or ice cream never hurt anyone. Plus, it makes for a picture-perfect presentation!

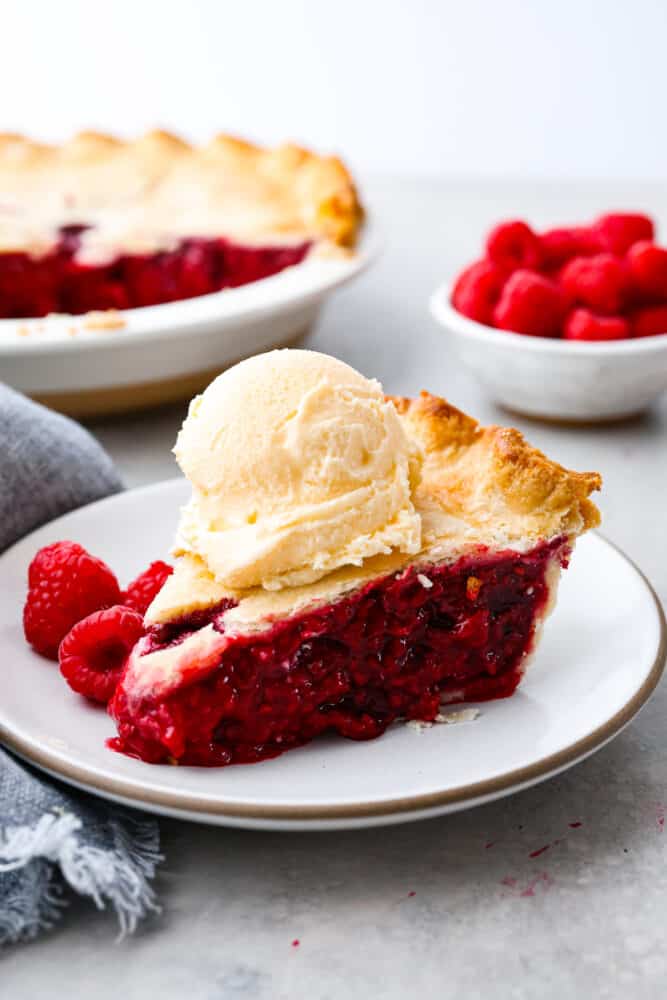
A slice of raspberry pie on a stoneware plate served with a scoop of vanilla ice cream on top.

Storing Leftovers

Alright, you’ve made the perfect raspberry pie, but what do you do with the leftovers? Here are some tips on how to store your delicious dessert:

  • In the Refrigerator: The easiest and most obvious way to store leftover raspberry pie is to cover it with plastic wrap or foil and pop it in the fridge. (It’s even better if you have a pie pan with a lid!) This will help keep it fresh and prevent it from drying out. Store for up to 4 days.
  • In the Freezer: If you have a lot of leftover raspberry pie, you can freeze it for up to a month. Wrap it tightly in plastic wrap and then place in a large freezer bag. Let it thaw in the fridge overnight before serving!

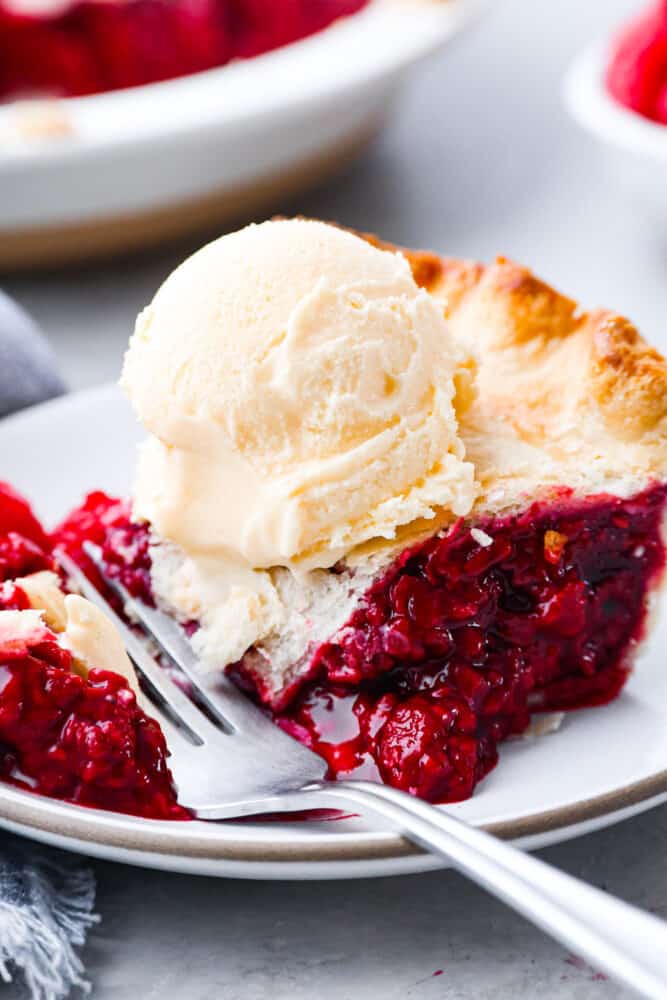
Closeup of slice with a bite taken out of it.


  • Preheat the oven to 400 degrees Fahrenheit. Roll out half of the pie crust and form the bottom crust in an 8-9 inch pie pan.

  • In a large bowl, combine the raspberries and lemon juice.

  • In a small bowl, whisk together the sugar, cornstarch, and salt.

  • Add the sugar mixture to the raspberries and mix thoroughly.

  • Pour the raspberry filling to the pie pan and roll out the top crust. Place the top crust on and crimp the edges. Cut your desired design into the crust, or simply cut a few vents for steam to escape.

  • Combine the egg with water and brush over the top crust.

  • Bake for 40-50 minutes, until the crust is golden brown and the filling is bubbling.

  • Let cool completely before slicing. Chilling in the fridge for a few hours will help the filling set up further.


Serves: 8

Calories206kcal (10{d2b09b03d44633acb673e8080360919f91e60962656af8ade0305d5d8b7e4889})Carbohydrates35g (12{d2b09b03d44633acb673e8080360919f91e60962656af8ade0305d5d8b7e4889})Protein3g (6{d2b09b03d44633acb673e8080360919f91e60962656af8ade0305d5d8b7e4889})Fat7g (11{d2b09b03d44633acb673e8080360919f91e60962656af8ade0305d5d8b7e4889})Saturated Fat2g (10{d2b09b03d44633acb673e8080360919f91e60962656af8ade0305d5d8b7e4889})Polyunsaturated Fat1gMonounsaturated Fat3gTrans Fat0.003gCholesterol20mg (7{d2b09b03d44633acb673e8080360919f91e60962656af8ade0305d5d8b7e4889})Sodium169mg (7{d2b09b03d44633acb673e8080360919f91e60962656af8ade0305d5d8b7e4889})Potassium142mg (4{d2b09b03d44633acb673e8080360919f91e60962656af8ade0305d5d8b7e4889})Fiber5g (20{d2b09b03d44633acb673e8080360919f91e60962656af8ade0305d5d8b7e4889})Sugar16g (18{d2b09b03d44633acb673e8080360919f91e60962656af8ade0305d5d8b7e4889})Vitamin A55IU (1{d2b09b03d44633acb673e8080360919f91e60962656af8ade0305d5d8b7e4889})Vitamin C20mg (24{d2b09b03d44633acb673e8080360919f91e60962656af8ade0305d5d8b7e4889})Calcium26mg (3{d2b09b03d44633acb673e8080360919f91e60962656af8ade0305d5d8b7e4889})Iron1mg (6{d2b09b03d44633acb673e8080360919f91e60962656af8ade0305d5d8b7e4889})

All nutritional information is based on third party calculations and is only an estimate. Each recipe and nutritional value will vary depending on the brands you use, measuring methods and portion sizes per household.

Course Dessert

Cuisine American

Keyword homemade raspberry pie, raspberry pie, raspberry pie recipe

This Hanky Panky Recipe Puts a Spicy Twist on the Fernet Drink

This Hanky Panky Recipe Puts a Spicy Twist on the Fernet Drink

The Hanky Panky had always been a favorite of Ektoras Binikos, beverage director at Sugar Monk in Harlem, New York. When he set out to develop his own recipe for the drink, a variation of the classic Martinez, he opted not to mess with the “golden ratio” of Ada Coleman’s original recipe. Instead, his approach was to dissect and tweak the drink’s individual components, which are typically equal parts gin and sweet vermouth, plus a bracing bar spoon of Fernet-Branca—a simple and elegant construct, he notes. 

First, he subbed genever for gin, in a move that was admittedly more about practicality than preference. Each Monday, Sugar Monk offers classic cocktails to accompany live jazz performances. Because the menu leans on Prohibition-era drinks, it’s a gin-heavy list. “So we thought, let’s try something different,” he says.


At first, he tried a base of unaged whiskey, or moonshine, in place of the traditional gin. “The cocktail was too round, a little heavy,” according to Binikos. He then pivoted to malty genever, which added just enough complexity. Specifically, he uses Old Duff, an unaged Dutch genever distilled from a mix of rye and malted barley, which adds depth while being light enough that it doesn’t put off gin purists.


Juxtaposed against the genever, Binikos adds an equal amount of Carpano Antica, the bar’s vermouth of choice, for its vanilla tones, which harmonize with the maltiness of the genever.

Echoing the original, a teaspoon of Fernet-Branca anchors the drink. While Binikos’ preferred version switches the amaro for Branca Menta, he wasn’t convinced others would love it as much as he did. “Menta can take over,” he concedes. So he returned to Fernet-Branca, which allows the whiskey-like grain notes in the genever to shine.

The final differentiating touch comes via housemade orange bitters. When the pandemic temporarily shut down New York’s bars and restaurants, Binikos began manufacturing herb- and spice-infused amaros, liqueurs and bitters. Although these elaborate flavors had always been part of the bar’s drinks, he took advantage of the enforced downtime to codify the formulas and bottle them for commercial sale. 

The orange bitters—one of 17 varieties developed by the bar “to create something unique to Sugar Monk, another layer”—are made by combining coriander and cinnamon with a mix of Seville orange, bergamot, “a little bit of Buddha’s hand if available” and Thai or Japanese chile peppers. The latter ingredient imparts a touch of heat, which distinguishes the bitters from others on the market. While Sugar Monk’s bitters can be purchased at the bar, to approximate the effect at home, Binikos recommends infusing Regans’ orange bitters with fresh chiles. 

“There’s a little heat at the end, but not too much,” Binikos says. “It brightens the cocktail a little bit.” Finally, a quick spritz of orange oil over the top of the drink adds enticing aroma and accentuates the bitters. 

The result provides an accessible introduction to genever, with just a flicker of spicy heat enlivening a traditional stirred drink. And despite the conventional wisdom that the Martinez is a forerunner of the Martini, Binikos says his version is closer to a Negroni, thanks to its mix of sweet vermouth, orange and aperitif-adjacent Fernet. “It’s like two-thirds of a Negroni,” he says, “but more whimsical.”

Lexy Rogers’ not-from-Philly cheesesteak recipe

Lexy Rogers’ not-from-Philly cheesesteak recipe

Lexy Rogers, a celebrity chef and author of the cookbook “Break Bread on a Budget,” recently dropped by “GMA3” to show us how to make gourmet meals without breaking the bank.

Scroll below to check out her recipe for a delicious and cost-effective cheesesteak.

Not-From-Philly Cheesesteak

1 tablespoon avocado oil (or olive oil)

1 medium white onion, sliced

8 ounces baby portabella mushrooms, sliced

2 teaspoons lemon pepper seasoning

1 pound steak (ribeye or New York strip), or 1 pound skinless boneless chicken breast

1 tablespoon Creole seasoning

4 slices pepper jack cheese

4 slices provolone cheese

Budget tip: A foot-long sandwich feeds Rogers’ family of five. If you don’t need as much food, go slider style. Make single servings by using a ciabatta bun, Hawaiian roll, or regular sliced bread. Save the rest of the filling in the fridge and make sandwiches throughout the week.

1. Preheat oven to 375 F.

2. Heat oil in a pan over medium-low heat.

3. Add peppers, onions, and mushrooms.

4. Season with lemon pepper seasoning.

5. Cook for about 7 minutes covered, until onions are translucent and mushrooms have released liquids into the pan. Peppers should be cooked al dente, just enough so their color has lightened, and they do not taste raw but are still somewhat firm.

6. Turn off the heat and set veggies aside.

7. Slice the steak thinly, about 1/8 inch in thickness. Sear steak in a cast iron pan or nonstick skillet with butter for 2 1/2 minutes on each side.

8. Mix mayonnaise with Creole seasoning and set aside.

9. Cut bread loaf lengthwise without cutting it completely in half.

10. Spread seasoned mayo on both halves of the inside of the bread.

11. Top with steak, veggie mixture, and cheeses, alternating between a slice of pepper jack and a slice of provolone.

12. Bake in the preheated oven for 5 minutes, or until the cheese is melted and the bread is toasted.

Ways to stretch your dollar

Putting steak into a sandwich filled with veggies is a great way to get your steak fix without relying on the steak to fill you up.

Alternatively, you can use chicken to save further. Instead of using individual hoagie rolls, buy one or two fresh baked French loaves from a big box store for $1.50 and slice them into appropriate portions (about 4-5 servings per loaf).

Use the filling on top of fries, or baked potatoes to stretch the filling and feed more people, ultimately saving about $1 per person.

For the “non-chefs”: Knives not your thing? No biggie. Buy pre-shaved steak and pre-cut veggies to cut down on time and reduce the risk of cutting your fingers.