
New cocktail book is the Cure for tired New Orleans cocktail recipes

New cocktail book is the Cure for tired New Orleans cocktail recipes

Comment

Even the inside cover of “Cure: New Orleans Drinks and How to Mix ‘Em,” Neal Bodenheimer and Emily Timberlake’s gorgeous new cocktail book, reminded me why the Crescent City is my favorite place in the world to get a drink.

That inside cover is a map of some of the most important watering holes, restaurants and live music joints around the city. For people who have the good fortune to know New Orleans, it’s a map of both remembered pleasures and those still to be explored; for those yet to eat, drink and explore this joyful, sorrowful city, it’s a cartographical to-do list, one the book later supplements with a “New Orleans Cocktail Bucket List.”

The map captures something about the spirit of the book, which is not just a celebration of Cure, one of the country’s best cocktail bars — a perennial James Beard nominee that won for Best Bar Program in 2018 — but a celebration of its community and city. Any number of books teach readers about cocktails through the lens of the bar they’re representing and recipes for drinks its mixologists have created. Far fewer also amplify their city and their neighbors (and nominal competitors) so generously.

Bodenheimer almost had to be hogtied and dragged into writing it.

To be fair, it’s not like the man doesn’t have a few other projects on his hands. Along with Cure, which he opened in 2009 after moving back to his native Louisiana after Hurricane Katrina, Bodenheimer owns Cane & Table in the French Quarter, and over the course of the pandemic, while he was writing, he opened Dauphine’s (a New Orleans-inspired restaurant in Washington, D.C.), as well as Val’s (a taqueria and agave spirits bar in the same neighborhood as Cure) and Peychaud’s (a cocktail bar in the courtyard of a French Quarter building that was once home to Antoine Peychaud, the inventor of the red bitters that now give a licorice-y hit to countless cocktails). And he also serves as a partner in Tales of the Cocktail, the annual bar conference that attracts thousands of industry folks and dedicated tipplers to the city every summer.

“Which all makes it sound like I’m … insane … but it wasn’t meant to be that way,” Bodenheimer says, noting how the pandemic played hell with so many plans and threw off so much original project timing. But he knew he’d never get the book done without help, and Timberlake, a longtime food writer and editor based in Oakland, Calif., proved to be the perfect partner in the project. Their calls and planning sessions for the book helped keep him sane during the pandemic, when so much seemed to be coming apart.

Bodenheimer knew he “didn’t want to do another bar-bar book, because so many bars have made bar books that I think it’s a pretty complete genre. And I didn’t want to do a vanity project either … . I want to talk about what Cure is and what it’s done, but I want to put it into the larger context of New Orleans drinking.”

Thus the book provides plenty of drinks that are original to Cure and the many creative mixologists who have worked there over the years, but it also provides the history of many New Orleans classic cocktails, and recipes for iterations of and riffs on such drinks as the French 75 and the Pimm’s Cup, not originally New Orleans drinks but which, through specific bars (Arnaud’s and the Napoleon House, respectively) have become indelibly associated with the city.

Exploring the historical component of New Orleans drinking required some wrestling with the ghost of Stanley Clisby Arthur, the journalist whose 1937 book, “Famous New Orleans Drinks And How to Mix ’Em” inspired the subtitle of the Cure book.

The Clisby Arthur book helped establish an early history of cocktails and of New Orleans’ place in it. The problem with the history it established is that a lot of it is what Bodenheimer describes with an expletive meaning bovine excreta.

In the intro to his book, for example, Clisby Arthur writes of New Orleans, “It was here that your most modern of American beverages, the cocktail, first came into being and was given its jaunty name,” going on to harrumph about a number of fake stories about how the word “cocktail” came into being, before then insisting that Antoine Peychaud himself was responsible for the name via a bastardization of the French word “coquetier,” which referred to a style of egg cup in which the apothecary once served doses of brandy enhanced with his stomach-settling bitters.

Unfortunately, the word “cocktail” is now known to have appeared in print when Peychaud was still in nappies.

And yet in Clisby Arthur’s book also appear such drinks as the Sazerac — the quintessential New Orleans cocktail, and the city’s official one since 2008 — the Vieux Carré, the Cocktail a la Louisiane, the Ramos Gin Fizz, the Roffignac (see recipe below), and multiple absinthe-focused drinks. (The spirit, which was illegal in the United States for nearly a century, largely due to misconceptions of its purported herbal dangers, has had a deep impact on the city’s cocktails and drink style.)

“We used ‘Famous New Orleans Drinks, and How To Mix ’Em’ as a guide when we were opening Dauphine’s,” Bodenheimer says, and that meant he ended up spending a lot of time with the book. “So I have this deep appreciation for him, because he really created this canon of New Orleans drinks. … Without him, I don’t think New Orleans would hold that important place in world drinking. At the same time, I look at some of his history, and I’m like, ‘Man, you were really winging it.’ But that’s also kind of perfect, because that is like the bar world, too. There are a lot of people who are faking it till they make it.”

Happily the Cure team spent plenty of time refining and rejiggering recipes — the book’s precise spec for the Sazerac provides the preferred amount of Peychaud’s down to the very drop — and developing their own terrific drinks. In that development process, Bodenheimer says, Cure has long followed a very specific hierarchy of considerations: “How does it taste? How does it taste? How does it taste? How does it smell? How does it look?”

That is not necessarily a recipe for success in an Instagram-driven world, he acknowledges, but over time, it seems to have worked for the bar. “With Cure, there was our desire to do what we wanted to do, and then there was what New Orleans had always done” with cocktails and their preservation, he says. “Together it kind of created this magic, where people wanted to take the journey with us and see where we were going to go.”

Scale and get a printer-friendly, desktop version of the recipe here.

This upgrade on an old New Orleans drink makes for a more balanced take on what was originally a very sweet drink. The old recipe in Stanley Clisby Arthur’s classic cocktail book called for whiskey, but this version from the bar Cure’s new cocktail book uses Darroze 8 Year Les Grands Assemblages Bas-Armagnac, a French grape brandy, for the base. Co-author Neal Bodenheimer notes that the recipe works “surprisingly well with any number of unaged spirits,” but doesn’t like it with the original whiskey. The raspberry shrub can be refrigerated for several months and can be added to sparkling water, lemonade or other drinks.

Storage: Refrigerate the shrub for up to 3 months.

  • 1/2 cup fresh raspberries
  • 1/2 cup cold water
  • 1/2 cup granulated sugar
  • 1/2 cup white vinegar
  • Ice
  • 1 1/2 ounces bas-armagnac (or your preferred spirit; see headnote)
  • 1 ounce raspberry shrub
  • 2 to 3 ounces soda water, to top
  • Fresh raspberries, for garnish (optional)
  • Mint sprig, for garnish (optional)

Make the shrub: In a blender, combine the raspberries, water, sugar and vinegar and process on high until smooth. Strain through a fine-mesh sieve or cheesecloth, transfer to a bottle and refrigerate until needed. You should get about 1 1/4 cups (enough for about 12 drinks).

Make the drink: Fill a Collins, large coupe or a stemmed punch glass with ice.

Fill a cocktail shaker with ice, then add the armagnac and raspberry shrub. Shake to chill, about 15 seconds, then strain into the glass and top with the soda water. Garnish with the raspberries and a mint sprig, if you like, and serve.

Adapted from “Cure: New Orleans Drinks and How to Mix ‘Em,” by Neal Bodenheimer and Emily Timberlake (Abrams, 2022)

Tested by M. Carrie Allan.
Have easy party food recipes handy for the holidays | Entertainment/Life

Have easy party food recipes handy for the holidays | Entertainment/Life

It’s that wonderful time of year, also known as the holidays, when we gather with friends and family over tables and tables of finger food.

It just also happens to be a very busy time of decorating, planning and shopping. That’s why it’s a good idea to have an arsenal of hors d’oeurve recipes you can quickly whip up and take to parties with little notice or prep time.

Here’s a tip for hosts and hostesses: Let your guests help! When someone asks what he or she can bring to your party, assign them something. Most of the time, they really are happy to help and are asking you in all seriousness.

Our local farmers markets have a lot of prepared home canned goods, cheeses and breads to help make your holiday party prep easier.

I’ve shared just a couple of recipes you can pull together using those items and saving yourself a ton of time. Bring them to a party or include them with other dishes your guests bring at your own get-together.

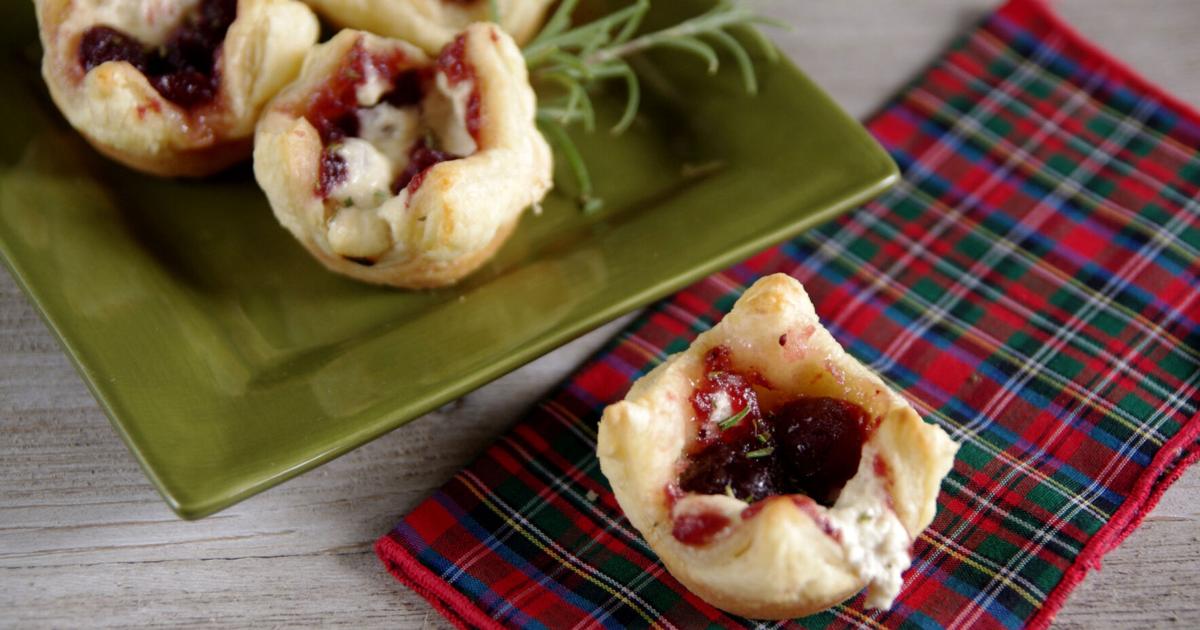
These little cranberry bites are a little sweet and a tad tart — just like I am about this stage in the holiday season. They look impressive, but are very easy to make. The last time I made these, I used some goat cheese found at my local farmers market and a little rosemary from my small herb container garden.

I tend to hoard jars of preserved figs in the back of my pantry, but I’ve seen quite a few available at almost any market I visit. I usually use my whole jarred figs for these little crostini, but you could easily use spreadable jam instead. If you’re not a fan of figs, your favorite fruit spread would work as well. The mint gives these crispy, sweet bites some holiday flare. Our market has a baker who has crostini already cut and toasted to perfection, which would make this dish even easier.

Not piling all of the party responsibilities on yourself is one of the best things you can do to allow yourself to actually enjoy the party. Make use of the helpful ingredients at your local farmers market or other local vendors. And don’t forget to get a little help from your friends! You’ll be doing yourself and your guests a favor by letting them join in the compliments to the chefs, and giving yourself some time back to really celebrate the season.

Cranberry Goat Cheese Bites

Recipe is by Teresa B. Day.

1 package frozen puff pastry, thawed

1 cup whole berry cranberry sauce

4 ounces goat cheese

1 tablespoon honey

1 tablespoon milk

1 teaspoon fresh rosemary

1. Preheat oven to 375 F.

2. Cut the pastry into approximately 3-inch-by-3-inch squares. Press each square into a mini-muffin tin.

3. In a small bowl, whisk together cheese, honey and milk.

4. Spoon a little cheese in the bottom of each pastry.

5. Top with cranberry sauce. Pull together all four corners of the pastry and pinch together. The pastry will “bloom” while cooking.

6. Bake about 10 minutes or until puff pastry corners are lightly brown.

7. Sprinkle with rosemary. Let cool 5 minutes before serving.

Fig and Mint Crostini

Recipe is by Teresa B. Day.

1 cup ricotta cheese

1 small baguette, sliced into about 16 pieces, toasted

16 jarred figs, sliced in half if whole figs

4 mint leaves, sliced julienne style

Sea salt, to taste

1. Spread ricotta on each crostini. Top with two fig halves or spread jam evenly.

2. Sprinkle mint leaves and drizzle with fig syrup.

3. Sprinkle a pinch of sea salt on top before serving.

4. Serve immediately or chill and serve later.

5 Longevity-Boosting Blue Zones Recipes

5 Longevity-Boosting Blue Zones Recipes
The wait is finally over, and the one item your holiday wishlist has been missing has finally hit the (book) shelves. Dan Buettner, the New York Times bestselling author of titles like The Blue Zones Kitchen and The Blue Zones and a National Geographic Fellow, has released his latest (and potentially greatest) book yet, The Blue Zones American Kitchen: 100 Recipes to Live to 100. And we couldn’t be more excited to share the news.

Buettner, who has closely studied the hotspots that are home to the longest-living people in the world, focuses on reconstructing a largely-forgotten American diet that closely resembles the dietary patterns found in the Blue Zones in this new release. “For the book, I’ve exhumed more than 60 oral histories, scientific reports, and academic papers to reconstruct four traditional American diets from the early 20th century,” Buettner says. “The scope of the work is ethnically and racially diverse—it precisely captures the diets of Mexican Americans, Asian Americans, African Americans, as well as Native Americans.”

The book is comprised of more than 100 plant-based recipes that, according to Buettner, “showcase the ingenuity of our Indigenous people and our immigrants who brought their time-honored cooking techniques from the Old World and blended New World ingredients to produce ingenious food that just may help you live to 100.” He also notes that the data-driven representation of what Americans were really eating a century ago closely represented what was found in his original Blue Zones research.

To get an inside glimpse into the book, Buettner kindly has shared a few of his favorite five-ingredient (or less) recipes so you can get cooking right away. And they’re filled with longevity-boosting ingredients to nourish your body with the same type of nutrient-rich foods found in the Blue Zones, where people live well into their 100s.

5 longevity-boosting recipes from The Blue Zones American Kitchen

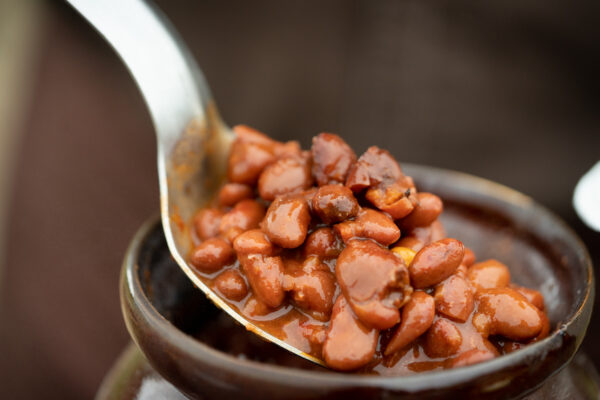
blue zones American kitchen beans
Photo: David McLain

Mohawk Baked Beans

Recipe by Dave Smoke McCluskey
Yields 6-8 servings

Ingredients
2 pounds dried cranberry beans
1 large onion, diced
1/4 cup darkest maple syrup
2 Tsp tomato paste
2 Tbsp yellow mustard
Salt
Freshly ground black pepper

1. Place the beans in a large pot and cover them with cold water. Soak them overnight. Drain.

2. Put the beans in a Dutch oven or oven-safe pot and cover them with water. Bring them to a boil over medium-high heat, then reduce the heat to low and simmer for 1 to 1 1/2 hours, until the beans are al dente.

3. Once the beans are al dente, add the onion, maple syrup, tomato paste, and mustard. Put them in the oven and set the oven to 225°F. Let the beans cook 8 hours or overnight, checking occasionally and adding water if needed. Season with salt and pepper to taste. Serve hot.

blue zones American kitchen mash
Photo: David McLain

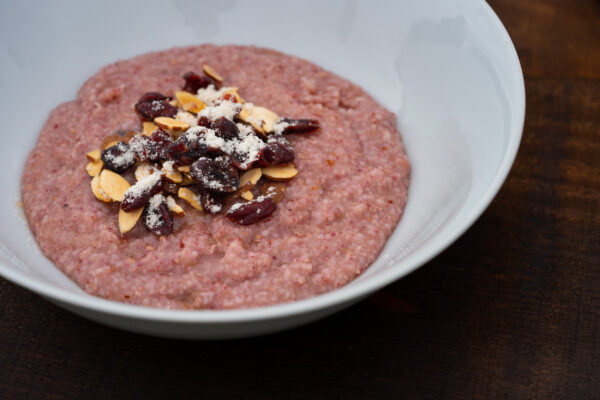
Warriors of the Rainbow Cranberry Mush

Recipe by Dave Smoke McCluskey
Yields 6 servings

Ingredients
4 cups water
4 cups almond milk
1 pound fresh cranberries or 1/2 pound dried cranberries
3 cups hominy grits
1 cup maple syrup, or to taste
Optional toppings: pumpkin seeds, pecans, dried cherries, or maple sugar

1. In a large pot, combine the water, almond milk, and cranberries and bring to a boil over high heat.

2. Reduce the heat to medium-low, stir in the grits, and let simmer for 45 to 60 minutes, stirring occasionally, until the grits have absorbed the liquid and are very tender.

3. Stir in the maple syrup and serve hot with desired toppings, if using.

blue zones American kitchen coconut rice
Photo: David McLain

Coconut Rice

Recipe by Nicole Marquis
Yields 6 servings

Ingredients
2 Tbsp dried coconut shreds
3 cups long-grain rice
2 cans unsweetened coconut milk
2 1/2 cups water
2 Tsp cane sugar

1. In a small sauté pan over medium-low heat, sauté the dried coconut until golden brown throughout. Set aside.

2. In a rice cooker, combine the rice, coconut milk, water, and sugar. Cover and turn on the rice cooker. (Alternatively, cook the rice in a covered pot.)

3. Once the rice is cooked, fold in the toasted coconut.

blue zones American kitchen corn
Photo: David McLain

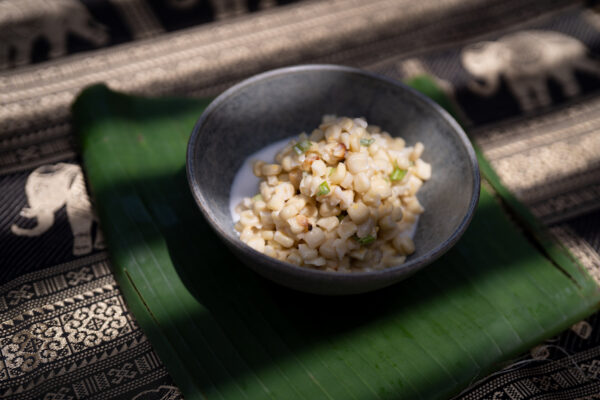
Cambodian Coconut Corn

Recipe by Chad Phuong
Yields 3 servings

Ingredients
2 cups fresh corn kernels
1/2 cup unsweetened coconut milk
1/3 cup sugar
1/2 Tsp salt
1/4 cup chives, chopped

1. Preheat the oven to 350°F. Spread the corn kernels in a baking dish in an even layer and roast them in the oven for 10 minutes.

2. Meanwhile, in a small saucepan, bring the coconut milk to a boil.

3. Add the sugar and salt and reduce the heat to low. Simmer for 5 minutes.

4. Add the chives and simmer for 1 minute more.

5. Pour the coconut milk mixture over the corn kernels and return the dish to the oven to bake for about 5 minutes, until lightly brown on top.

blue zones American kitchen succotash
Photo: David McLain

1620s Plymouth Succotash

Recipe by Paula Marcoux
Yields 5 servings

Ingredients
2 pounds cooked, hulled corn (or reconstituted dry whole hominy, frozen hominy, or pozole)
8 ounces dried cranberry beans (or Jacob’s cattle beans or other similar beans), soaked and cooked until just tender
Salt

Optional add-ins:
2 turnips, peeled and chopped
2 carrots, peeled and chopped
1 acorn squash or other winter squash, seeded and sliced
Few handfuls of chopped cabbage, collards, or turnip greens
2 leeks or onions, sliced
Few handfuls of chopped lettuce, spinach, endive, chicory, or arugula (or a combination)
Tender strawberry or violet leaves
1 cup ground walnuts, chestnuts, or hazelnuts
Freshly ground black pepper
Few chives or scallions, chopped
Calendula petals
Fresh mint or parsley

1. In a large soup pot, stir together the corn, beans, and salt.

2. Add the optional turnips, carrots, squash, cabbage or other winter greens, and leeks or onions, and simmer until they are almost tender, about 10 minutes. (Add oil, if needed.)

3. When the above are nearing tenderness, add the leafy greens (lettuce, spinach, endive, chicory, or arugula), strawberry or violet leaves, ground nuts, and pepper, and simmer for a few minutes more.

4. Stir in the chives or scallions, calendula petals, and mint or parsley.

An herbalist shares her brain-boosting herbal shot for longevity:


Our editors independently select these products. Making a purchase through our links may earn Well+Good a commission.

All Boba Tea recipes in Disney Dreamlight Valley: Coconut, Raspberry & more

All Boba Tea recipes in Disney Dreamlight Valley: Coconut, Raspberry & more

Published: 2022-12-14T14:16:09

Updated: 2022-12-14T14:16:24

Disney Dreamlight Valley is filled with delicious recipes for players to make. One such recipe is Boba Tea, a recent addition during the Toy Story update. So, we’ve compiled all the Boba Tea recipes in Disney Dreamlight Valley including how to make Coconut Boba Tea and Raspberry Boba Tea.

Disney Dreamlight Valley is a fantastic game for budding chefs. It includes over 170 unique recipes where you’re tasked with finding the ingredients and creating your favorite foods. While it’s exciting to create new ideas, finding out the ingredients for these recipes can be a little frustrating.

We’ve compiled all the Boba Tea recipes in Disney Dreamlight Valley so you can get back to drinking your favorite drink without needing to hunt around for the ingredients or the recipe.

Article continues after ad

If you’re looking for more recipes in Disney Dreamlight Valley we have a guide detailing all the ingredients you need.

How to make Boba Tea in Disney Dreamlight Valley

Disney Dreamligt Valley how to make Boba teaDisney / Gameloft

You’ll need Milk, Sugarcane and a flavoring to make a three-star Boba Tea.

The base ingredients surrounding Boba Tea in Disney Dreamlight Valley are thankfully relatively easy to get hold of. You’ll only need two ingredients to make the base Boba Tea then the respective additional flavoring for the three-star drinks. For example, a Dreamlight Valley Raspberry Boba tea will need the normal ingredients with one raspberry added in.

To make a normal Boba Tea you’ll need:

You can find Milk in Chez Remy and it’ll cost you 230 Star Coins each. Then the Sugarcane can be brought at Dazzle Beach. The Sugarcane itself is 29 Star Coins while the seeds are only 5 Star Coins. Due to the growth time being only seven minutes, we recommend buying the seeds and growing them.

Article continues after ad

All Boba Tea recipes in Disney Dreamlight Valley

We’ve compiled all five of the current Boba Tea recipes in Disney Dreamlight Valley so you can get to drinking your tea as soon as possible. The recipes, their ingredients, and how much they sell for are below:

That’s all the Boba Tea recipes in Disney Dreamlight Valley along with how you can make this delicious drink. While waiting for your Sugarcane to grow, take a look at some of our other handy Disney Dreamlight Valley guides:

Lost Diaries locations in Disney Dreamlight Valley | How to upgrade your house in Disney Dreamlight Valley | All flowers in Disney Dreamlight Valley | All Realms in Disney Dreamlight Valley | How to unlock all characters in Disney Dreamlight Valley | Disney Dreamlight Valley Emeralds guide | Is Disney Dreamlight Valley multiplayer? | How to feed animals in Disney Dreamlight Valley | How to redeem the Golden Potato code | All Disney Dreamlight Valley recipes | Current Disney Dreamlight Valley Star Path | When is the next Disney Dreamlight Valley update? | Disney Dreamlight Valley crop growth times

Article continues after ad

Hot chocolate mix and 3 other recipes as the holidays approach

Hot chocolate mix and 3 other recipes as the holidays approach

Hot Chocolate Mix

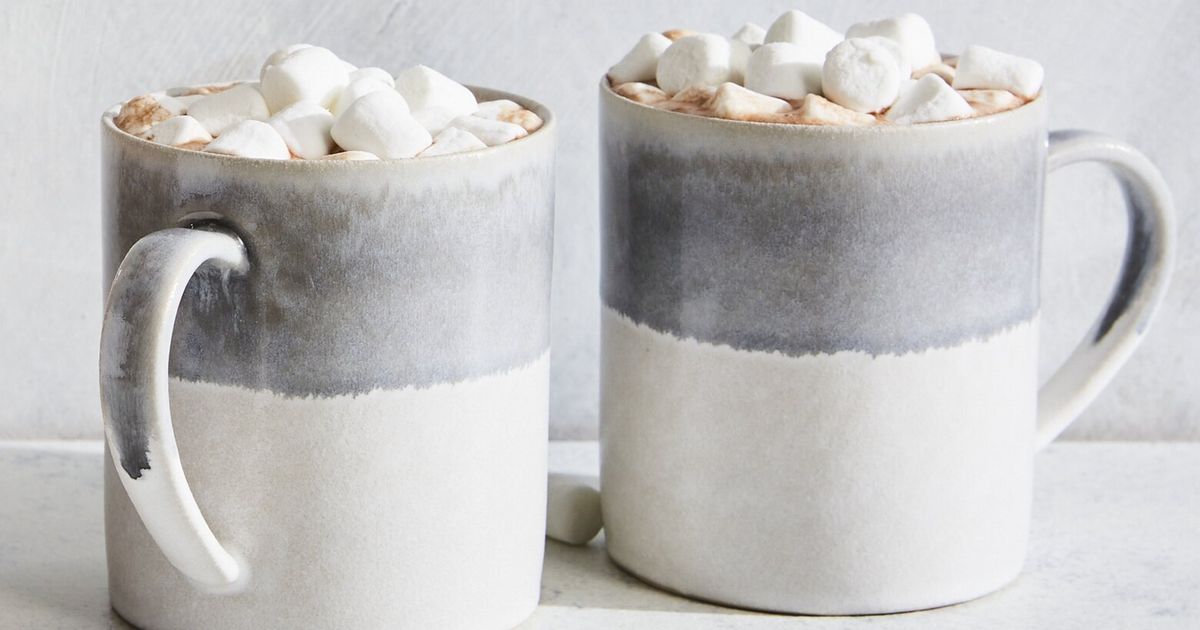
Fancy hot chocolate mixes can be wildly expensive, but they’re extremely easy to make at home. This one uses a mix of bittersweet and milk chocolate to give it a deeply complex flavor. (For a vegan version, you can substitute vegan milk chocolate.) This makes an excellent winter gift, packaged in festive jars or tins and will keep for at least six months stored at room temperature. Feel free to double or triple the recipe as needed.

Total time: 10 minutes

Servings: 4

INGREDIENTS
  • 1/3 cup powdered sugar
  • ¼ cup unsweetened cocoa powder, either natural or Dutch-process (see tip)
  • ¼ cup chopped bittersweet chocolate (preferably 62{d2b09b03d44633acb673e8080360919f91e60962656af8ade0305d5d8b7e4889} to 72{d2b09b03d44633acb673e8080360919f91e60962656af8ade0305d5d8b7e4889} cacao)
  • ¼ cup chopped milk chocolate or vegan milk chocolate
  • 1 teaspoon vanilla bean paste (optional)
  • Pinch of fine sea salt
  • Mini marshmallows
STEPS
  1. In a blender or food processor, combine sugar, cocoa powder, both chocolates, vanilla paste (if using) and salt. Pulse to pulverize into a coarse powder. Transfer to an airtight jar. Package marshmallows in another airtight jar.
  2. To prepare: Fill a small pot with 4 cups whole milk or your favorite alternative milk (almond, oat, rice, coconut, etc.), and bring to a simmer. Whisk in cocoa mixture until very smooth. Serve topped with whipped cream or marshmallows.

Tips: Natural cocoa will give you a more complex flavor; Dutch-process gives a deeper, richer color.

Caramel Cheddar Popcorn

There’s a sweet and salty allure to eating caramel corn and cheddar popcorn in the same bite, but popcorn purists can keep the two flavors separate. Either way, a giant tin of homemade fancy popcorn is the gift that everyone wants and no one thinks to ask for. And it’s a lot less expensive to make yourself than it is to buy. The popcorn will last stored airtight at room temperature for up to two weeks.

Total time: 45 minutes

Servings: About 6 quarts (24 cups)

INGREDIENTS
For the caramel popcorn
  • 3 quarts popped unsalted popcorn (pick out any unpopped kernels)
  • ¾ cup dark brown sugar
  • 6 tablespoons unsalted butter
  • 3 tablespoons corn syrup
  • ¾ teaspoon fine sea salt
  • ¾ teaspoon vanilla extract
  • 1½ teaspoons baking soda
For the cheddar popcorn:
  • ¾ cup Cheddar powder
  • 1 tablespoon mustard powder
  • ½ teaspoon fine sea salt
  • 3 quarts popped unsalted popcorn (pick out any unpopped kernels)
  • 3 tablespoons unsalted butter, melted, plus more if needed
STEPS
  1. Heat oven to 250 degrees, and line 2 rimmed baking sheets with parchment paper.
  2. Make caramel popcorn: Place popcorn in a very large mixing bowl. In a medium pot, bring brown sugar, butter and corn syrup to a boil. Cook, stirring constantly, until butter and sugar have melted (the mixture should be foamy), about 2 to 3 minutes. Stir in salt and vanilla. Remove from heat, and stir in baking soda. (Mixture should bubble up.)
  3. Immediately pour hot syrup over the popcorn and use a spatula or large spoon to mix it well. Scrape popcorn onto the prepared baking sheets in one layer. Bake until crisp, rotating the pan and tossing popcorn after 15 minutes, 20 to 30 minutes total. To test for doneness, carefully remove a piece of the popcorn, let it cool for 30 seconds or so, then take a bite; if it’s crisp, it’s done. Set aside to cool.
  4. While the caramel popcorn is in the oven, prepare the cheddar popcorn: In a mixing bowl, whisk together the cheddar and mustard powders and salt.
  5. Place popcorn in a very large mixing bowl. Pour melted butter on top of popcorn and toss to combine. Sprinkle cheddar mixture over popcorn and toss well using a rubber spatula. If the mixture looks dry, add a little more melted butter.
  6. Pour popcorn onto the second prepared baking sheet in one layer. Bake until dry, about 5 to 10 minutes, rotating the pan and tossing popcorn halfway through. Let cool completely.
  7. Combine cheddar and caramel popcorn, or keep them separate, and pack them into tins, jars or bags.

Tips: Cheddar powder is available at spice stores, and online. To pop your own popcorn, heat 3 tablespoons of oil in a large, heavy pot over medium-high heat. Add 3 kernels of popcorn and cover. When it pops, add another 1/3 cup popcorn kernels and reduce heat to medium-low. Partly cover the pot (leaving a crack open and away from you, or use a splatter screen to cover the pot; you want the steam to escape). Continue to cook until the popping stops. Transfer popcorn to a bowl and sprinkle with salt.

Peppermint Saltine Toffee Bark

A cross between a cookie and candy, classic saltine toffee is made by pouring a quickly made brown sugar caramel over a layer of salty crackers, baking it, then coating the whole thing with chocolate. This version uses a copious amount of bittersweet chocolate for the topping, which helps offset the sweetness of the toffee mixture. (Note that the higher the cacao percentage, the less sweet this treat will be.) The crushed candy cane topping makes this perfect for tucking into a holiday cookie box, but you can make it anytime of year. Toasted nuts, shredded coconut, dried fruit, colorful dragées and chopped candied ginger would all make excellent alternatives.

Total time: 50 minutes, plus chilling

Servings: About 2 dozen pieces

INGREDIENTS
  • 6 ounces (about 6 cups) saltine crackers
  • 1 cup unsalted butter
  • 1½ packed cups dark brown sugar
  • 2 teaspoons vanilla extract
  • Large pinch of fine sea salt
  • 1½ pounds chopped bittersweet chocolate (preferably around 70{d2b09b03d44633acb673e8080360919f91e60962656af8ade0305d5d8b7e4889} cacao)
  • 2 teaspoons neutral oil, such as grapeseed or sunflower
  • ¾ cup crushed candy canes (about 12 whole candy canes, see tip)
  • Flaky sea salt
STEPS
  1. Heat oven to 350 degrees. Line a 13-by-18-inch rimmed baking sheet with aluminum foil, allowing it to go up and over the edges of the pan. Line the bottom of the pan with a piece of parchment. Arrange crackers over parchment in an even layer, breaking pieces to fit as necessary.
  2. In a medium pot over medium-high heat, bring butter and sugar to a boil, whisking, until thickened and smooth, about 3 minutes. The mixture may separate, and that is OK. Stir in vanilla and salt.
  3. Working quickly, pour mixture over crackers. Using an offset spatula, rubber spatula or even the back of a spoon, carefully spread caramel all over the crackers. (Try to keep the saltines all in one even layer.) Transfer baking sheet to oven and bake until bubbly, about 10 to 15 minutes. Transfer pan to a wire rack to cool completely before topping, at least 15 minutes.
  4. Pour about 1 inch of water in a medium saucepan and bring to a boil. In a medium metal mixing bowl that fits on top of the saucepan, combine chocolate and oil. Place the bowl on top of the pan. (Be sure the water is not touching the bottom of the mixing bowl; if so, pour out some water.) Reduce heat to medium-low and allow the chocolate mixture to melt, stirring frequently with a rubber spatula. (Alternatively, combine chocolate and oil in a bowl and microwave in 30-second blasts, stirring in between, until melted and smooth, about 2 minutes total.)
  5. Pour melted chocolate on top of cooled crackers. Use an offset spatula to spread chocolate smoothly over the surface of the toffee. Immediately sprinkle the crushed candy canes on top and sprinkle with a little sea salt.
  6. Transfer baking sheet to refrigerator and chill for about an hour to set chocolate. Break saltine toffee into large pieces for storing and serving. Toffee will keep at room temperature in an airtight container for up to a week, after which it may get a little soft but still taste pretty good.

Tips: To crush candy canes, put them in a heavy-duty plastic bag, wrap the bag in a kitchen towel and hit the bag with a rolling pin or heavy can.

Large-Batch Rye Manhattan Cocktails

Recipe: Large-Batch Rye Manhattan Cocktails

According to cocktail historian David Wondrich, from whom this recipe is adapted, this is the Manhattan as it was made from the 1890s until the 1960s, and again since the 2000s. The optional absinthe, which amounts to no more than a dash per drink, is a late 19th-century addition that gives the drink a little herbal pizazz; do not use more than suggested. This keeps for weeks at room temperature.

Total time: 10 minutes

Servings: 10 to 12 cocktails

INGREDIENTS
  • 2 2/3 cups 100-proof rye whiskey
  • 1 1/3 cups red Italian vermouth
  • 1 tablespoon plus 1 teaspoon Angostura bitters
  • 1¼ teaspoons absinthe (optional)
  • Lemon twists or brandied cherries, for serving
STEPS
  1. In a clean, sealable 750-milliliter or quart glass bottle, combine the whiskey, vermouth, bitters and absinthe, if using.
  2. To serve, stir 3 ounces (about 1/3 cup) per cocktail with ice and strain into chilled cocktail glasses. Garnish each glass with either a twist (hold lemon peel over glass and twist it to extract the aromatic oils), or with a cherry.

15 Dump Cake Recipes for the Perfect Lazy Dessert

15 Dump Cake Recipes for the Perfect Lazy Dessert

There’s nothing better than capping a home-cooked meal with a delicious, homemade dessert, but sometimes dessert can be a lot of work. Between the prepping, different baking and cooking techniques and making sure that it cooks properly, sometimes the added stress just isn’t worth it. Thankfully there’s one dessert that’s always simple to make: dump cake.

Dump cakes—which are named after the fact that most recipes only need you to dump the ingredients into a pan and pop it in the oven—are among the most simple desserts to make. Many of them only require as little as three or four ingredients. However, don’t conflate how these cake recipes are with a lack of flavor. Though hassle-free, these delicious treats pack a decadent  punch.

When in need of a quick treat that’s sure to impress, try any of these 15 dump cake recipes. And for more recipes that will satisfy your sweet tooth, be sure to check out 16 Ambitious Dessert Recipes That Are Easier to Make Than You Think.

slow cooker caramel apple dump cake
Courtesy of Show Me The Yummy

On its own, dump cake is a great dessert. But this recipe somehow is able to combine three delicious sweet treats into one: caramel apples, dump cake, and of course, the recommended ice cream to top the cake off. This recipe is also made in a slow cooker, so the hassle-free dessert is even more simple to make than usual.

Get the recipe from Show Me the Yummy.

gooey caramel chocolate dump cake
Courtesy of Taste & Tell

Normally, dump cakes are made with some sort of fruit. However, this recipe proves that it’s absolutely possible to have a gooey, chocolate-filled dump cake too. This recipe is a bit more complex than typical dump cake recipes, as it gives instructions on how to make your own cake mix, but we’re sure that a boxed chocolate cake mix would work just as well.

Get the recipe from Taste & Tell.

strawberry rhubarb cobbler with orange and ginger
Courtesy of Feasting At Home

There are some minor differences between cobblers and dump cakes; dump cakes typically use of cake mix, while a cobbler uses a pie crust or biscuit topping. Yet the main gist is the same—there’s a delicious filling on the bottom with a crumbly, cake-like that gets baked on top. This strawberry rhubarb cobbler has a flavor-packed filling, with four cups each of the always-delicious combination of strawberries, rhubarb, orange zest, and fresh orange juice to add some acidity.

Get the recipe from Feasting at Home.

crock pot apple crisp
Courtesy of Well Plated by Erin

If you’re looking for a delicious variation on the beloved dessert, then this apple crisp recipe—which just replaces the cake mix you’d find in a dump cake with oats and flour—is a healthier version. Because this recipe uses an oat-based crumble topping instead of the traditional cake mix, it saves a lot of calories, and contains less fat than most dump cake recipes.

Get the recipe from Well Plated by Erin.

dump cake
Courtesy of Taste & Tell

You can always make a flashy dump cake with a semi-intensive recipe. But at its core, dump cakes are delicious desserts of convenience. This recipe is a celebration of that simplicity. The recipe only contains four ingredients: cherry pie filling, crushed pineapple, yellow cake mix, and butter. And despite being so simple, it’s extremely delicious.

Get the recipe from Taste and Tell.

easy texas blueberry cobbler
Courtesy of Little Spice Jar

While traditional cobbler differs from dump cake in that cobbler has a more biscuit-like topping, the state of Texas does things a bit differently. Rather than the biscuit topping that other cobblers come with this Texas cobbler-esque dump cake recipe, is made with more of a cake topping.

Get the recipe from Little Spice Jar.

apple dump cake
Courtesy of The Seasoned Mom

This recipe uses a combination of Granny Smith and honeycrisp apples. While this recipe recommends using a spice cake mix, it also yields great results when using yellow cake mix.

Get the recipe from The Seasoned Mom.

blueberry crumble
Courtesy of Eating Bird Food

Rather than topping this dessert with cake mix, the dump cake is topped with an oatmeal pecan crumble. So although this recipe strays a bit from the traditional definition of a dump cake, it still has all of the basic dump cake  elements while being a bit of a healthier, plant-based option.

Get the recipe from Eating Bird Food.

pumpkin dump cake
Courtesy of The Seasoned Mom

Just like in a pumpkin pie, this dump cake recipe requires a bit more effort than just opening the canned and boxed ingredients and pouring them into a casserole dish. Once your pumpkin puree is mixed with the spices, it can be poured into the dish, covered with cake mix and butter and placed in the oven.

Get the recipe from The Seasoned Mom.

small peach cobbler with cake mix
Rebecca Clyde MS, RDN, CD / Nourish Nutrition Co

The South has some of the most delicious comfort food in the country, and a staple of the region’s dessert options is the peach cobbler. This cobbler recipe is made with cake mix, making it more of a dump cake. However, it also includes some added sweetness from the extra brown sugar and cinnamon.

Get the recipe from Nourish Nutrition.

aunt bee's 5-minute 5-ingredient cherry dump cake
Courtesy of The Seasoned Mom

A classic dump cake is simple, and although the fruit in a typical dump cake can include any variety of canned fruits, they also generally feature cherries as its main one. This recipe not only showcases cherries as the primary fruit, but it also uses only five ingredients! Where this recipe deviates from traditional recipes are the pecans on top, a creative touch that adds a little crunch to this delicious dessert.

Get the recipe from The Seasoned Mom.

strawberry chocolate dump cake
Courtesy of The Seasoned Mom

Chocolate and strawberries are an unbeatable combination that always goes well together, so it only makes sense that they’d go well in a dump cake together. One of the best parts of this recipe is that it’s packed with so much flavor, yet it’s only three ingredients, and like most dump cakes, it’s extremely simple to make, and for a dump cake, it’s relatively low on calories.

Get the recipe from The Seasoned Mom.

crockpot pumpkin dump cake
Courtesy of Show Me the Yummy

While pumpkin pie is the more popular fall dessert, this pumpkin dump cake is an undeniably tasty treat you can enjoy year-round. Although this recipe is a little more intensive than other dump cakes that have just three or four ingredients, these incredible flavor combinations make the extra effort worth it.

Get the recipe from Show Me the Yummy.

s'more butterscotch caramel dump cake
Courtesy of What’s Gaby Cooking

Who says that dump cakes all have to have fruit in them? This recipe proves that theory wrong, by being just as yummy and easy to make as any other fruit-filled dump cake. Best of all, it only takes 15 minutes of prep time!

Get the recipe from What’s Gaby Cooking.

cherry dump cake pineapple
Courtesy of Gift of Hospitality

If you grew up loving dump cake, chances are this is the one that stole your heart. With the sweetness of the cherries, and the slight tartiness of the pineapple, it’s a perfect combination in a simple, easy-to-make dessert. This recipe is a true classic.

Get the recipe from Gift of Hospitality.