My holiday baking is best summed up by my attempt at fulfilling a boyfriend’s request for a gingerbread house. It cracked, it sagged, and it finally gave up and collapsed — much like the relationship. I tried my best, but ultimately, neither the baked goods nor the romance could be saved.
The truth is, I want to be someone who bakes for the holidays, but I feel stymied. How can I bake when life is chaos? How can I bake when vanilla beans are so expensive? And how can I bake when no one will like what I’ve made anyway?
So, instead, I’m that person who guiltily contributes a box of Trader Joe’s best and hopes to sneak by unnoticed. Each year, I resolve that this season will be different, but this year I decided to make it happen. For inspiration, I gathered wisdom from several baking wizards.
Cookie shirkers of the world, unite: Together, we can face unafraid the plans that we’ve made. Here are three common obstacles and how to get beyond them.
Obstacle No. 1: Disorganization
However full your calendar, it probably overflows during the holidays. Baking can feel like an unwelcome extra bit of insanity, but it doesn’t have to. Sarah Jampel, recipe developer and test kitchen manager for King Arthur Baking, says that pre-measuring dry ingredients for your recipes cuts prep time significantly: “Just be sure to label the containers with contents and amounts so you don’t mix them up.”
A one-bowl sheet-pan cookie so easy a child taught me how to make it
She also advises printing recipes and noting bake temperatures, times and pan sizes (or other required equipment, like cutters, sifters, mixers and thermometers) at the top of the page. “You’ll avoid accidentally baking your cookies at too high of a temperature, you’ll make sure you have all of the equipment you need, and you can make a list of [baking order], starting with the lower temperature bakes and working your way up,” she said.
Working ahead also can relieve holiday gridlock. “You can even start holiday baking [early] and freeze things,” said Dorothy Kern, who blogs at Crazy for Crust. If you have storage space, you can make most cookie doughs and refrigerate or even freeze them. If you want to actually bake ahead and freeze, brownies and bar cookies are particularly good choices, Kern said.
Sugar and chocolate are pricey enough, but add in specialty ingredients and it could break your budget. That’s why Dan Pelosi, food and lifestyle creator of GrossyPelosi, encourages the inexperienced to start with simple, well-tested recipes. “My Peanut Butter Blossoms use normal pantry ingredients, even for non-bakers,” he said. “The hardest part is peeling the wrappers off the chocolate Kisses, and they are always the most popular cookies on the table.”
If you must have a pricey ingredient, Pelosi tries friends and family first, then encourages buying just the minimum. “Go to a bulk store and see if you can buy just the exact amount you need,” he said. If you belong to a neighborhood Buy Nothing group or have friends to ask (the women in my local She Runs This Town are so helpful), see if someone has what you need and wouldn’t mind offering up a bit — obviously, in exchange for some cookies.
Paul Arguin and Chris Taylor, authors of the new “Fabulous Modern Cookies,” support a well-placed swap of like for like, saving money and frazzle. “For example, macadamia nuts are delicious, but also very pricey. Substituting another type of nut, like cashews, is smart,” Arguin said. “Will the cookie taste exactly the same? No, but if you’re saving $10 per pound, it might be good enough.”
While essential ingredients, such as almond paste, are absolutes, Jampel pointed out that some ingredients can be skipped completely, if not subbed. “Check out the recipe’s reviews for successful substitutions,” she added.
Obstacle No. 3: Fear of failure
Ultimately, people like cookies and they’re not going to blast you for your efforts (forgetting a dear friend who called the chocolate chip cookies I made for his birthday “a little dry”). “We see baking as a form of love,” Taylor said. “If you are baking with love, it doesn’t matter if your cookies end up a little misshapen or darker at the edges.”
They also mentioned that cookies are much easier to make the second time around, once you’ve done a trial batch. “If you have the time, budget and patience, you can remake anything you’re not happy with.”
But if you’re still feeling less than confident, Kern has the solution: Employ sweet camouflage. “Slap on some frosting and a generous amount of colorful sprinkles and no one will notice,” she said.
“Release expectations of perfection,” Pelosi said. “Let a mess happen. People can taste the energy that goes into what you are baking, so make sure it’s delicious.”
If the mood stays light and sweet, the cookies will be the same.
PHOTOGRAPHY TERRY BRENNAN, FOOD STYLING LARA MIKLASEVICS
‘Tis the season for baking. Making your own holiday cookies can be rewarding and they are always welcome at get-togethers throughout the season, whether you’re hosting or arriving with a delicious plate of treats in hand. Plus, they make great homemade gifts. I have gathered tips and recipes from pros that I have highlighted so you can create with confidence not only this holiday season, but anytime the baking urge strikes throughout the year.
The following classic sugar cookie recipe by cookbook author Georgeanne Brennan will not only make beautiful snowflakes or other wintry shapes now, but you can also make treats for any occasion when you cut the cookies into a variety of other shapes. Twin Cities chef and Saint Paul College Culinary Arts instructor Jason Ross’ tips will help you turn out the cookies you are looking for. And everyone’s favorite chocolate chip cookie can be made soft and chewy or crisp if you have pastry chef and author of “The Baking Answer Book,” Lauren Chatmann’s tips and recipes on hand. Plus, elevate bars with more tricks from Chatmann below.
Cookie Do’s from Chef Jason Ross
Scrape the Bowl to Get Fully Mixed Dough: Do it after adding eggs, adding dry to wet, or wet to dry ingredients. Mixer attachments don’t quite reach the bottom and sides of the bowl, so parts are left unmixed. Use a rubber spatula to stir the unmixed parts back into the dough—and scrape the paddle attachment.
Chill Dough: It makes the batter easier to handle and gives the flour enough time to fully absorb liquid ingredients and make more cohesive dough. For the chocolate chunk cookie recipe here—and any soft cookie—bake from frozen. This will make a tender, crisp cookie that stays chewy. Keep cookie dough balls ready in the freezer during the holidays in case of a “cookie emergency.”
Finish with Salt: Just a few grains sprinkled on top of cookies will hit the palate first, bringing out a surprise flavor. Don’t use enough so you can see it—like a pretzel—rather just enough for a little salt secret.
Cool Cookies on a Rack: Cookies will continue to cook on a hot pan. Unless they are too soft or fragile to handle, lift them off the pans with a metal spatula and cool on a wire rack.
Color Cues: Pay attention to brown color, especially around the edges, and lighter color in the center. This helps determine a perfectly baked cookie. Since cookies are small, a little more or less time makes a big difference. If a few cookies on a tray are done, pull them off to cool and finish cooking the rest of the tray.
Rotate Pans Halfway Through Cooking: All ovens have hot and cool spots, so rotate pans to get even cooking across the tray. Be quick—you don’t want the oven to cool down.
Cookie Spread
The way cookies spread and thin has a big impact on crispness, softness and chewiness.
More creaming of butter and sugar will add more air and increase spread; less creaming, less spread and chewier cookies.
Lower temperature, even just a few degrees, slows cooking and gives dough more time to spread. Higher temperature will make thicker cookies since it firms up more quickly.
More sugar—especially syrupy sugars like honey, molasses or corn syrup—will spread more easily and make softer cookies.
Overmixing flour decreases spread and makes doughy cookies.
Must-Have Tools
Scoop: Use a portion control scoop instead of a spoon to avoid messy fingers and quickly and easily scoop balls the same size. Cookies will bake more evenly. Use it for ice cream too!
Digital Scale: It helps especially for measuring flour—the weight difference between cups of flour can be surprising. If you don’t have a scale, avoid compressing flour into the measuring cup; instead spoon it into the cup and level off with the straight edge of a butter knife.
Parchment Paper and Silicon Mats: These both work well and have an impact on cooking besides ease in cleanup: Cookies will spread more on a silicon mat and stay tighter on parchment. Parchment browns cookies a little more nicely, while silicon will yield slightly less crisp cookies. If I had to choose one, it would be parchment, but both have their place depending on the cookie you are baking. If using aluminum pans without either of these, try a little oil spray and possibly dust with flour if you have had trouble with cookies sticking.
More tips from Ross and use your skills with his Chocolate Chunk Cookies recipe here.
Tips and Tricks: Soft and Cakey Chocolate Chip Cookies • Cream butter and sugar together. This will whip some air into the dough, so your cookies will puff up a bit in the oven. • 1/4 teaspoon of baking powder along with the soda will provide more lift. • Subtract an egg yolk and use an extra egg white. Egg whites contain more water than yolks which when evaporated in the oven helps cookies rise like little cakes. • Use twice as much brown sugar as white sugar. Brown sugar, which is slightly acidic, will react with the baking soda in the recipe for a higher rise. • Add a little extra flour—enough to add structure, but not so much that it will dilute the sweetness of the sugar. • Chill the dough. Cold dough will spread less in the oven, creating a cakey center. • Turn up the heat. If a recipe calls for 350°F, increase to 375°F. A hotter oven will allow the cookies to bake before spreading, resulting in cakey centers.
Tips and Tricks: Crisp and Chewy Chocolate Chip Cookies • Use melted, not softened butter for a dense and chewy texture. • Subtract an egg white and add an extra egg yolk. Yolks have more fat than whites, which give cookies a fudgy rather than cakey texture. • Use twice as much white sugar as brown. White sugar, which is neutral rather than acidic like brown sugar, will cause your cookies to spread rather than rise. It will also give your cookies a nice crispness around the edges. • Turn down the heat. A cooler oven will let the cookies spread without drying out. • Do not overbake. Cookies will continue to firm up and dry out as they cool off, so pull them out of the oven while they still look a little damp on top.
Find more tips from Chattman and recipes for soft and cakey and crisp and chewy chocolate chip cookies here.
Plus: Elements of science combine to create your perfect treat in her Cakey or Fudgy Brownies Recipes
Sparkling Snowflake Cutout Cookies and Icing
PHOTOGRAPHY TERRY BRENNAN, FOOD STYLING LARA MIKLASEVICS
Sparkling Snowflake Cutout Cookies
Makes 2 to 3 dozen cookies
I like to make snowflake cutouts in different shapes and sizes, then ice some with white frosting and some with blue, and decorate with sparkling white and blue sprinkles. For a variation, use holly-leaf cookie cutters and green food coloring with red hot candies for berries. Like all iced, cutout cookies, these are best eaten within 1 week. —Georgeanne Brennan
For the Cookies 1¾ cups all-purpose flour ½ teaspoon baking powder ¼ teaspoon salt ²⁄³ cup unsalted butter, at room temperature ½ cup sugar 1 large egg 1 teaspoon pure vanilla extract
For the Icing 2 egg whites 4 cups powdered sugar, or more as needed Blue food coloring or blue gel
For the cookies: Heat oven to 400°F. Line a baking sheet with parchment paper.
In a bowl, whisk together flour, baking powder, and salt. In a separate bowl, beat together butter and sugar until light and fluffy. Beat in egg and vanilla. Add flour mixture in three batches, mixing each time until a smooth, not sticky, ball can be formed. Divide into two balls, wrap in plastic wrap, and refrigerate 15 to 20 minutes.
Flour a rolling pin and lightly flour a working surface. Roll a ball out to a generous ¹⁄8 inch thickness. Using snowflake cookie cutters, cut out several shapes and sizes. Using a metal spatula, transfer to baking sheet, spacing cookies at least ½ inch apart (they will expand as they bake). Shape remaining dough scraps into a firm ball and repeat. Repeat with second dough ball.
Bake 6 to 8 minutes, until delicately browned on bottom and pale golden on top. Remove from oven and let cool on sheet at least 5 minutes. Using a metal spatula, gently loosen cookies and transfer to a flat surface to cool slightly before icing. (If cookies are warm, icing will spread more easily. However, icing when cookies are fully cooled is fine.)
For the icing: In a large bowl, using an electric mixer, beat together egg whites and sugar 5 minutes, until stiff enough to spread. If too stiff, add 1 teaspoon water and beat. If too thin, continue beating and add up to ½ cup powdered sugar.
Divide icing into 2 bowls. To 1 bowl, add 2 drops blue food coloring and mix well with a spoon.
Using a knife or stiff spatula, gently spread icing on cookies. Add sprinkles immediately. Set aside on a flat surface to cool completely.
Arrange cookies in a single layer on a platter and cover loosely with wax or parchment paper. They will keep up to 3 days at room temperature. To store in an airtight container up to 1 week, line container with wax or parchment paper. Place cookies in single layer. Top with a layer of wax or parchment paper and repeat.
A Sweet Gift: Choose a special teacup and saucer set and package it with a bag of cookies and a favorite tea to create a gift for a perfect pause, a quiet minute.
Nutrition info (per serving) Sparkling Snowflake Cutout Cookies: Calories 142 (38 From Fat); Fat 4g (Sat. 3g); Chol 17mg; Sodium 35mg; Carb 25g; Fiber 0g; Protein 1g
More Cookie Recipes
Stenciled Gingerbread Cookies Recipe
Enjoy the seasonal taste of gingerbread in grown-up style—and you don’t need to worry about whether to start with a bite of a little gingerbread fella’s feet or head. (If you want to bake ahead, these cookies can be stored carefully in an airtight container for about two weeks.)
Cranberry Macadamia Nut Cookies Recipe
Keep old cookie friends but make new ones this holiday baking season
Toffee Squares with Pretzel Topping and Hazelnut and Honey Diamonds
PHOTOGRAPHY TERRY BRENNAN, FOOD STYLING LARA MIKLASEVICS
Bars and Brownies
You may think of bar cookies as basic party fare, but if you elevate them by using delicious ingredients and attractive decorations, they make a perfect addition to holiday dessert choices. While they are easy to make, there are some guidelines that Chattman suggests for good results plus recipes.
Raise the (Dessert) Bar
Easy yet delicious and decorative, bar cookies elevate options for serving and gifting, including Toffee Squares with Pretzel Topping and Hazelnut and Honey Diamonds recipes.
Patchwork Bars
PHOTOGRAPHY TERRY BRENNAN, FOOD STYLING LARA MIKLASEVICS
Patchwork Bars Recipe Plus Top Tips for Baking Bars
Elevate easy-to-make bar cookies with festive toppings for any get-together or homemade gift this holiday season
Hungry for More?
Dark Chocolate Sea Salt Brownies Recipe These intensely chocolate, not-too-sweet brownie bites by cookbook author Georgeanne Brennan are a tasty marriage of chocolate and a hint of savory.
Brown Butter Blondies Recipe
Celebrate with this twist from Twin Cities baker Sarah Kieffer
Living in a small space seems daunting, let alone cooking in one.
But Virginia Beach native A.J. Forget does both and has written his debut cookbook, “The Buslife Kitchen: Cuisine for the Modern Nomad.”
He, his girlfriend, Ayana Otteman, and their puggle live in a 2001 converted school bus (Sweet Bea) that gives them 90 square feet.
Forget worked as a wildland firefighter for the National Park Service in his 20s but his body couldn’t handle it anymore, he said.
In 2017, Forget started the next adventure: writing, cooking and building Sweet Bea with Otteman. He uses funds from the sale of his book, savings and odd jobs to make this dream a reality.
Forget grew up in a family where cooking was important to the menand he learned by watching his father. He also had a passion for writing and the desire to explore places he read about in novels. Forget attended the Virginia Beach Friends School and went to the College of William & Mary where he studied psychology and environmental science.
Ayana Otteman, A. J. Forget and a puggle (not pictured) live full-time and travel in a 2001 converted school bus named Sweet Bea. (Lisa Siciliano)
Since 2020, the bus lifers have wandered to places such as national parks where they set up camp for a week. Forget uses his three-burner propane cooktop to whip up pad thai and green chile, shrimp and corn chowder. He puts leftovers in the 70-liter refrigerator or shares them with other nomads.
Forget admits cooking in a bus is difficult.
“It makes you a better cook in the end because you have to be focused,” he said in a phone interviewfromStewarts Point campground in Lake Mead National Recreation Area in Nevada.
Forget suggests preplanning and organizing the cooking steps. Cooks need to consider the size of their workspace and how to utilize what’s in the kitchen already — a grocery store isn’t always nearby.
“Once you do this enough times,” he said,” it makes you a more efficient cook.”
Let’s Eat
Weekly
We’re serving up restaurant reviews and news about the local food scene every week.
He recommends recipes that don’t rely on equipment like a food processor or oven. Omit and modify recipes that have lots of ingredients and extra steps.
For example, “If there are 10 spices for a recipe, you probably don’t need them all,” he said. “I don’t think it impacts the quality of the food.”
He “bakes” on the stovetop but it takes practice and learning how heat works with different pans.
“We’ve got it pretty much down to a science,” he said, bragging about the pumpkin cookies Otteman made earlier in the day.
His cookbook features over 100 recipes from huli-huli chicken with Hawaiian mac salad, to Vietnamese pesto pasta with clay pot pork. He even has a stove-roasted turkey that looks appetizing.
Forget includes a salsa blanca recipe similar to the white sauce at Plaza Azteca — a Mexican restaurant chain — as an ode to living in Hampton Roads.
Rekaya Gibson, 757-295-8809, rekaya.gibson@virginiamedia.com; on Twitter @gibsonrekaya
Sweet Bea is a 2001 converted school bus driven by A.J. Forget, author of “The Buslife Kitchen: Cuisine for the Modern Nomad.” (A. J. Forget)
The internet is full of cooking tips and hacks, but not all of them become tried-and-true habits for every cook. I learned that for myself when I asked the BuzzFeed Community to share the well-known pieces of cooking advice that they ignore in their own kitchens, and TBH, it made me reconsider some of the tips I consider to be “fact.”
These are some of the most surprising responses.
1.
“I always use salted butter in recipes, even when it calls for unsalted. I don’t get the point of using unsalted and then adding salt separately. Plus, if I want butter in the house for bread, I don’t want to have to buy two different kinds.”
2.
“I’ve never, in 45 years of life, run water over my chicken to clean it. That’s an easy way to spread germs all over your sink and kitchen. I’ve patted it dry so that slimy ick is gone, sure…but run it under running water? Nope. Cook your chicken to 165°F and anything on it will give up the ghost.”
3.
“I never, ever measure vanilla. I’m well aware that baking is chemistry and proportions matter, but nothing’s ever been hurt by having approximately triple the amount of vanilla in a recipe.”
4.
“Pouring the rendered fat away from ground beef. That’s where all the flavor is! Unless you’re using really cheap, really fatty beef, there’s no need to dump it down the drain.”
5.
“Slowly adding stock to risotto and standing and stirring it for ages. Some people claim they find it therapeutic, but I find it tedious. I just dump all the stock in and let it do its thing, and I’ve never made a bad risotto! I’m convinced the whole thing is a myth.”
6.
“I press down on my burgers on the grill to get those nice grill marks and keep them flat. It does NOT make them dry, I swear!”
7.
“Bringing eggs to room temperature before baking with them. I understand the reasoning, but seriously, when has this ever made a difference in taste or texture?”
8.
“Sifting flour isn’t always necessary, and the lumps usually come out when you combine it with your wet ingredients anyway. I just use a whisk to blend it together, and I’ve never encountered any ‘lumpy’ flour in my baked goods.”
9.
“I don’t mind ‘crowding the pan’ when cooking mushrooms. Yes, it’s true the mushrooms will steam instead of brown, but that’s only at first! If I walk away for a bit, the water will eventually evaporate and the mushrooms will, in fact, brown. It’s my lazy-mom method to cooking because who the hell has time to do ‘batches?’ My pan is as crowded as my schedule.”
10.
“I was a certified executive chef for 15 years and I never once salted my pasta water. There is a ton of sodium that naturally occurs in most food that you serve with pasta and if you season your food and sauce correctly, there’s no need to salt the water.”
11.
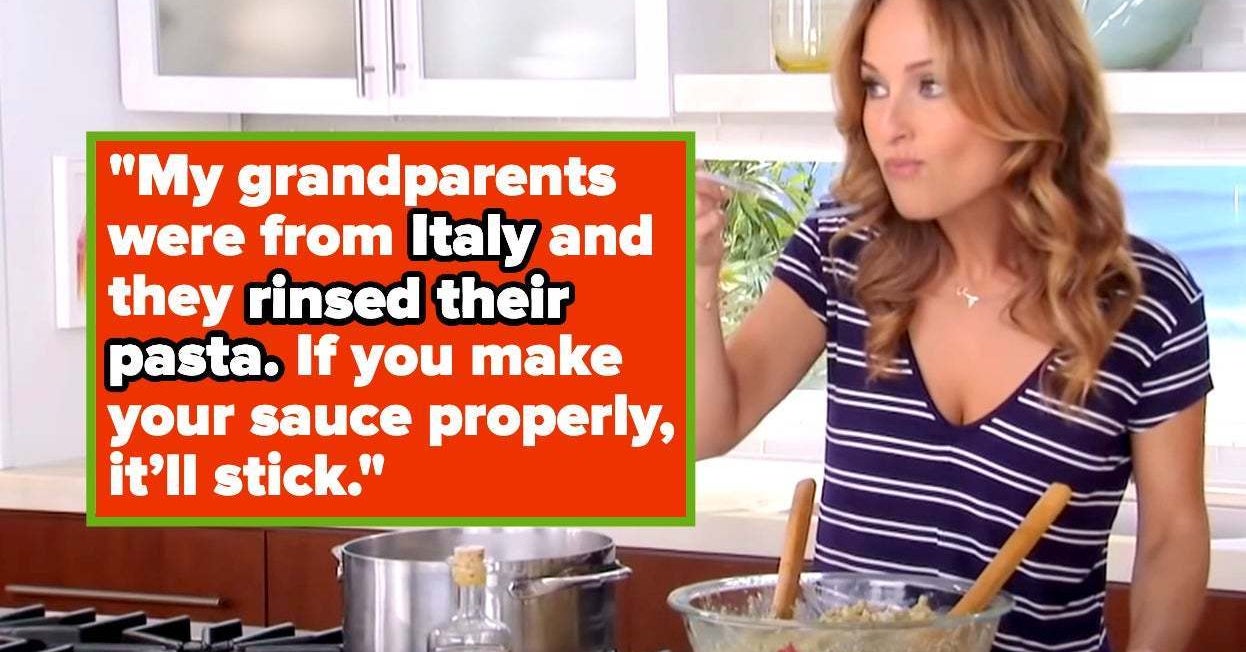
“I always rinse my cooked pasta. Chefs will claim that if you rinse your pasta, the sauce won’t stick to it well. That may be true in a restaurant environment where sauces aren’t cooked long enough to thicken properly, but not in a home kitchen. My grandparents were from Italy and they rinsed their pasta. If you make your sauce properly, it’ll stick.”
12.
“I live in Colorado and I have never once followed the ‘high altitude’ cooking instructions crap. Things may take a bit longer to boil and yeasted baked goods definitely take a bit longer to rise, but for everything else, from baked goods to rice, I’ve never followed the high-altitude directions. Most of it says ‘one more egg,’ ‘more water,’ ‘more oil.’ Meh, I’ve noticed nothing different in terms of taste and texture.”
13.
“I cook pretty much all the time and I never let the oven entirely preheat — unless I’m making baked goods like cookies or cakes. I don’t have the patience for it and for most things you’re cooking, it’s really not that important.”
14.
“I almost always disregard cooking times in recipes. Timing is more like a guideline than an actual rule! Your stove and oven are not calibrated the same way as the recipe’s author. Use your senses to tell when something is done. You can see if the chicken is golden brown, you can hear if the oil you put your veggies in is hot enough, and you can smell if the garlic is fragrant. Trusting yourself in the kitchen is a chef’s best tool!”
15.
“I cook every day, and I ignore expiration dates 99.9{d2b09b03d44633acb673e8080360919f91e60962656af8ade0305d5d8b7e4889} of the time. In most cases (especially foods like dairy or meat), you can tell by sight, smell, or texture if an ingredient is still good. Ingredients are usually fine past their expiration dates, so why waste them unless they’ve actually turned?”
16.
“People still have this old, racist idea in their head (from old anti-Asian propaganda) that MSG is bad. It is not any less healthy than any salt and it tastes amazing! If you don’t use it, grab a shaker of Accent the next time you are shopping for spices and give it a try.”
17.
“When I’m cooking pasta, I only fill the pot with enough water so that my noodles will barely be fully covered. Catch me never filling up all six cups of water when making a package of Kraft mac ‘n’ cheese.”
18.
“I ignore the common advice that fresh herbs are always better. This isn’t always true. A lot of times they can be either overpowering or don’t come through at all!”
19.
“I generally don’t mix wet and dry ingredients in separate bowls when recipes call for it. I mix up the wet ingredients, then pour in the flour and other dry ingredients, then mix it all together. I’ve never noticed a difference between when I do it that way or the ‘right’ way if I’m being perfectly honest.”
What’s a piece of cooking advice that you always ignore in your own kitchen? Sound off in the comments. 👇
Get all the best Tasty recipes in your inbox! Sign up for the Tasty newsletter today!
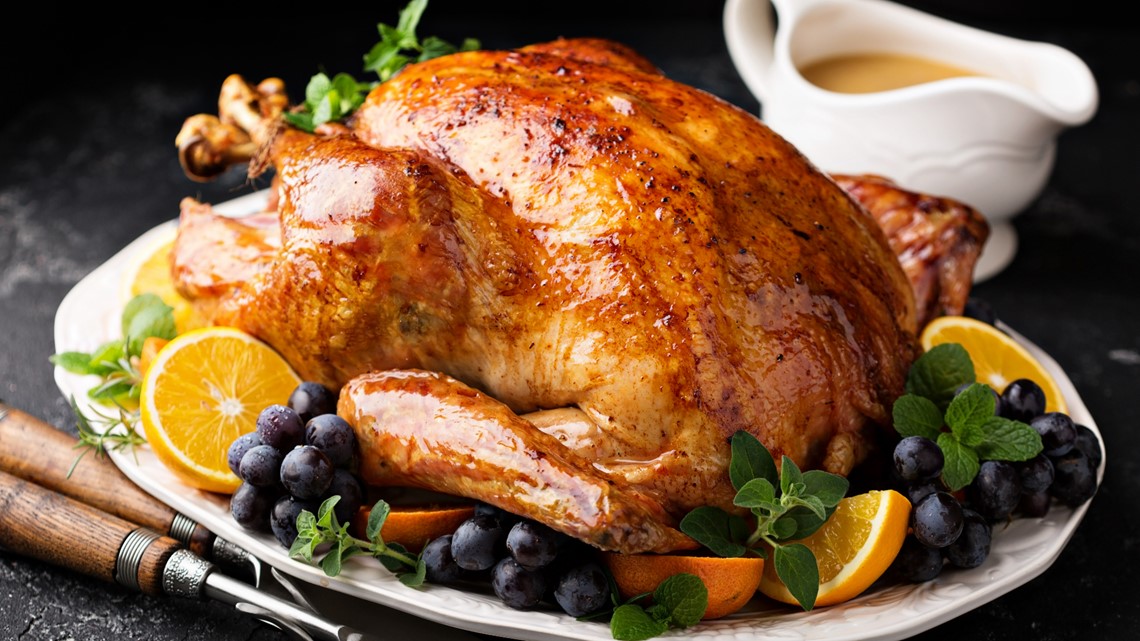
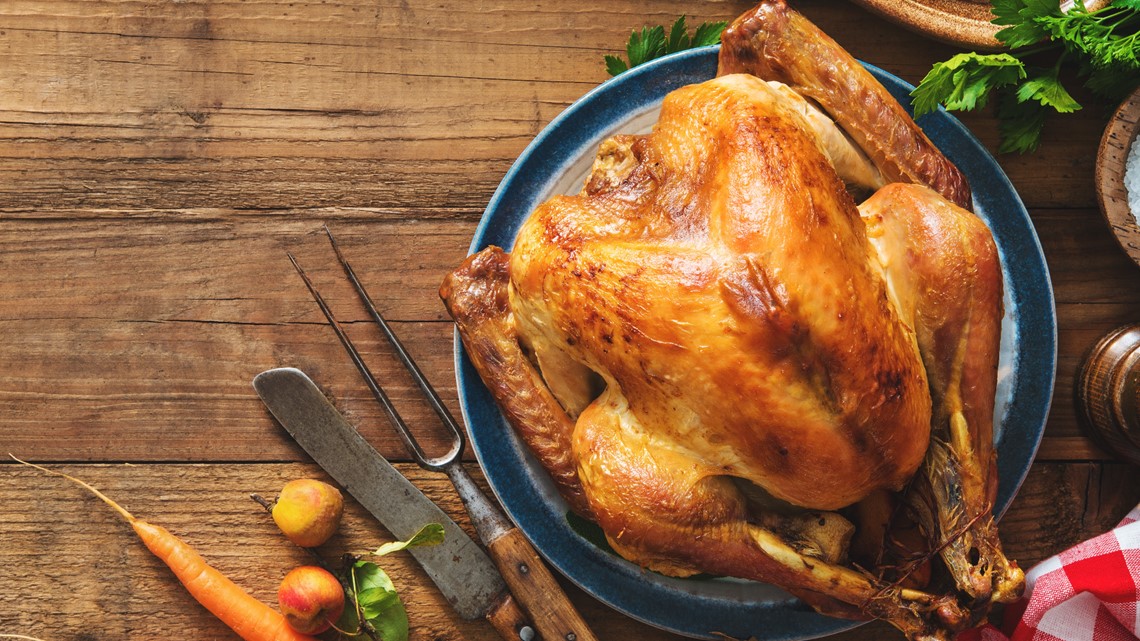
Use these tips for marinating, brining, baking and frying your Thanksgiving turkey.
COLORADO, USA — Having a perfectly cooked turkey as the centerpiece for your Thanksgiving meal can seem intimidating.
But, in reality, cooking a turkey is actually pretty easy.
Here are some tips and tricks to make sure yours comes out perfect.
Roasting Basics
Here are the basic steps to roast a turkey, from Butterball:
Preheat oven to 325°.
Remove bag with giblets from inside the turkey. Drain juices and lightly pat the turkey dry, using paper towels.
Place the turkey on a rack inside a roasting pan*, breast side up. Turn the wings back. Brush or spray the skin with oil.
Insert an oven-safe meat thermometer into the turkey. It should be placed in the lower part of the thigh, not touching the bone.
Begin baking the turkey.
Once the turkey is about 2/3 done, loosely tent with foil so the skin doesn’t burn.
When you think the turkey should be done (check time estimates below), check the temperature to be sure. One the thigh reaches 180° your turkey is done.
Put turkey on a platter on let stand 15 minutes.
*If you don’t have a rack, you can use vegetables or crinkled up aluminum foil to keep the turkey off the bottom of the pan. This ensures it cooks evenly.
Cooking time
The length of time you need to cook your turkey is based on how much it weighs and whether or not it is stuffed.
These are just estimates. Always look at temperature to determine whether or not your turkey has finished cooking. When the thigh reaches 180° and the breast or stuffing reached 170°, the turkey is done.
Brining
Brining your turkey before you roast it is a great way to be sure it stays moist.
As a general rule, you should brine your turkey for about an hour for each pound, according to Butterball. Here’s how it works:
The night before roasting, remove the giblets from your turkey and rinse it inside and out.
Prepare your brine recipe. Mix ingredients until all salt is dissolved and it’s cooled to room temperature.
Place turkey, breast side down, in your brining container or bag. It needs to be able to fit in your fridge and be made of food-grade plastic, stainless steel or glass.
Pour in liquid until in completely covers turkey.
Place in refrigerator for about one hour per pound of turkey.
Remove turkey from brine. Rinse and gently pat dry. Roast as directed above.
Marinating
Where a brine is for keeping a turkey moist, a marinade is to add flavor.
There are hundreds of recipes for turkey marinades: everything from spicy Cajun to sweet pineapple and teriyaki to rich bourbon and cola.
No matter what you choose, you’ll need about 1/4 cup marinade for every pound of meat, according to Butterball.
Depending on the recipe, you’ll marinate the turkey between two and eight hours. If it’s on the shorter end, you can make your marinade early so that the flavors have time to develop before you add the turkey. And be sure to never exceed eight hours to protect the turkey’s texture.
Always make sure the marinade is cool before pouring it over your turkey and marinate your turkey in the fridge.
Frying a turkey
If you aren’t going to roast your turkey, deep frying has become more and more popular over the last several years.
Fried turkeys are especially tender and moist, with a delicious crispy outside.
Here’s how it’s done, according to Butterball:
Remove the giblets from your turkey and ensure it’s completely thawed. Pat dry. If your turkey is 14 lbs or less it can fried whole. Otherwise, separate the legs and thighs to fry them separately*.
Add oil to your fryer. Don’t exceed the maximum fill line on an electric fryer. If you’re using a propane deep fryer, you can figure out the amount you’ll need by putting the turkey in the fryer, filling it with water until the turkey is just covered and marking the line.
Preheat the oil to 375°.
Submerge the empty frying basket in hot oil for about 30 seconds then remove to help prevent sticking.
If you’re using a propane fryer, turn off the burner. Add turkey to the basket and slowly submerge into the oil. If the turkey is not completely covered in an electric fryer, it will still cook fine.
Cook turkey about three to four minutes per pound, then check the temperature. When dark meat reaches a temperature of 175° F to 180° and white meat reaches a temperature of 165° F to 170°, it’s done.
Lift turkey in the basket from fryer and place in a pan or on paper towels to drain. Let stand for about 20 minutes before removing it from the basket to carve.
*If you’re frying pieces of your turkey separately, they should cook in oil that’s heated to 325°. It will take four to five minutes per pound.
Watch more from 9NEWS on the free 9NEWS+ app for Roku and Fire TV.
9NEWS+ has multiple live daily shows including 9NEWS Mornings, Next with Kyle Clark and 9NEWS+ Daily, an original streaming program. 9NEWS+ is where you can watch live breaking news, weather updates, and press conferences. You can also replay recent newscasts and find videos on demand of our top stories, local politics, investigations and Colorado specific features.
First and foremost, take a deep breath. Prepping a Thanksgiving feast shouldn’t be stressful if properly planned.
DALLAS — Want to avoid the stress of cooking a Thanksgiving meal?
Ask someone else to do it! Just kidding.
Cooking for Thanksgiving should be an enjoyable experience. What better way to celebrate those you love than by spending hours in the kitchen making a meal that you’ll be too tired to eat, anyway? Just kidding. Sort of.
I’m not a trained chef, but I am the self-proclaimed best home cook in the WFAA newsroom and I’m here to save you from holiday stress. Don’t believe me? I made Buc-ee’s Beaver Nuggets ice cream from scratch.
Here are my top five tips for ensuring an anxiety-free Thanksgiving meal prep.
1) Set the table the night before
It’s often one of the last things on our to-do lists before eating. In my family, one of the adults yells at a child to “Come set the table!” and it’s a mad dash to make sure the forks are on the left, spoons and knives (blade facing the plate) are on the right, and water glasses in their proper place before the turkey hits the table.
So, why wait and risk the rush?
Setting the table the night before you plan to eat. Get this chore out of the way so you can focus on making sure the food is ready on time.
Plus, setting the table the night before gives you a chance to look over the seating arrangement and make last-minute adjustments to prevent any …unsavory…dinner arguments.
2) Get baking ahead of time!
Many of your side dishes can be baked a day ahead of time, stored safely in the refrigerator, and warmed in the oven on Thanksgiving — even mashed potatoes!
A perfectly executed Thanksgiving meal prep means the only food you’re actually cooking on Thanksgiving is the turkey.
Casseroles, dressing (yes, I said dressing – not stuffing), mashed potatoes, desserts, you name it — can be made ahead.
Look at it this way — if your family came in early and you need a break, now you have an excuse to go to the kitchen for a couple of hours.
On Thanksgiving day, reheat your casseroles and dressing in the oven. cover them with aluminum foil so they don’t dry out. For side dishes like mashed potatoes, you can reheat them on the stovetop. Pro-tip for reheating mashed potatoes: go low and slow. Reheating at too high a temperature can scorch them. If the mashed potatoes seem dry, don’t be afraid to add more butter!
Whatever you do — do NOT reheat anything in the microwave. I don’t care how tempting it may be. Don’t do it.
3) Time to play Refrigerator Tetris
We all know the delicate balance of trying to store everything in the refrigerator the night before Thanksgiving. Dishes large and small are stacked on top of each other in hopes that nothing comes crashing onto the floor when you open the refrigerator door.
Save time and anxiety by doing a dry run with empty dishes before you begin cooking. Figure out what fits best in different parts of your refrigerator and freezer so that when the time comes to store your food, you’ll know exactly where everything goes.
Storing leftovers comes with its own stress. Remember to let food cool completely before they go into the refrigerator. Putting hot food in the fridge not only can create bacteria that cause foodborne illness, but it also can lower the overall temperature inside the refrigerator putting your already-stored items at risk of spoiling.
Here’s a handy FDA checklist on how to safely store food in a refrigerator or freezer.
This tip also gave me a good excuse to use this ridiculous stock photo.
4) Double the gravy!
Gravy is the unsung hero of every Thanksgiving meal.
Let’s be real. There’s a solid chance that you won’t be able to get all the food on the table … at the same time … and HOT!
Don’t worry about it! You have a secret stovetop weapon that will save the day.
Double your gravy recipe. When it’s finished, keep one batch in the gravy boat on the table. Keep the second batch on the stove on low heat with a lid so it stays hot.
If you’re like me, you pretty much pour gravy all over your Thanksgiving plate. Pouring hot gravy all over your Thanksgiving plate means the rest of the food gets a warm gravy hug.
When your gravy boat runs dry, you’ll have a hot backup batch on the stove ready to go.
5) Clean 👏 as 👏 you 👏 go 👏
Do not wait until after the meal to clean the kitchen.
Do not wait until after the meal to clean the kitchen.
You’re asking for trouble. The dishwasher will be full, dishes will be stacked in the sink, the garbage bin will be overflowing, and Aunt Karen will be yelling for you to clean the kitchen. (No offense to anyone who has an Aunt Karen.)
Clean as you go. As you make each dish, take a minute or two, stop down, and clean up your prep space.
Also, divide and conquer! If you’re cooking the meal, you shouldn’t have to clean the kitchen. I don’t make the rules. I help everyone follow them.
This is, by no means, an exhaustive list of wisdom to make your Thanksgiving cooking stress-free. But, it’s a start!
Or, you could just order pizza. No one said you had to have turkey on Thanksgiving.
From me to you this holiday season, here’s to a safe, joyful, and delicious Thanksgiving 2022!




:quality(70)/cloudfront-us-east-1.images.arcpublishing.com/tronc/LW72KLYLYVA2HHFG7X3PNMVCYQ.JPG "Tips for cooking in a van, bus, RV or small kitchen")
:quality(70)/cloudfront-us-east-1.images.arcpublishing.com/tronc/H452XJ3OXNBLZF4GFUJH7CFEKE.JPG)
:quality(70)/cloudfront-us-east-1.images.arcpublishing.com/tronc/SLCIGBDLDZEDNHMRPLZEHUM2JU.jpg)