Ninja Foodi French Fries | Everyday Family Cooking

Ninja Foodi French Fries | Everyday Family Cooking

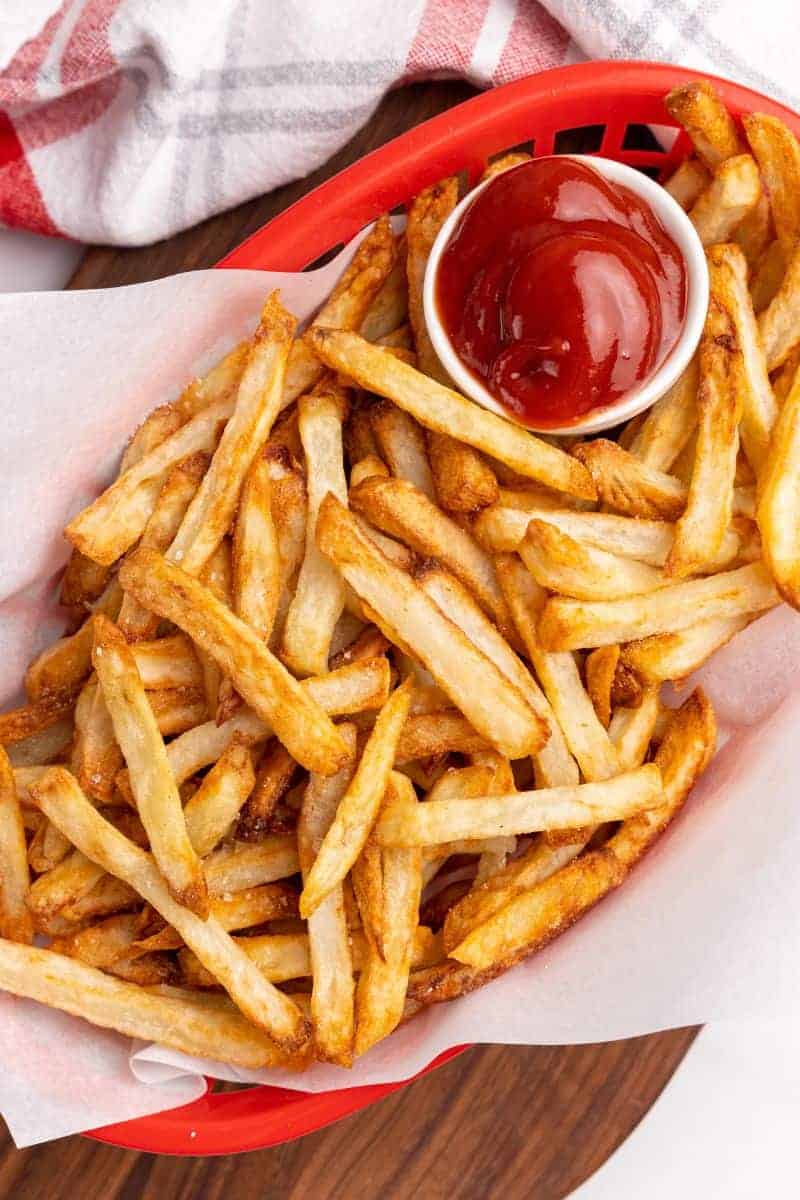
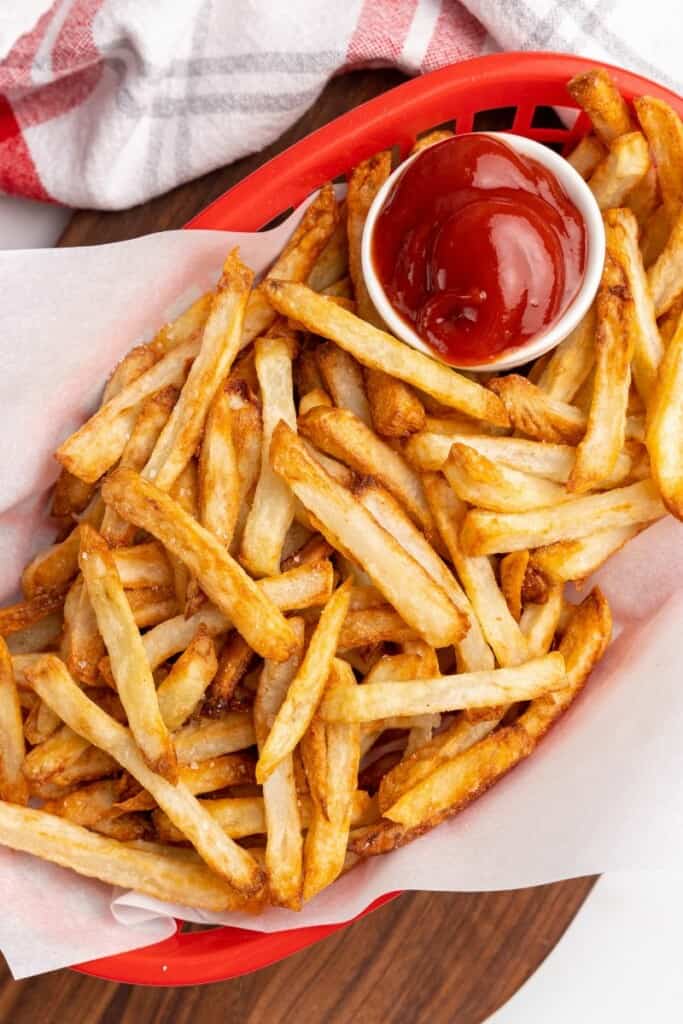
Ninja Foodi French Fries are super crispy, perfectly salted, and absolutely irresistible! You’ve never had homemade fries this delicious or this easy to make.
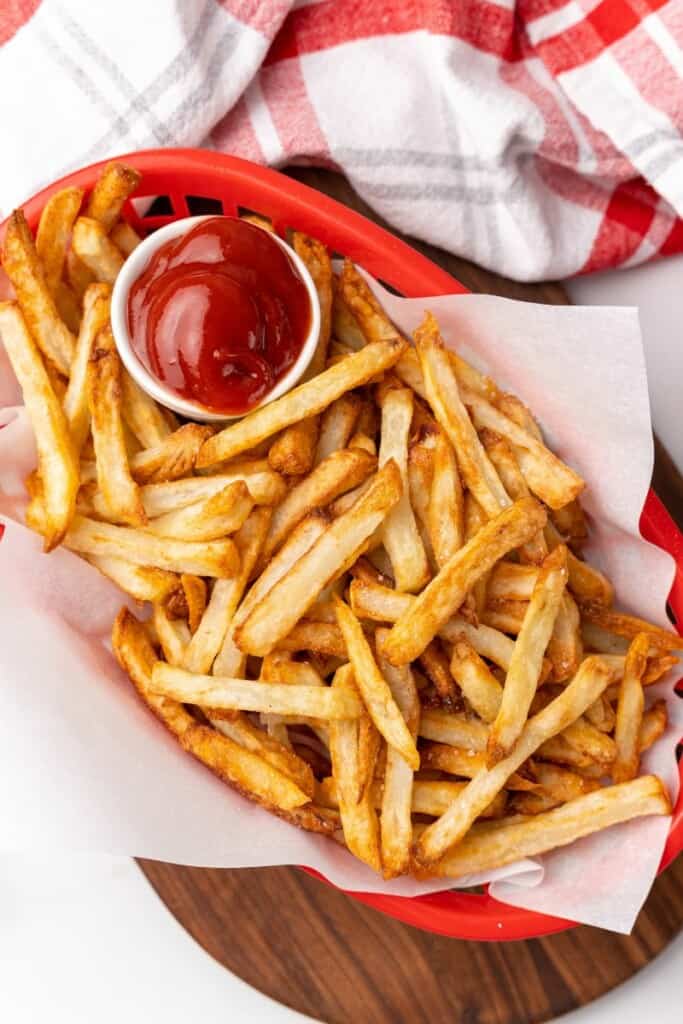
basket of french fries and ketchup

This post may contain affiliate links. If you click on a link and make a purchase, I may receive a small commission at no extra cost to you. For more information, please read my disclaimer.

Craving crispy, salty, hot-out-of-the-fryer fries? Skip the fast food joint and whip up these craveworthy Ninja Foodi French fries instead!

It’s never been so easy to make homemade French fries that taste so good. Just cut, soak, toss in oil, and let the Ninja Foodi handle the rest.

Best of all, you’ll only use a fraction of the oil you get from deep fried French fries!

I love making frozen French fries when I’m short on time.

But once I realized how easy it was to make fries from scratch, this has become my go-to method when I want an irresistible side the whole family will devour!

I used the Ninja Foodi 8QT Pressure Cooker and Air Fryer for this recipe. I find this to be a great size for my family of four!
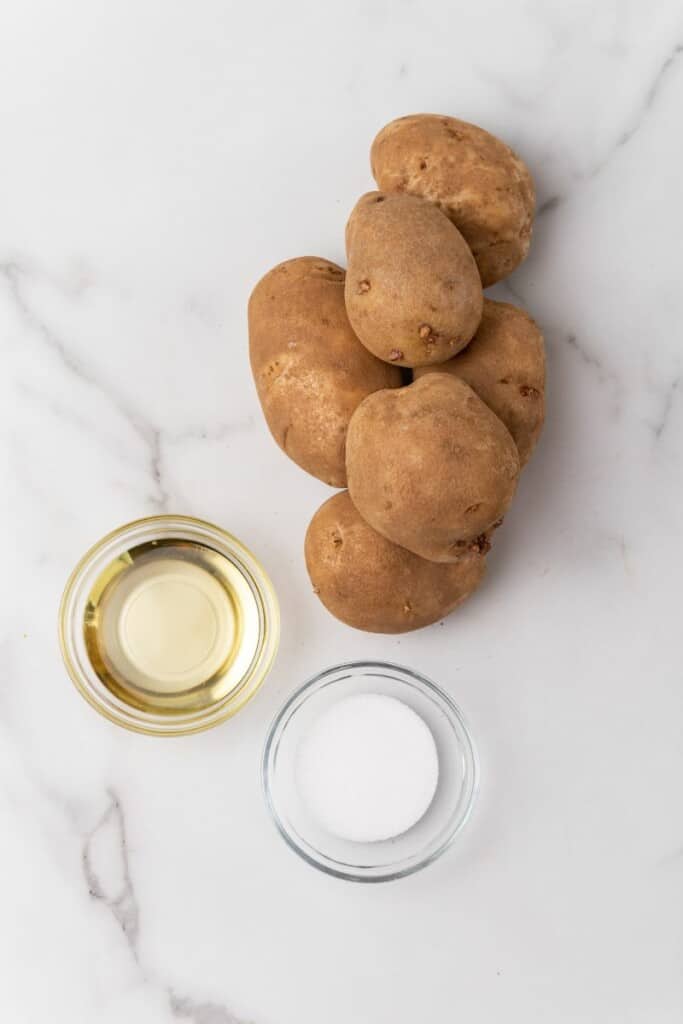
ingredients for french fries

How to Make French Fries in the Ninja Foodi

A full printable version of this recipe with ingredient measurements is available at the bottom of this post.

STEP ONE: Peel and wash all potatoes, then cut into ¼-inch rectangle French fries with a fry cutter or a knife.
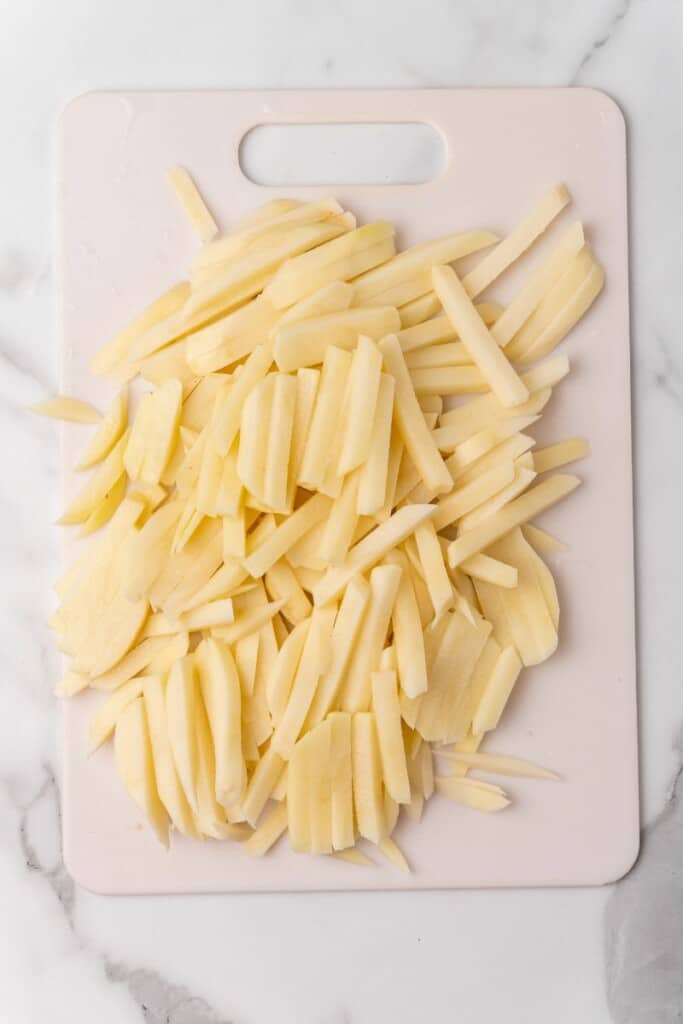
sliced french fries

STEP TWO: Rinse the fries, then soak in cold water with 1 tablespoon of salt for at least 30 minutes at room temperature or up to overnight in the fridge.
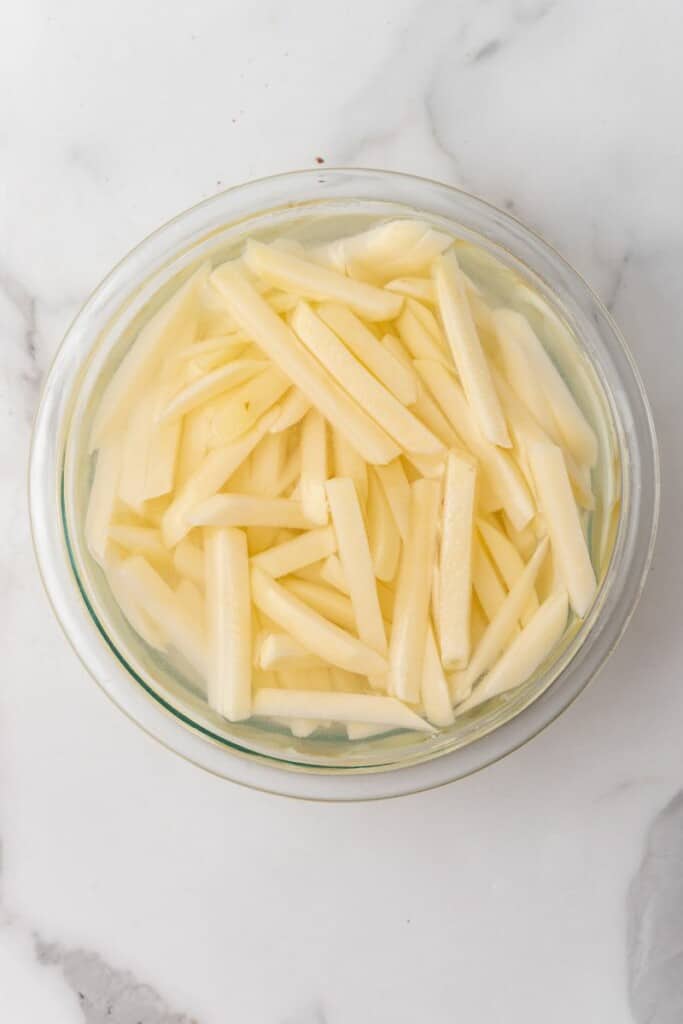
soaking fries

STEP THREE: Drain the water, rinse the fries, then pat them dry with paper towel until all of the moisture has been absorbed.
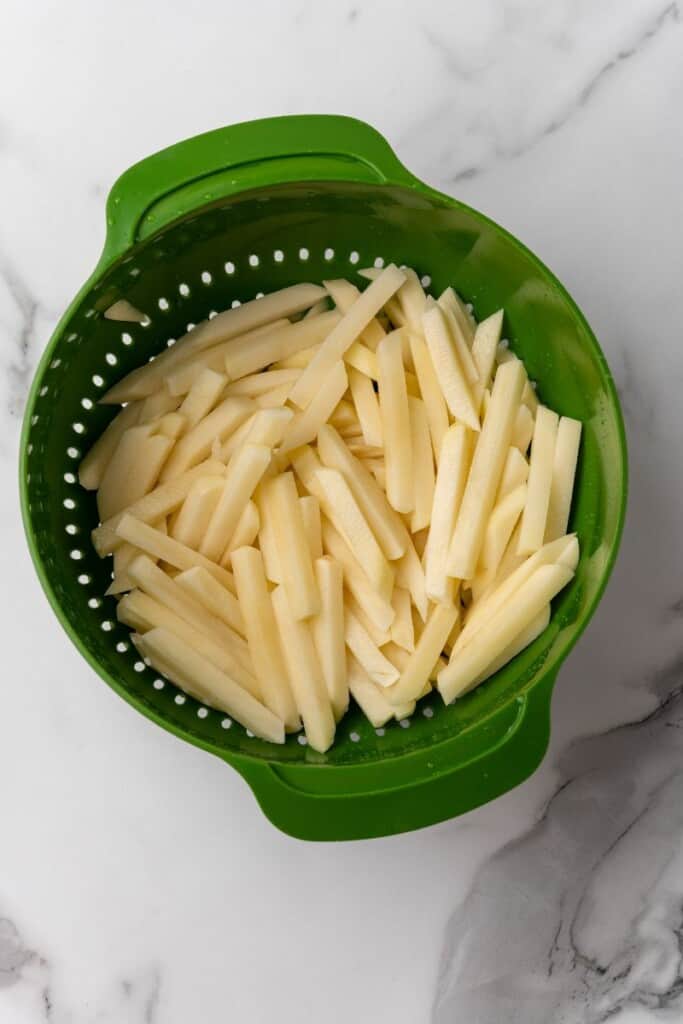
straining french fries

STEP FOUR: Drizzle the fries with oil and toss to coat.
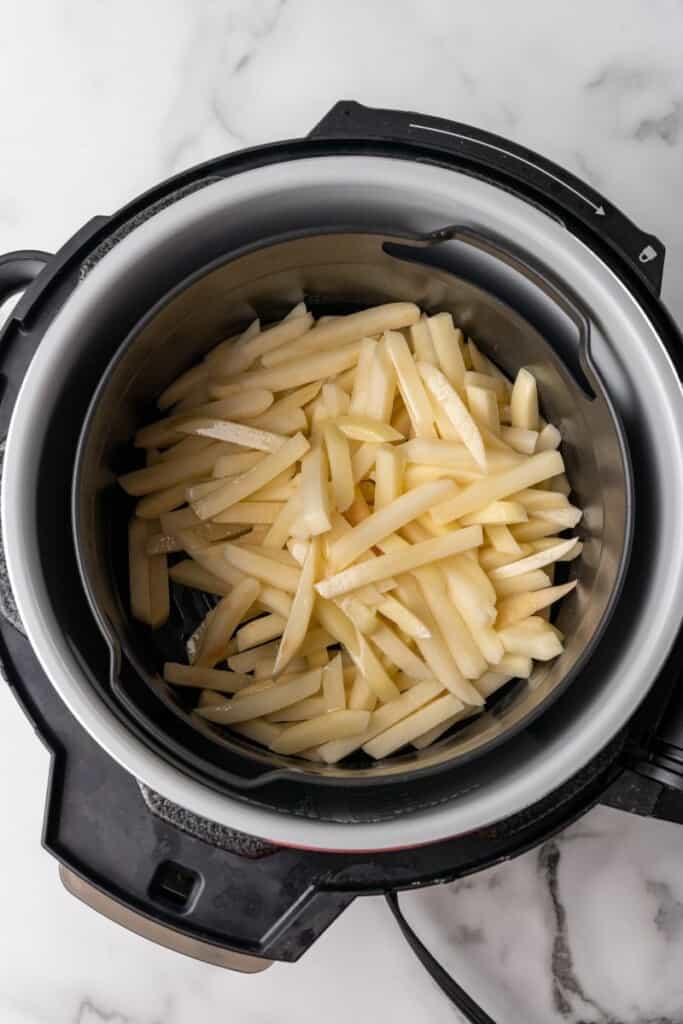
french fries in a ninja foodi

STEP FIVE: Air crisp at 390 degrees F in the Ninja Foodi for 25-30 minutes, shaking the basket every 5-10 minutes to make sure the fries cook evenly.
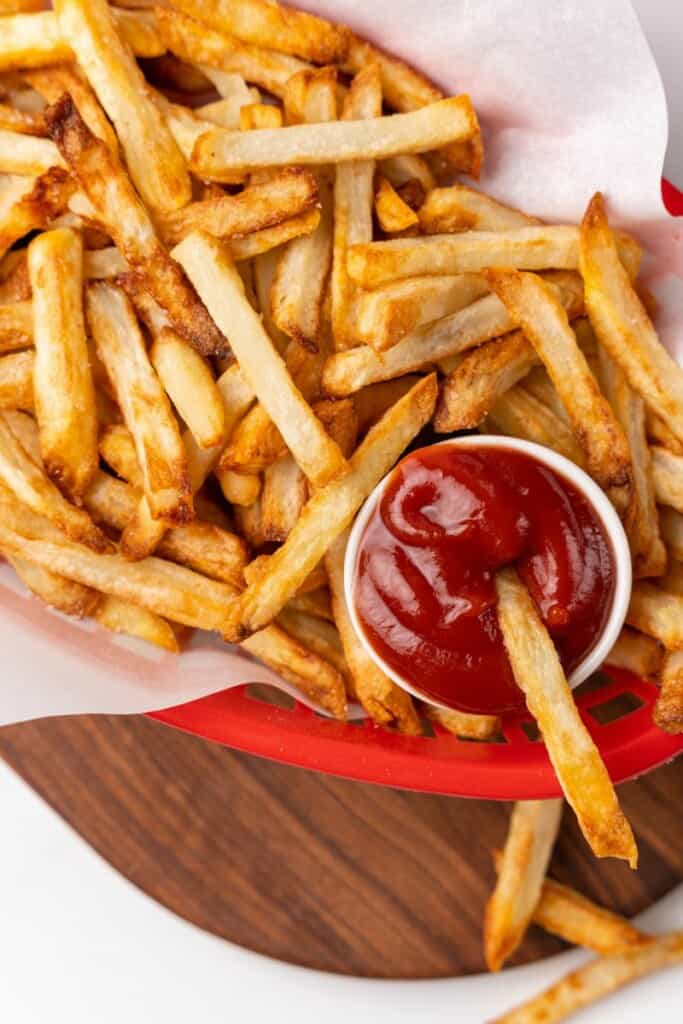
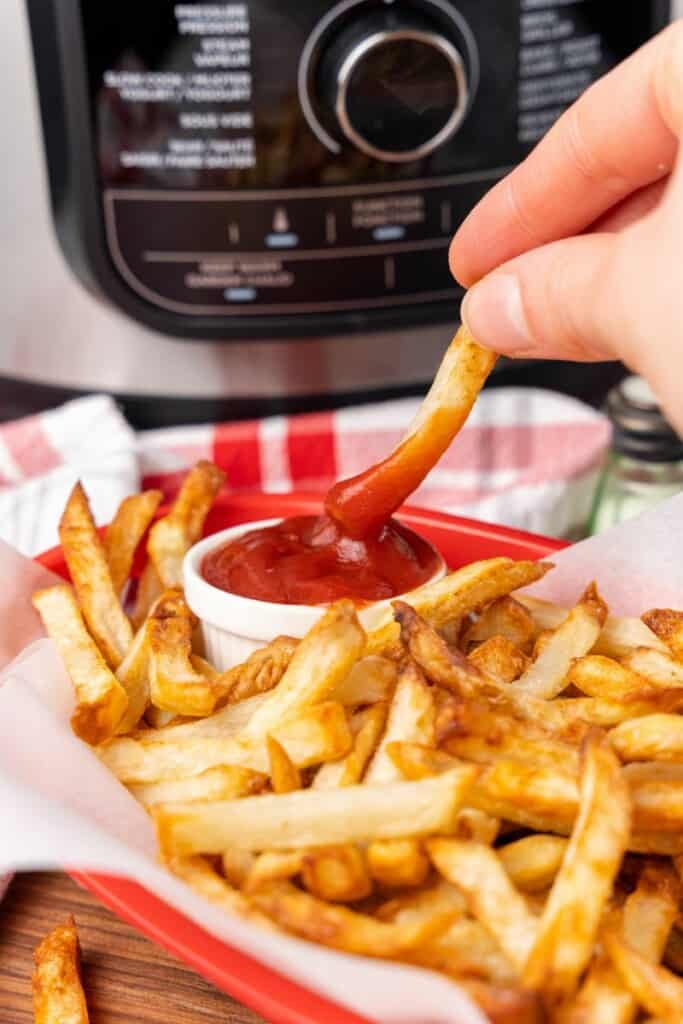
dipping fry into ketchup

STEP SIX: Sprinkle with additional salt to taste and serve immediately with your favorite dipping sauces.

What to Serve with Ninja Foodi Fries

How Long to Cook French Fries in the Ninja Foodi

We want the fries to be super crispy on the outside and hot and fluffy on the inside.

If you cut them into ¼-inch rectangles, they should cook in 25-30 minutes in the Ninja Foodi.

I recommend checking on them around the 25 minute mark and then checking every minute until they’re cooked just the way you want them.
ready to serve basket of fries

Tips for Making the Ninja Foodi Air Fryer French Fries

  • Use russet (baking) potatoes for the fries. They are high in starch, which makes them great for Ninja Foodi French fries. 
  • Try to cut the potatoes into even rectangles. Slicing all of the potatoes to the same size will help them cook evenly. A fry cutter is a great tool here!
  • After draining the potatoes, dry them as thoroughly as possible. By removing the excess moisture, this helps them crisp up beautifully. If there’s too much moisture, the potatoes will steam instead.
  • Shake the basket every 10-15 minutes to help the fries cook evenly.
  • Add extra salt right when they come out of the Ninja Foodi for a true restaurant-quality batch of fries!
  • For an extra burst of flavor, feel free to add a little French fry seasoning right before serving.

More Delicious French Fry Recipes
dipping fry into ketchup

Other Ninja Foodi Recipes You’ll Love:

purchase my cookbook here!

Prep Time
10 minutes

Cook Time
30 minutes

Soak Time
30 minutes

Total Time
1 hour 10 minutes

Ingredients

  • 1.5 – 2 lbs russet (baking) potatoes
  • 1 tablespoon + 1 teaspoon salt (divided)
  • 2 tablespoons canola or vegetable oil

Instructions

  1. Peel and wash all potatoes, then cut into ¼” rectangle french fries, using a fry cutter or a knife.
  2. Rinse the potatoes, then soak in cold water with 1 tablespoon of salt for at least 30 minutes (or up to overnight if in the fridge).
  3. Drain the water, rinse the potatoes, then pat dry with paper towel until all moisture has been absorbed (this helps them crisp not steam)
  4. Drizzle oil, and toss to coat.
  5. Air crisp at 390 F in the foodi for 25-30 minutes, shaking the basket every 5-10 minutes to make sure they cook evenly.
  6. Sprinkle with additional salt to taste and serve immediately.

Nutrition Information:

Yield:

4

Serving Size:

1

Amount Per Serving:
Calories: 60Total Fat: 7gSaturated Fat: 1gTrans Fat: 0gUnsaturated Fat: 6gCholesterol: 0mgSodium: 529mgCarbohydrates: 0gFiber: 0gSugar: 0gProtein: 0g

This nutrition information is based on the exact products I used in this recipe. Brands and sizes of products could alter exact nutrition and should always be calculated independently.


Did you make this recipe?

Share a photo on Instagram tagging @EverydayFamilyCooking! I love to see your pictures!

Stop Cooking These 10 Foods in Your Instant Pot ASAP

Stop Cooking These 10 Foods in Your Instant Pot ASAP

If you own an Instant Pot, you know how convenient it is when it comes to cutting down the time it takes to cook food, all through the magic of heat and steam. But while Instant Pot has kitchen prowess, it can’t cook everything safely. And for some foods, you may find the results inferior to more traditional cooking methods like using a stovetop or air fryer. 

Steer clear of these 10 items and dishes you shouldn’t try to cook in your classic Instant Pot. And for more cooking tips, check out nine cooking hacks that actually work, why you might be ruining your chef’s knife and the top slow cooker mistakes to avoid. 

Crunchy, crispy food

Unless you’ve purchased a specialty model, your Instant Pot is not a pressure fryer and isn’t designed for the higher temperatures needed to heat cooking oil for something like crispy fried chicken. Of course, an Instant Pot is perfect for a dish like carnitas, but to get the final crisp on the meat, after you remove the meat from the Instant Pot, transfer to a skillet and brown for a few minutes or on a baking sheet to crisp up in a hot oven. (However, if you’re looking for an air fryer that will get your food nice and crispy, you can check out our tested picks for the best air fryers of 2023). 

Dairy

CNET Home Tips logo

Just like in a slow cooker, most dairy products such as cheese, milk and sour cream will curdle in an Instant Pot, no matter if you use the pressure cooking setting or the slow cooking setting. Add these ingredients after the dish cooks or avoid making the recipe in the Instant Pot altogether. 

There are two exceptions. One is when you’re making yogurt, and that’s only if you use a recipe specifically for an Instant Pot. The other is if you’re making a cheesecake, and again, only if you’re following an Instant Pot recipe.

Pasta

While you technically can cook pasta in an Instant Pot, it may come out gummy or unevenly cooked. Honestly, unless you don’t have the option, boiling the pasta in a pot on a stovetop is just as fast and easy and will yield consistently better cooked pasta.

Two recipes at once

Cooking a roast with potatoes and carrots is a time-honored recipe, right? Not in this case. Don’t try to cook a main dish with a side dish in your Instant Pot. They may fit in the pot together, but each food will need its own cooking time. Cooking items together will inevitably result in a dry or mushy mess.

Cakes

You aren’t really baking a cake in an Instant Pot, you’re steaming it. The cake will be moist — which works for something like bread pudding — but you won’t get a nice crust on the cake or the chewy edges that everyone fights over with baked brownies. However, if you do need to throw something together for a potluck or quick family dessert, you can get a moist sponge in half an hour or so, excluding prep time.

Foods for canning

Canning, the art of cooking and sealing foods in jars, is often done in a pressure cooker. So, it may seem like a good idea to make a batch of jams, pickles or jellies in your Instant Pot. Don’t do it. 

With an Instant Pot, you’re not able to monitor the temperature of what you’re canning as you would with a regular pressure cooker. With canning, cooking and sealing the food correctly is key. Improper cooking and sealing can lead to bacteria growth that can cause food poisoning.

While you want to avoid canning with an Instant Pot, some of the newer models (like the Duo Plus) do have a sterilize setting that lets you clean baby bottles and kitchen items like jars and utensils.

Rare or medium-rare meats

A pressure cooker is not a barbecue. An Instant Pot does great with tougher cuts of meat — which the pressure cooker can easily break down — but not so good with ones that are best eaten medium-rare, like a steak. Save those for the grill.

Yellow and red lentils

We love lentils, but not all of them can be cooked in an Instant Pot. Brown and green lentils can hold up to pressure cooking, but the more delicate yellow and red versions turn to mush because they cook so quickly. Unless you’re purposely making lentil soup or dhal, stick to cooking red and yellow lentils on the stove to preserve their texture and shape.

Sous-vide

Don’t try this trendy method of cooking with most Instant Pots models. The Instant Pot Max is an exception because it gives you the ability to accurately control the cooking temperature. If you don’t own an Instant Pot that has that level of control, you are better off using an Instant Pot attachment to do your sous-vide cooking, if you are really set on using your pressure cooker this way.

Seafood

In general, seafood such as fish, oysters, shrimp, muscles and clams are just too delicate for pressure cooking and slow cooking modes. They are foods that are meant to be cooked quickly at just the right temperature, which is hard to do with an Instant Pot. A few seconds too long or at the wrong temperature and you can end up with mush or rubbery lumps.

Besides, fish, shellfish and crustaceans are easily cooked with other methods, so breaking out the Instant Pot for them won’t guarantee better results as it can for tougher meats.

The only exception is octopus and squid. Pressure cooking these tough creatures can make them tender while keeping the meat juicy. Just be sure to find a recipe that is specifically for the Instant Pot.

More kitchen and household recommendations

Advice | Quiz: Are you taking good care of your cast-iron skillet? Test your IQ.

Advice | Quiz: Are you taking good care of your cast-iron skillet? Test your IQ.

Cast-iron skillets have been beloved by many generations of cooks. They’re a kitchen workhorse and the stuff of lore, often passed down as heirlooms within families.

But all that legend sometimes leads to fear or confusion. Will I ruin the coveted seasoning? Should I only use it on a gas cooktop? Can I really not clean it with soap?

So how much do you know about taking care of your cast-iron skillet? Take our quiz to find out how to ensure it stays in the best shape for many years to come.

Question 1 of 7

You have to season cast iron before you use it.

Seasoning is what happens when fats are heated to a certain point that causes them to reorganize into something resembling a plastic coating and bond to the metal. That coating is smooth and slick, allowing for foods to easily release from the pan. There’s a reason cast iron is often called “the original nonstick cookware.”

Most of the cast iron you buy comes preseasoned. That means you can start cooking in it right away. At that point, the best thing you can do is use the pan as much as possible so the seasoning gets better over time. To maintain it, clean the pan after each use, return it to the burner over medium-low heat, and rub it down with oil and paper towels until it’s smooth and shiny with no visible residue. You can do your coat of maintenance oil in a 200-degree oven for 15 to 20 minutes, too.

Question 2 of 7

Some fats are better than others for seasoning.

Most experts generally prefer to season cast iron with unsaturated fats, Daniel Gritzer says on Serious Eats, as these oils are easier to spread than saturated options such as butter, shortening or lard. Plus, unsaturated fats tend to build up seasoning faster. Canola, corn, soybean, sunflower and flaxseed (be sure to get culinary-grade) are accessible and affordable. Olive oil isn’t the best pick since it’s more expensive and has a lower smoke point, meaning it is more likely to burn.

Question 3 of 7

You can’t use dish soap on cast iron.

Mild dish soap is not strong enough to damage the seasoning, though you can skip it if you prefer. Remove food debris with a brush or the scrubby side of a soft sponge. If you need to scrape up crusted-on food, a paste of kosher salt mixed with oil or water can do the job. Chain mail scrubbers are another option. Just don’t use harsh cleaners or abrasives such as Bar Keepers Friend, which can actually remove the seasoning.

Question 4 of 7

It’s okay to use cast iron to cook acidic foods.

A well-seasoned pan can stand up to acidic foods such as tomato sauce, to a certain extent. To protect the seasoning and prevent metallic flavors in your food, Cook’s Illustrated recommends limiting the cook time for acidic foods to 30 minutes and then removing the food immediately. J. Kenji López-Alt also suggests staying away from cooking liquid-based dishes in cast iron until the seasoning is well-established.

Question 5 of 7

You should not put your cast-iron skillet in a dishwasher.

Dishwasher detergents can be harsh enough to damage the seasoning. Plus, extended exposure to moisture can cause rust. Wash your cast-iron pans by hand. Avoid soaking them for any longer than a few minutes, if at all, and dry with a clean towel right away. Briefly returning the pan to the burner can quickly evaporate any remaining water.

Question 6 of 7

You can’t use your cast-iron skillet on a glass cooktop.

Stove manufacturers who don’t recommend cast iron are likely covering themselves in the event that consumers damage the glass and call for repairs or replacements. But you can safely use cast-iron cookware on your ceramic cooktop, whether it’s traditional electric or induction. The key things to remember are not to drag the cookware on the glass and, of course, not to drop it. Superficial scratches won’t affect the performance of the cooktop (or the skillet).

Question 7 of 7

Eventually you will have to replace your cast-iron skillet.

Cast iron can handle way more than you may realize. When we collected reader stories about their beloved pans, several people told us their skillets have survived house fires. Unless it has cracked or rusted all the way through, “there isn’t much that can ‘ruin’ a cast-iron skillet,” America’s Test Kitchen says.

There are a variety of strategies for stripping and reseasoning cast iron when needed. For small patches of rust, use steel wool to rub it down before reseasoning. Manufacturer Lodge’s preferred method is to rub the seasoning oil or melted vegetable shortening all over the pan and let it bake on the middle rack of the oven at 350 degrees for an hour, with a sheet of aluminum foil underneath to catch any drips. Repeat as necessary until the seasoning is where you want it to be.

If you have a truly abused skillet, you will need to strip the seasoning and do multiple rounds of restoring it. Strategies vary on how to strip seasoning, including using the self-cleaning feature of your oven. You’ll find plenty of guidance from experts online.

Cooking Tips: 7 Easy Ways To Give Your Snacks A Crispy Coating

Cooking Tips: 7 Easy Ways To Give Your Snacks A Crispy Coating

We all love indulging in crispy snacks. Whatever may be filling, there is something very enjoyable about biting into foods with a perfectly crisp coating. We tend to lose ourselves in their yumminess and just savour the moment! There are a variety of ways to achieve this particular sensation. Whether you’re working with veggies, meat, chicken, fish, paneer, etc. you can use more or less the same ingredients to coat them. Of course, the particular snack has to then be deep-fried or air-fried to complete the process. Breadcrumbs are one of the most commonly used coating options. But there are other great choices too, as discussed below.

Here Are 7 Easy Ways To Give Your Snacks A Crispy Coating:

1. Cornflakes

opedhb7o

Cover your snacks in crushed cornflakes before frying them to get an amazing golden crust. Photo Credit: Pixabay

Cornflakes are not just meant for breakfast or chidwa. You can take advantage of their texture in innovative ways. Say you’re making cutlets at home and want to give them an extra special coating. Simply crush the cornflakes and roll the cutlets in them before frying. The final result will be very satisfying, believe us! If you want a recipe that uses this method, check out this one for restaurant-style veg nuggets.

2. Oats

Oats are another common breakfast food that you can use for coating veg and non-veg snacks. All you have to do is grind oats with seasonings of your choice to make a fine crumb. Once your snack mixture is ready, simply roll shapes of it in the crumb until completely covered. Here’s a recipe for Oat Crusted Chicken Tenders to try at home.
Also Read: 6 Chicken Finger Foods That Will Make You Say ‘Winner, Winner, Chicken Dinner’

3. Makhana (Fox Nuts)

gnpt520g

Use coarsely ground pieces of makhana to give your snacks a unique coating. Photo Credit: Pixabay

Makhana or fox nuts are all the rage right now in the world of nutrition. This superfood is gluten-free and comes with a range of health advantages. They are often eaten lightly seasoned or as a part of other preparations. But did you know makhana can also be used to make snacks crispy? You have to first coarsely grind them. Then coat the food item in slurry or egg white before covering them with the makhana crumb. Check out this recipe for Stuffed Fried Chicken that uses this technique.

4. Vermicelli (Sevai/ Semiya)

In India, vermicelli is typically used to make dishes like semiya upma or sweet semiya kesari. However, it can also give your snacks a crisp, golden thread-like coating. All you have to do is lightly roast the semiya, boil it for around three minutes and allow it to cool before using. Dip your snacks in a cornflour slurry before covering them with crushed vermicelli. This will help keep the outer layer intact. Here is a recipe for a tasty mixed veg snack with a vermicelli coating.

5. Noodles

Yes, you read that right. Noodles are actually a very convenient option for a crisp covering. Boil noodles, drain them and ensure they dry before layering them around your paneer, chicken or veggie pieces. You can also add a little cornflour to the noodles to remove any moisture. If they are damp, they will make your entire snack soggy and may also absorb more oil than required. Now you know a unique way of using that pack of store-bought noodles! One example of this method is Crispy Thread Chicken; click here for the full recipe.
Also Read: 5 Mouth-Watering Noodles Ready In Just 30 Mins

6. Tempura Batter

ra9me5ig

Tempura batter is a wonderfully light and simple coating option you have to try. Photo Credit: Pixabay

Tempura is often associated with Japanese cuisine. However, this dish – typically consisting of deep-fried seafood or veggies coated in a specific batter – is actually of Portuguese origin. Tempura batter is prepared with flour, eggs and chilled water. It can give your snack a delicately crisp and beautifully golden coating. It can be used for veg as well as non-veg food items. Check out this recipe for Farzi Cafe-Style Tempura Prawns.

7. Breadcrumbs

Our list would be incomplete if we didn’t mention good old breadcrumbs. This is a classic option to make snacks crispier. Many recipes not only use breadcrumbs for coating but also include a small quantity of it in the snack mixture itself. Doing so helps bind the ingredients better. Breadcrumbs can be easily made at home by grinding bread to the desired consistency. You can also use panko breadcrumbs if you want a special coating. These are a popular Japanese version of breadcrumbs that are said to be more crackly and less oil-absorbing than the regular variety.

How Do You Keep Snacks Crispy?

To maintain the crispiness of fried foods, one effective method is to place them on a cooling rack set over a baking sheet. This helps to prevent the buildup of moisture, which can cause fried foods to become soggy. By allowing air to circulate around the food, the cooling rack helps to keep the exterior of the fried food crispy while the interior remains moist and tender. Here are 4 quick tips on how to fry food to get that perfect crust.

Make your snacks even more irresistible by using these methods!

Cooking Tips: Learn How To Make Perfectly Fluffy And Soft French Toast With These 6 Tips

Cooking Tips: Learn How To Make Perfectly Fluffy And Soft French Toast With These 6 Tips

French toast is the king of breakfast. This sweet and delicious dish is soft and fluffy from inside and crispy from the outside. Besides that, it is super easy to make and only needs 4-5 ingredients to prepare, which include bread, milk, eggs, sugar, butter and honey or maple syrup for that extra sweet taste. Even though is it simple to cook, many people fail to get a perfectly fluffy French toast. For those who don’t know what they are doing wrong while cooking this dish, these tips will surely be helpful. Find out how to make perfectly fluffy and soft French toast at home.

Also Read: Paneer Bread Roll And More: 5 Unique Bread Rolls That Are A Class Apart

Here Are 6 Tips To Prepare Fluffy French Toast:

1. Choose The Right Bread

Bread is the base of the French toast recipe. There are a variety of breads available in market these days; you can use any bread which is broad in size. Broad breads turn out to be fluffier as they hold more mixture within them. However, it’s okay to use thin sliced bread too but there are chances it will break after soaking the wet batter.

nlq597t

Use a big-broad bread to make French toast. Photo Credit: unsplash

2. Balance Egg and Milk Ratio

The trick for making fluffy French toast is to balance the ratio of eggs and milk. Do not hold back on adding more eggs. Use around 2 to 4 eggs for preparing 2 slices of French toast. While you make the batter, ensure that you add more eggs in comparison to milk. If there’s too much milk added to the batter, there are chances that the egg in the mixture will not cook properly, which will make the French toast very soggy.

cbeehqm

Don’t add too much milk in the batter. Photo Credit: unsplash

3. Mix The Batter Well

This is the most important step in making French toast. Mix the egg, sugar, and milk batter properly till you see froth on the mixture. When you see tiny little bubbles on top of the mixture, it’s time to stop mixing the batter. You can now go ahead with using it to soak the bread.

2vti1is

The batter should not be too runny. Photo Credit: unsplash

4. Soak The Bread

Don’t miss out on soaking the bread in the wet mixture. In a broad, deep bowl, pour the mixture and put the bread slice in it. Soak it until it absorbs the mixture and looks soft. You have to be careful while doing this as the bread should not be under soaked or over soaked.

th8pbtfo

Let the bread soak the batter properly. Photo Credit: unsplash

Also Read: Make This 3-Ingredient Banana Pancake For A Healthy Start To Your Day

5. Cook At Right Temperature

To make fluffy French toast, ensure to preheat the pan on low flame. Do not over heat it, because the base of the bread will cook faster and become crispy, whereas the inside of the bread will be undercooked and soggy. The pan should neither be over heated nor under heated.

6. Grease The Pan

Apply 1 tbsp oil and half tbsp butter on the hot pan. Using only butter to cook the bread will not be a great choice because the butter will burn out soon, leaving a bitter taste. This is why it is important to use both oil and butter together to add flavour and to cook the bread properly. This will result in perfectly fluffy French toast.

Don’t forget to sprinkle honey or maple syrup on top of your delectable French toast to give it an extra flavour boost.

The Sims 4: Cooking Recipes Guide

The Sims 4: Cooking Recipes Guide

Cooking is an essential aspect of daily life, and in The Sims 4, it is no exception. Cooking skill is a crucial skill for any Sim looking to whip up a delicious meal. From the base game to the various expansion packs, the game offers a wide range of recipes for players to learn and experiment with. Whether it’s whipping up a quick snack or preparing a gourmet feast, mastering the Cooking Skill will enable players to satisfy their Sim’s hunger, impress guests, and make a profit.

GAMERANT VIDEO OF THE DAYSCROLL TO CONTINUE WITH CONTENT

Related: Great Games To Learn How To Bake

In The Sims 4, Sims can primarily learn new recipes by practicing their Cooking Skill. As they cook more meals, their skill level will increase, and they will unlock new recipes. Aside from leveling up the Cooking Skill, Sims can also unlock new recipes through various means. For example, ordering food from a food vendor or a restaurant can also sometimes result in Sims learning the recipe of the dish they ordered. Additionally, some recipes can be unlocked by Sims that experiencing certain emotional states, such as being energized, flirty, angry and more.


Tips For Cooking Skill

The Sims 4 Tips For Cooking Skill

Cooking is an important skill for Sims to master, as it affects their overall mood and well-being. While Sims can opt for quick snacks or microwave food, relying on these options for too long can give Sims a negative moodlet. The best way to improve the cooking skill is to cook meals to satisfy the hunger need. However, Sims with low-grade appliances or those completing the Unlucky Chef Scenario may find it beneficial to learn cooking from skill books in order to prevent fires. Gourmet Cooking skill requires a minimum of level 5 in cooking, but this can also be learned from skill books.

Sims who enjoy cooking frequently and in larger quantities may want to consider completing the Master Chef aspiration, as it enables them to cook high-quality food that never spoils. For those who enjoy these activities, gardening and fishing are also great skills to develop alongside cooking since fresh, high-quality ingredients improve the overall quality of the food, while using one’s own ingredients reduces the cost of food preparation. By improving their cooking skills, Sims can learn to add flavor to their stove-cooked meals, and by reaching level 8 in the Gourmet Cooking skill, they can learn how to garnish their dishes. These techniques not only enhance the overall quality of the meal but also give unique moodlets to the Sims who eat it.

All Skill-Based Cooking Recipes

The Sims 4 All Skill-Based Cooking Recipes

These recipes are easily accessible through the fridge or oven as players improve their cooking skill, without requiring additional unique interactions with objects or other Sims. The base game provides a substantial collection of cooking recipes, but various expansion packs offer an extensive range of options, catering to Sims’ unique tastes and lifestyles.

Regardless of the pack or base game, many of the recipes in The Sims 4 can be cooked with fresh ingredients. However, the Cottage Living expansion pack introduced a new lot challenge called Simple Living, which adds another layer of realism and challenge to cooking. With this trait, Sims cannot rely on their Simoleons to purchase ingredients via the cooking appliance right away, and must instead do their own grocery shopping or grow and harvest all the required produce themselves. This can make cooking a bit more challenging, but also more rewarding for players who enjoy a more immersive gameplay experience.

The order of the lists below is based on cooking skill level and alphabetical order:

Base Game

Level

Name

Ingredients

Simple Living Ingredients (Amounts and some ingredients depend on sizing)

Notes

1

Chocolate Cake

None

Chocoberry or Chocolate Syrup, Egg, Flour, Sugar

Vegetarian-Safe

1

Eggs and Toast

None

Bread, Egg

Vegetarian-Safe, Lactose-Free

1

Garden Salad

Tomato

Lettuce, Tomato

Fridge-only, Vegetarian-Safe, Lactose-Free

1

Grilled Cheese

None

Bread, Cheese

Vegetarian-Safe

1

Hamburger Cake

None

Egg, Flour, Sugar

Exclusive To Up All Night Content Vegetarian-Safe

1

Japchae

None

Any Herb, Egg, Flour

None

1

Mac and Cheese

None

Cheese, Flour

Vegetarian-Safe

1

Pan De Muerto

None

Egg, Flour, Sugar

Vegetarian-Safe, Lactose-Free.

1

Pão de Queijo

None

Flour, Milk/Egg

Vegetarian-Safe

1

Rice Cake

None

Egg, Flour, Sugar

Vegetarian-Safe

1

White Cake

None

Egg, Flour, Sugar

Vegetarian-Safe

1

Vegetable Dumplings

None

Any Vegetable, Flour

Vegetarian-Safe, Lactose-Free

2

BLT

Tomato

Lettuce, Meat

Lactose-Free

2

Brigadeiro

None

Chocoberry or Chocoberry Syrup, Milk

Vegetarian-Safe

2

Chips and Salsa

Tomato, Onion

Tomato

Vegetarian-Safe, Lactose-Free

2

Faux Meat Protein Plate

None

Meat Substitute

Requires Energized emotion Vegetarian-Safe

2

Fish Tacos

Any Fish, Any Vegetable

Any Fish, Flour

Lactose-Free

2

High Energy Protein Plate

None

Meat

Requires Energized emotion Lactose-Free

2

Scrambled Eggs With Bacon

Tomato, Eggs

Egg

Lactose-Free

2

Tteokguk

None

Any Vegetable, Flour

None

2

Winter Cake

None

Egg, Flour, Sugar

Vegetarian-Safe

3

Chocolate Chip Cookies

None

Chocoberry or Chocolate Syrup, Egg, Sugar

Vegetarian-Safe

3

Faux Meat Casserole

Meat Substitute

Lettuce, Meat Substitute, Cheese

Exclusive to Up All Night Content Vegetarian-Safe

3

Flirty Heart Cookies

None

Egg, Flour, Sugar

Requires Flirty emotion Vegetarian-Safe

3

Galbi-jjim

Any Meat

Any Meat

None

3

Hallaca

Tomato

Any Meat, Tomato, Flour

None

3

Pan Fried Tilapia

Tilapia

Tilapia

Lactose-Free

3

Pancakes

Any Fruit

Egg, Flour, Sugar

Vegetarian-Safe

3

Silly Gummy Bear Pancakes

None

Egg, Sugar

Requires Playful emotion Vegetarian-Safe

3

Taco Casserole

Faux Meat Cube

Wrapped Red Meat, Lettuce, Cheese

Exclusive to Up All Night Content

3

Zaatar Manakeesh

Any Herb

Any Herb, Flour, Sugar

Vegetarian-Safe

4

Angry Flaming Spaghetti

Tomato, Onion, Mushroom, Garlic

Onion, Tomato

RequiresAngry emotion Vegetarian-Safe

4

Black and White Cookies

None

Egg, Flour, Sugar

Exclusive to Up All Night content Vegetarian-Safe

4

Spaghetti

Tomato, Onion, Mushroom, Garlic

Flour, Tomato

Vegetarian-Safe

4

Strawberry Cake

Strawberry

Egg, Flour, Sugar, Strawberry

Vegetarian-Safe

5

(Sim’s Name) Signature Cake

None

Egg, Flour, Sugar

Requires Level 6 on Chef Career Branch Vegetarian-Safe

5

Acarajé

Onion

Flour, Onion

Lactose-Free

5

Fish and Chips

Potato, Any Fish

Any Fish, Potato

Lactose-Free

5

French Toast

Any Fruit

Any Bread, Egg

Vegetarian-Safe, Lactose-Free

5

Fried Fish Plate

Any Fish

Any Fish

Lactose-Free

6

Baked Chocolate Mousse

None

Chocoberry/Chocolate Syrup

None

6

Blue Confetti Cake

None

Blue Egg, Flour, Sugar

Vegetarian-Safe

6

Butter Chicken

None

Tomato, White Meat

None

6

Chili

Tomato, Onion

Red Meat, Tomato

Lactose-Free

6

Palak Paneer

None

Cheese, Spinach

None

7

Blackened Bass

Bass

Any Herb, Bass

Lactose-Free

7

Boiling Frog Hot Pot

Any Frog

Any Frog

None

7

Crown Roast

Potatoes, Any Herb

Any Herb, Potato, Red Meat

Lactose-Free

7

Mud Carp

None

Any Fish

Lactose-Free

7

Golden Omelet

Golden Eggs

Golden Egg, Mushroom

Vegetarian-Safe

7

Obsidian Omelet

Obsidian Eggs

Obsidian Egg, Mushroom

Vegetarian-Safe

7

Omelet

Spinach or Eggs, Mushroom, Onion

Egg, Mushroom, Onion

Vegetarian-Safe

7

Steamed Fish

Any Fish

Any Fish

None

8

Apple Pie

Apple

Apple, Flour, Sugar

Vegetarian-Safe, Lactose-Free

9

Cioppino

Tomato, Any Fish, Garlic

Any Fish, Tomato

Lactose-Free

10

Roast Chicken

Carrot, Potato

Carrot, Potato, White Meat

Lactose-Free

10

Tuna Casserole

Any Vegetable

Any Fish, Any Vegetable, Cheese

None

City Living

Related: The Sims 4: Best Fertilizer

Level

Name

Ingredients

Simple Living Ingredients (Amounts and some ingredients depend on sizing)

Notes

2

Faux BLT

Tomato

Bread, Meat Substitute, Tomato

Vegetarian-Safe

2

Tofu Tacos

Any Vegetable

Any Vegetable, Flour, Meat Substitute

Vegetarian-Safe

3

Faux Meat Bowl

Meat Substitute

Mayonnaise, Meat Substitute

Vegetarian-Safe

3

Poke Bowl

Any Fish

Any Fish, Mayonnaise

Any Fish is Required

5

Faux Meat and Chips

Potato, Meat Substitute

Meat Substitute, Potato

Vegetarian-Safe

6

Faux Meat Butter Chicken

None

Meat Substitute, Onion, Tomato

Vegetarian-Safe

6

Vegetable Chili

Tomato, Onion

Meat Substitute, Onion, Tomato

Vegetarian-Safe

9

Chicken Stir Fry

Mushroom, Wrapped White Meat

Mushroom, Onion, White Meat

Lactose-Free

9

Tofu Stir Fry

Onion, Mushroom

Meat Substitute, Mushroom, Onion

Vegetarian-Safe

10

Roast Tofu Chicken

Carrot, Potato

Carrot, Meat Substitute, Potato

Vegetarian-Safe

10

Vegetable Casserole

Any Vegetable

Any Vegetable, Meat Substitute

Vegetarian-Safe

Seasons

Level

Name

Ingredients

Simple Living Ingredients (Amounts and some ingredients depend on sizing)

Notes

1

Honey Cake

Honey

Egg, Flour, Sugar, Honey

Vegetarian-Safe

1

Scout Cookies

None

Egg, Flour, Sugar

Exclusive to Teens or older Sims who have unlocked a scout badge

Island Living

Level

Name

Ingredients

Simple Living Ingredients (Amounts and some ingredients depend on sizing)

Notes

3

Coconut Cake

Coconut

Egg, Flour, Sugar, Coconut

Vegetarian-Safe

Eco Lifestyle

Level

Name

Ingredients

Simple Living Ingredients (Amounts and some ingredients depend on sizing)

Notes

1

Popcorn Crickets

Cricket Flour

Any Vegetable, Cricket Flour

Lactose-Free

3

Cricket Meal

Cricket Flour

Any Vegetable, Cricket Flour

Lactose-Free

5

Bombardier Beetle Stir-Fry

Bombardier Beetle Nugget

Any Vegetable, Bombardier Beetle Nugget

Snowy Escape

Level

Name

Ingredients

Simple Living Ingredients (Amounts and some ingredients depend on sizing)

Notes

1

Onigiri

None

Mayonnaise, Any Vegetable

Vegetarian-Safe, Lactose-Free

2

Beef Ramen

Faux Meat Cube

Flour, Wrapped Red Meat

Lactose-Free

2

Egg Ramen

None

Flour, Egg

Vegetarian-Safe, Lactose-Free

2

Matcha Cake

None

Green Egg, Flour, Sugar

Vegetarian-Safe

2

Miso Ramen

None

Flour, Any Vegetable

Vegetarian-Safe, Lactose-Free

2

Seaweed Ramen

None

Flour, Any Vegetable

Vegetarian-Safe, Lactose-Free

4

Knafeh

None

Cheese, Flour, Sugar

Vegetarian-Safe

4

Minced Pork Noodles

Any Meat, (Flour or Sugar)

Flour/Sugar, Meat

4

Tri-Color Dango

None

Flour, Sugar

Vegetarian-Safe

5

Beef Yakisoba

Faux Meat Cube

Wrapped Red Meat, Any Vegetable

Lactose-Free

5

Fish Yakisoba

Any Fish

Any Vegetable, Any Fish, Any Mushroom

Lactose-Free

5

Veggie Yakisoba

Any Vegetable

Any Vegetable, Any Mushroom

Vegetarian-Safe, Lactose-Free

Cottage Living

Level

Name

Ingredients

Simple Living Ingredients (Amounts and some ingredients depend on sizing)

Notes

1

Cheese

Any Milk

Milk

Vegetarian-Safe. Group Meal only.

1

Golden Eggs and Toast

Golden Eggs

Any Bread, Golden Egg, Egg

Vegetarian-Safe, Lactose-Free

1

Lactose-Free Milk Bread

Mighty Plant Milk, Flour

Flour, Mighty Plant Milk, Sugar

Vegetarian-Safe, Lactose-Free

1

Lactose-Free Yorkshire Pudding

Mighty Plant Milk, Egg, Flour

Egg, Flour, Mighty Plant Milk

Vegetarian-Safe, Lactose-Free

1

Milk Bread

Flour, Any Milk

Flour, Milk, Sugar

Vegetarian-Safe

1

Obsidian Eggs and Toast

Obsidian Eggs

Any Bread, Obsidian Egg, Egg

Vegetarian-Safe, Lactose-Free

1

Yorkshire Pudding

Egg, Flour, Any Milk

Egg, Flour, Milk

Vegetarian-Safe

2

Beef Wellington

Wrapped Red Meat, Flour

Any Herb, Flour, Red Meat

Lactose-Free

2

Faux Meat Wellington

Flour, Meat Substitute

Any Herb, Flour, Meat Substitute

Vegetarian-Safe

2

Golden Scrambled Eggs and Bacon

Golden Eggs

Golden Egg, Egg

Lactose-Free

2

Obsidian Scrambled Eggs and bacon

Obsidian Eggs

Obsidian Egg, Egg

Lactose-Free

2

Watermelon Salad

Any Watermelon

Any Vegetable, Watermelon

Fridge-only, Vegetarian-Safe, Lactose-Free

3

Aubergine Parmesan

Any Aubergine, Any Cheese

Aubergine, Cheese, Egg

Vegetarian-Safe

3

Blueberry Pie

Blueberry or Blueberry Jam

Blueberry/Blueberry Jam, Egg, Flour/Sugar

Vegetarian-Safe, Lactose-Free

4

Charming Mushroom Soup

Charming Mushroom

Charming Mushroom

Vegetarian-Safe

4

Lovely Mushroom Soup

Lovely Mushroom

Lovely Mushroom

Vegetarian-Safe

4

Mushroom Soup

Any Mushroom

Any Mushroom

Vegetarian-Safe

4

Mysterious Mushroom Soup

Mysterious Mushroom

Mysterious Mushroom

Vegetarian-Safe

4

Nightly Mushroom Soup

Nightly Mushroom

Nightly Mushroom

Vegetarian-Safe

4

Raspberry Pie

Raspberry or Raspberry Jam

Egg, Flour/Sugar, Raspberry/Raspberry Jam

Vegetarian-Safe, Lactose-Free

4

Spicy Mushroom Soup

Spicy Mushroom

Spicy Mushroom

Vegetarian-Safe

4

Verdant Mushroom Soup

Verdant Mushroom

Verdant Mushroom

Vegetarian-Safe

5

Berry Scones

Any Berry

Berry, Egg, Flour

Vegetarian-Safe

5

Chocolate Pie

Chocoberry or Chocolate Syrup

Chocoberry/Chocolate Syrup, Egg, Flour/Sugar

Vegetarian-Safe

5

Chocolate Scones

Chocoberry or Chocolate Syrup

Chocoberry/Chocolate Syrup, Egg, Flour

Vegetarian-Safe

5

Pumpkin Scones

Any Pumpkin

Egg, Flour, Pumpkin

Vegetarian-Safe

6

Blueberry Jam Crumpets

Flour, Blueberry Jam

Blueberry/Blueberry Jam, Egg, Flour

Vegetarian-Safe

6

Buttered Jam Crumpets

Flour

Egg, Flour, Milk

Vegetarian-Safe

6

Cottage Pie

Wrapped Red Meat

Any Vegetable, Any Meat, Potato

Lactose-Free

6

Faux Cottage Pie

Meat Substitute

Any Vegetable, Meat Substitute, Potato

Vegetarian-Safe

6

Faux Meat Pie

Meat Substitute

Egg, Flour/Sugar, Meat Substitute

Vegetarian-Safe

6

Meat Pie

Wrapped Red Meat

Egg, Flour/Sugar, Any Meat

Lactose-Free

6

Pumpkin Stew

Any Pumpkin

Pumpkin

Vegetarian-Safe, Lactose-Free

6

Strawberry Jam Crumpets

Flour, Strawberry Jam

Egg, Flour, Strawberry

Vegetarian-Safe

7

Pumpkin Pie

Any Pumpkin

Egg, Flour/Sugar, Pumpkin

Vegetarian-Safe, Lactose-Free

9

Bangers and Mash

Potato Wrapped Red Meat

Any Herb, Meat, Potato

Lactose-Free

9

Faux Meat and Mash

Potato, Meat Substitute

Any Herb, Meat Substitute, Potato

Vegetarian-Safe

Outdoor Retreat

Level

Name

Ingredients

Simple Living Ingredients (Amounts and some ingredients depend on sizing)

Notes

1

Franks and Beans

Onion

Onion, Any Meat

Lactose-Free

3

Fried Fish

Any Fish

Any Fish

Lactose-Free

5

Breakfast Scramble

Potato, Onion, Any Mushroom

Potato, Onion, Egg, Any Mushroom

Vegetarian-Safe

6

Camper’s Stew

Carrot, Potato, Any Mushroom

Carrot, Potato, Any Meat

Lactose-Free

7

Fruit Cobbler

Any Fruit

Bottle of Milk, Any Fruit, Flour/ Sugar

Vegetarian-Safe, Lactose-Free

8

Gumbo

Onion, Any Crawdad, Any Insect

Onion, Crawdad, Any Insect

Lactose-Free

9

Walleye Surprise

Walleye, Huckleberry, Locust

Walleye, Huckleberry, Locust

Lactose-Free

Spa Day

Related: The Sims 4: Lot Traits, Explained

Level

Name

Ingredients

Simple Living Ingredients (Amounts and some ingredients depend on sizing)

Notes

1

Sugar-Free Carob Coconut Cake

None

Egg, Flour, Sugar

Wellness level 2, Vegetarian-Safe

1

Superfood Salad

Pomegranate

Pomegranate, Onion

Wellness level 7, Fridge-only, Vegetarian-Safe, Lactose-Free

Dine Out

Level

Name

Ingredients

Simple Living Ingredients (Amounts and some ingredients depend on sizing)

Notes

1

Fruit Salad

Any Fruit

Any Fruit

Fridge only, Vegetarian-Safe, Lactose-Free

4

Italian Meatballs

Parsley

Any Tomato, Any Meat, Parsley

Lactose-Free

5

Minestrone

Carrot, Basil, Tomato

Carrot, Basil, Tomato

Vegetarian-Safe, Lactose-Free

6

Clam Chowder

Potato, Onion

Potato, Onion, Milk

Vampires

Level

Name

Ingredients

Simple Living Ingredients (Amounts and some ingredients depend on sizing)

Notes

1

Plasma Fruit Salad

Plasma Fruit

Plasma Fruit

Vampire Lore level 9, Fridge only, Vegetarian-Safe, Lactose-Free

Jungle Adventure

Level

Name

Ingredients

Simple Living Ingredients (Amounts and some ingredients depend on sizing)

Notes

1

Remedy of the Ancients

Ancient Bone Dust

Ancient Bone Dust

Requires “Curse of the Ancients” moodlet

Werewolves

Level

Name

Ingredients

Simple Living Ingredients (Amounts and some ingredients depend on sizing)

Notes

2

Steak Tartare

Any Red Meat

Any Red Meat

Lactose-Free

Spooky Stuff

Level

Name

Ingredients

Simple Living Ingredients (Amounts and some ingredients depend on sizing)

Notes

2

Spooky Cookies

None

Egg, Flour, Sugar

Vegetarian-Safe

3

Cheese Eyeballs

None

Cheese

Vegetarian-Safe

4

Zombie Cake

None

Egg, Flour, Sugar

Vegetarian-Safe

Gourmet Cooking Recipes

The Sims 4 Gourmet Cooking Recipes

Gourmet cooking may appear similar to normal cooking in many ways, but it offers more exciting options for Sims to explore. It also includes items such as Ambrosia, which can revive dead Sims. Gourmet cooking recipes are also compatible with simple cooking. However, unlike normal cooking recipes, they do not require varying types or amounts of ingredients for different serving sizes.

The order of the lists below is based on cooking skill level and alphabetical order:

Base Game

Level

Name

Ingredients

Simple Living Ingredients

Notes

1

Black and White Cake

None

Egg, Sugar, Flour

Exclusive to Up All Night Content Vegetarian-Safe

1

Caprese Salad

Tomato, Basil

Lettuce, Tomato

Fridge-only, Vegetarian-Safe

1

Fruit & Yogurt Parfait

Any Fruit

Any Fruit, Milk

Vegetarian-Safe

1

Garlic Noodles

Garlic

Egg, Flour

Vegetarian-Safe, Lactose-Free

1

Gourmet Fruit Cake

Any Fruit

Any Fruit, Flour, Sugar

Vegetarian-Safe

1

Pasta Primavera

Any Vegetable, Any Herb

Any Vegetable, Flour

Vegetarian-Safe, Lactose-Free

1

White and Black Cake

None

Egg, Sugar, Flour

Exclusive to Up All Night Content Vegetarian-Safe

2

Butternut Gnocchi

Any Herb

Any Herb, Pumpkin

Vegetarian-Safe, Lactose-Free

2

Chicken Saltimbocca

Lemon, Spinach

Lemon, White Meat

Lactose-Free

3

Herb-Crusted Salmon

Salmon, Any Herb

Any Herb, Salmon

Lactose-Free

3

Salt and Pepper Shrimp Cocktail

None

Onions, Any Herb

Group Meal only, Lactose-Free

3

Spinach Frittata

Spinach

Egg, Spinach

Vegetarian-Safe, Lactose-Free

4

Prosciutto-Wrapped Asparagus

Any Herb

Meat

Lactose-Free

5

SimCity Cheesecake

Any Fruit

Cheese, Egg, Sugar

Vegetarian-Safe

5

Tiered Cake

None

Egg, Flour, Sugar

Vegetarian-Safe

6

Rack of Lamb

Carrot, Potato, Faux Meat Cube, Any Herb

Any Herb, Meat, Potato

Lactose-Free

7

Lobster Thermidor

Lemon, Any Herb

Any Herb, Lemon

7

Lobster Tortellini

Tomato, Any Herb

Any Herb, Tomato

Lactose-Free

8

Monte Cristo Sandwich

Any Fruit

Bread, Meat

9

Trout Meunière

Trout, Lemon, Parsley

Lemon, Trout

Lactose-Free

10

Ambrosia

Angelfish, Potion of Youth, Death Flower

Angelfish, Potion of Youth, Death Flower

Used to bring back ghosts to life.

10

Baked Alaska

Any Fruit

Any Fruit

Vegetarian-Safe

City Living

Level

Name

Ingredients

Simple Living Ingredients

Notes

2

Tofu Chicken Saltimbocca

Lemon, Spinach

Lemon, Meat Substitute

Vegetarian-Safe, Lactose-Free

4

Faux Bacon-Wrapped Asparagus

Any Herb

Meat Substitute

Vegetarian-Safe, Lactose-Free

7

Faux Lobster Tortellini

Tomato, Any Herb

Lettuce, Tomato

Vegetarian-Safe, Lactose-Free

8

Meatless Monte Cristo

Any Fruit

Bread, Meat Substitute

Vegetarian-Safe

Snowy Escape

Level

Name

Ingredients

Simple Living Ingredients

Notes

3

Avocado Maki Roll

Avocado

Any Vegetable

Vegetarian-Safe

3

Salmon Maki Roll

Salmon

Salmon, Any Vegetable

Lactose-Free

3

Tuna Maki Roll

Blue-Fin Tuna

Any Vegetable, Any Fish

Lactose-Free

5

Salmon Nigiri

Salmon

Salmon

Lactose-Free

5

Tamago Nigiri

None

Egg

Vegetarian-Safe

5

Tuna Nigiri

Bluefin Tuna

Any Fish

Lactose-Free

Cottage Living

Level

Name

Ingredients

Simple Living Ingredients

Notes

1

Lactose-Free Fruit & Yogurt Parfait

Mighty Plant Milk

Any Fruit, Mighty Plant Milk

Vegetarian-Safe, Lactose-Free

5

Lactose-Free SimCity Cheesecake

Mighty Plant Milk

Egg, Mighty Plant Milk, Sugar

Vegetarian-Safe, Lactose-Free

Dine Out

Level

Name

Ingredients

Simple Living Ingredients

Notes

2

Caesar Salad

Lemon

Lemon, Any Lettuce

Fridge-only, Vegetarian-Safe, Lactose-Free

4

Butternut Squash Soup

Onion

Onion, Any Pumpkin

Vegetarian-Safe, Lactose-Free

5

Tiramisu

None

Egg, Sugar, Chocoberry or Chocolate Syrup

Vegetarian-Safe

6

Eggs Benedict

None

Egg, Bottle of Milk

Lactose-Free

Luxury Party Stuff

Level

Name

Ingredients

Simple Living Ingredients

Notes

1

Almond Macaroons

None

Egg

Vegetarian-Safe, Lactose-Free

1

Ceviche and Chips

None

Potato, Any Fish, Flour, Sugar

Lactose-Free

1

Vegetable Tempura

None

Any Vegetable

Vegetarian-Safe, Lactose-Free

Vendor Recipes

The Sims 4 Vendor Recipes

To learn new vendor recipes in The Sims 4, Sims must visit vendor stalls and try out new food. While the City Living expansion pack introduced the first set of vendor recipes, other packs also include some vendor recipes. The requirements per pack for these recipes are as follows:

Related: The Sims 4: City Living Complete Guide

  • City Living: Sims must visit each festival and food stall and eat the food to unlock the recipe. This pack is compatible with the Simple Living lot trait.
  • Cats & Dogs: Sims must visit vendor stalls at Brindleton Bay and eat the food to unlock the recipe.
  • Jungle Adventure: Sims must visit the vendor stalls at Selvadorada and eat the food to unlock the recipe. Some recipes require the Selvadoradan Culture Skill at level 5.
  • Journey to Batuu: Food can be purchased from multiple locations in Black Spire Outpost, including Docking Bay 7, Ronto Roasters, and Oga’s Cantina. To learn the recipes, the Sim trying the food must be inspired.

Other Food Interactions And Recipes

The Sims 4 Dine Out Restaurant Ordering Food

Additional food options for Sims can be obtained through certain objects or features in base game or packs. Here are some of them:

  • Cupcake Machine: Requires the Whipped Dream Cupcake Factory object from Build/Buy Mode. With the Get To Work expansion, players can also gain baking skill from this item and unlock more recipes. Most items are compatible with the Simple Living lot challenge.
  • Experimental Dishes: These dishes require the Dine Out game pack and can only be eaten at restaurants. While players can’t learn these recipes to cook at home, taking pictures of experimental dishes serves as a new collection group while enjoying interesting meals.
  • Fire Pit: Comes with the Outdoor Living pack. Most items don’t require any ingredients for normal or simple living, nor simoleons, except for cooking Beetles which need 1 beetle in the inventory.
  • Grand Meals: These dishes are exclusive to the Seasons pack. Their primary function is to be served during holiday celebrations, but they can be cooked anytime. They are also compatible with the Simple Living lot challenge.
  • Off-The-Grid Exclusive Recipes: While many general recipes can be cooked at an off-the-grid lot, some items are only available when this lot challenge is active. Most require fish or certain vegetables, and can also be utilized in combination with the Simple Living lot challenge.
  • Outdoor Grill: These recipes are exclusive to the Outdoor Grill. Most are compatible with the Simple Living lot challenge.
  • Pet Recipes: Requires the Cats & Dogs expansion pack and a pet to be present in the household. There are normal cooking and gourmet cooking pet recipes available.

The Sims 4 is available on PC, PS4, PS5, Xbox One, and Xbox Series X/S.