Cooking Tips: How To Make Crispy Banana Chips (Easy Recipe Inside)

Cooking Tips: How To Make Crispy Banana Chips (Easy Recipe Inside)

Crispy, flavourful and simply delicious, chips are something that no one can resist biting on. Be it in the evening with a cup of hot chai or at night while binge-watching your favourite show, they always come to our rescue whenever we crave something salty and crunchy. While you’ll find a wide variety of chips in the market, nothing defines comfort best than gorging on some homemade desi munchies. Speaking of desi snacks, banana chips are one such snack that are quite popular in South India. This yummy snack is known for its thin and crispy texture, and makes for a delicious snack to munch on. 

Also read: 5 Best Chips Recipes To Prepare At Home: Potato Chips, Banana Chips & More

These crispy delights are made from raw unripe bananas and are deep-fried until golden in colour. They can be sweet or savoury in flavour, and are often seasoned with masalas such as red chilli powder and black pepper. While most of us prefer buying this South Indian snack from the market, it’s best to make fresh banana chips at home. Now you may think that making banana chips from scratch requires a lot of time and effort. But what if we tell you that you can easily make this yummy snack at home? Here we bring a simple banana chips recipe that’ll ensure that they turn out to be super crispy.  

cjiru6do

Here’re Some Tips To Make Crispy Banana Chips At Home: 

1. Use The Right Type Of Bananas

Using the right type of bananas helps in ensuring that your banana chips turn out to be crispy. Opt for firm and unripe bananas as they have a low sugar content. If possible, try to get your hands on starchier banana varieties like the Nendran and Saba cultivars.  

2. Slice Them Thinly 

The next thing to keep in mind while making banana chips is to slice them thinly. Make sure that they are sliced uniformly, as this allows them to cook evenly. The thinner your banana chips are, the crisper they will be.

3. Soak Them In Salt Water 

Once you’ve sliced the bananas, soak them in a bowl of salted water for a few minutes. This helps in removing excess starch from the bananas and prevents them from sticking together while frying.  

Also read: Bored of Potato Chips? 5 Unique And Delicious Chips Recipes You Should Try At Home
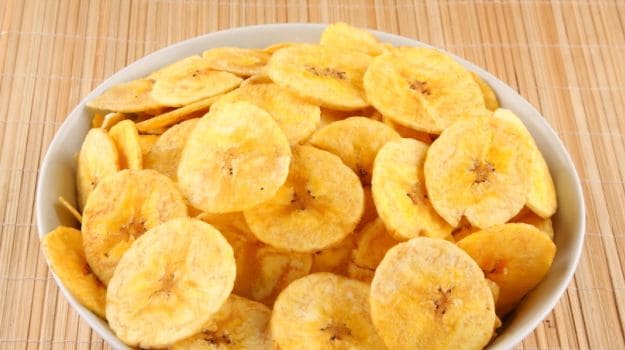
banana chips

Crispy Banana Chips Recipe: How To Make Crispy Banana Chips 

To begin with, add banana slices, salt and turmeric in a bowl and let it set for around 4-5 minutes. Now, give it a good mix and transfer to a colander to drain completely. Heat some coconut oil in a kadhai set on medium flame.  

Add the banana slices in small batches and fry until crispy and golden in colour. Once done, transfer onto a paper napkin. Sprinkle some salt and red chilli powder on top and allow them to cool. Store in an air-tight container for up to a week. Serve and enjoy! 

For the complete recipe of crispy banana chips, click here. 

Try out this recipe and let us know how it worked for you in the comments section below. If you’re looking for more South Indian snacks, click here for some of our best recipes. 

Cooking Tips: How To Make Perfect Rajasthani Bati At Home

Cooking Tips: How To Make Perfect Rajasthani Bati At Home

Bati is a popular Rajasthani bread made using whole wheat flour and ghee. Crispy from the outside and soft from the inside, this quintessential Rajasthani delicacy is an absolute delight to eat. It is typically served with dal, chutney, churma, and topped with a generous drizzle of ghee. Made using local ingredients, bati is quite flavourful and has a unique texture. However, making it at home can be quite challenging. Did your bati turn out to be too soft or too hard? If you’re someone who often faces this problem, we’ve got you covered. While it may take some practice to perfect the art of making this Rajasthani bread, here are some easy tips that’ll come in handy the next time you struggle to make bati at home.

Also read: Rajasthani Dal Bati Recipe Will Give Your Weekend Meal A Royal Makeover

dal bati

Do you often find yourself wondering?…

Why Is My Bati So Hard?

Bati tastes best when it is neither too soft nor too hard. Your bati may turn out to be hard if you fry it for a longer period of time. There are chances of over-frying, and this could easily make it harder from the inside.

What Are The Types Of Bati?

This Rajasthani bread can be relished as is or stuffed with various fillings. You can stuff it with peas, onions, potatoes or even sattu.

Who Invented Bati?

According to studies, it is believed that bati was invented by the founder of the kingdom of Mewar – Bappa Rawal. Back then, it was their preferred war-time meal. 

Also read: 11 Sumptous Rajasthani Recipes | Popular Rajasthani Recipes

5b5kmht

Here Are Some Tips To Make Perfect Rajasthani Bati At Home:

1. Knead The Dough Well

Kneading the dough well is the first step in ensuring that your batis turns out to be of the right texture. If you knead the dough too smoothly, it will ruin the crispness of the batis. Always knead a firm dough instead of a smooth one as this allows them to retain their shape.

2. Bake It

Batis are traditionally cooked in a tandoor. However, since most of us do not have access to a tandoor, it’s best to bake them. While some people also choose to fry them, there are high chances that you might over-fry them. Baking is much simpler and allows you to check the hardness of the batis.

3. Add Loads Of Ghee

Ghee is something that you simply cannot compromise on while making batis. It gives them a rich flavour and helps enhance their taste. Make sure to rub the dough with enough ghee instead of water.

4. Add Yogurt

Another ingredient that can help you make perfect batis at home is yogurt. While kneading the dough, you can add 1-2 tsp of yogurt along with the ghee. This too helps in enhancing the flavour of the batis.

Try these tips and let us know how they worked for you in the comments below.

About Vaishali KapilaVaishali finds comfort in eating parathas and rajma chawal but is equally enthusiastic about exploring different cuisines. When she’s not eating or baking, you can often find her curled up on the couch watching her favourite TV show – FRIENDS.

Indian Cooking Tips: How To Make Soft And Fluffy Poha

Indian Cooking Tips: How To Make Soft And Fluffy Poha

Poha is one of the most popular Indian breakfast dishes. Made with flattened rice that is steamed and cooked with a wide variety of veggies and masalas, poha never fails to disappoint our taste buds. The best part about this dish is that it is super light on the stomach and has a number of variants in different parts of the country. Be it the classic Indori poha,Maharashtrian kanda poha or Nagpuri tarri poha, they all taste equally divine! Now, it may seem easy to make poha at home but it is also something that can go wrong very quickly. Poha tastes best when it is super soft and fluffy, and achieving this consistency at home can be quite challenging. To help you make the perfect poha, we have jotted down some easy tips that’ll definitely come in handy the next time you decide to make this dish at home. Take a look.

Also read: Want To Lose Weight? Try This Protein-Rich Poha For Your Next Breakfast

g3itoj8g

Here’re Some Tips To Make Soft And Fluffy Poha At Home:

1. Rinse The Poha Nicely

The first thing to keep in mind while making poha is to wash it thoroughly. The best way to do this is by rinsing it under running water. Once done, squeeze out all the excess water using a strainer and allow it to dry.

2. Don’t Soak It For Too Long

Once you’ve rinsed the poha, it’s time to soak it in water. However, make sure to soak it only for a few minutes as soaking it for an extended period of time could end up ruining its texture. This would also make the poha extra soggy, and this is something we certainly do not want.

3. Fluff The Poha

Another tip that works like wonders while making poha is to gently fluff it with your hands before cooking. This helps in separating the grains and making the poha less clumpy and mushy. You could also use a fork to fluff the poha.

Also read: Different States, Different Specialities: 5 Poha Recipes From Across India To Spruce Up Your Breakfast

i5qnhn2

4. Cook On Low Flame

Another common mistake that most of us make while making poha is cooking it on medium-high flame. Overcooking the poha can end up making it super dry and hard. In order to retain its moisture, cook it only for a few minutes for the best results.

5. Add A Dash Of Milk Or Lemon Juice

Lastly, if your poha is still a bit dry, you can add a dash of milk or lemon juice. Adding milk or lemon can help add moisture to the poha while enhancing its flavour. Make sure to add either of these ingredients only after switching off the gas. Cover it with a lid for 4-5 minutes for an extra layer of moistness.

So, the next time you make poha at home, keep these tips in mind! Happy Cooking!
 

About Vaishali KapilaVaishali finds comfort in eating parathas and rajma chawal but is equally enthusiastic about exploring different cuisines. When she’s not eating or baking, you can often find her curled up on the couch watching her favourite TV show – FRIENDS.

Watch: Secret Tips To Make Perfectly Crispy Aloo Chips That Will Last A Year

Watch: Secret Tips To Make Perfectly Crispy Aloo Chips That Will Last A Year

Whether it is for evening snacking, or late-night munching paired with meals like sandwiches, aloo chips stand out as the preferred option. Homemade aloo chips are commonly seen in Indian households as they offer the same crunch and saltiness, minus the preservatives. But one problem that all home chefs face is that the chips turn black, soggy and unpalatable sooner than expected. Do you also face a similar issue? You are going to thank us for these superb tips that we dug out for you to make long-lasting aloo chips at home.  

In a video posted on the YouTube channel ‘Cooking With Reshu’, we found out some great hacks to make the perfect homemade aloo chips that don’t turn black and remain crispy for a long time. We listed down the recipe with tips for you here.  

(Also Read: Indian Cooking Tips: How To Make Street-Style Crispy And Khasta Samosa)

4931enn

You can easily make aloo chips at home. Image Credit: iStock

How To Make Crispy Aloo Chips I Homemade Aloo Chips Recipe  

1. First, take large-sized potatoes. Wash and peel them and put them in water. This ensures that the potatoes don’t turn black when cooked. Then cut them into round slices.   

Tip: After cutting the slices, immediately put them in water. This is also an important step to prevent the blackening of the chips later.  

2. Now wash all the slices in water.  

Tip: Wash thoroughly 2-3 times. This removes the starch from the potatoes and lengthens their life. With low starch content, the chips will retain shape for a long time. 

3. Now boil some water and add salt to it. When the water starts boiling, add the raw potato slices and cook with the lid closed.  

Tip: The water should be fully boiling when you put the chips, the slices may cook unevenly otherwise. If you put slices in cold or par-boiling water, some of the chips will dunk to the bottom of the vessel and will cook later than others. 

4. Boil the slices for 5-7 minutes, not more than that.   

Tip: Keep shuffling and turning the slices so that all the slices cook evenly at the same time. Take a ladle and keep turning the slices after a minute so that both the sides of the chips get heat from the gas. 

5. When foam forms in the water, take it as a sign that the slices are cooked.   

Tip: Another way to know if the slices are cooked is that the ends slightly curl inwards. The chips should be crispy and should not break when touched.  

6. Take off the slices from the gas, drain the water through a strainer and dry in the sun for 1-2 days.  

Tip: Sun-drying is a long process but it gives an everlasting crispiness to the chips. If the weather is sunny, one day should be enough or else it may take up to 3 days too. Check if the chips have hardened to know they are dried enough.  

7. Store these chips and fry them whenever you want to consume them.   

Also Read: 5 Tricks To Make Perfect Street-Style Aloo Tikki

Try this recipe and these tips to make the perfect homemade potato chips. Watch the complete recipe video here:  

Featured Video Of The Day

Cooking Beyond Boundaries: Chef Gaggan Anand In Conversation With Gargi Rawat

Indian Cooking Tips: How To Make Street-Style Crispy And Khasta Samosa

Indian Cooking Tips: How To Make Street-Style Crispy And Khasta Samosa

Be it any occasion, festival or celebration, samosa is always the star of snacks platter. We can never get enough of this classic Indian street food, no matter how many times we have it. It’s available in every nook and cranny of the country, and is even prepared in household kitchens. While making samosa is a fairly easy job, but not everyone is able to replicate the same street-style samosa at home. Do you also often find your homemade samosa turning soggy? Do you wonder why the samosas available in all the street shops are so crispy and not yours? You will get your answers today.

(Also Read: How To Make Street-Style Chicken Biryani In Just 30 Mins)

In a video posted on YouTube channel ‘Cook With Parul’ we found out some amazing tips to make street-style samosa that are khasta and crispy. We noted down the recipe with tips for your reference. So without wasting any time. Let’s get started.

Also Read: 5 Tricks To Make Perfect Street-Style Aloo Tikki

Street-Style Samosa Recipe I How To Make Crispy Samosa At Home:

1.Start with dough for samosa. Knead dough with maida, a dash of salt, crushed ajwain and some oil. Some people add ghee but it is oil that gives more crispiness to the samosa than ghee. Add water gradually to knead the dough.

Tip: Always remember to keep the dough tight, not soft. If the dough is soft, the samosa will turn soft soon after frying. Also ensure that the dough is not too rough. 

2. Let the dough rest for around 15 minutes. 

Tip: Spread some ghee on the dough after it has rested for some time. This will ensure that the outer layer is khasta and crispy. 

3. Make stuffing for the samosa. Saute jeera, hing, crushed whole coriander seeds (dhaniya), ginger, green chillies and peas. Then add crushed boiled potatoes. 

Tip: You should roughly crush the potatoes, not grate it or cut into pieces. 

4. Add seasonings like coriander powder, red chilli powder, cumin powder, turmeric powder and garam masala. Also add salt, amchoor powder/chaat masala, kasuri methi and chopped coriander leaves. 

Tip: Roast the masala well. There should not be any water/moisture left. Saute till dry and let the mixture cool down.

5. Now divide the dough into small parts and roll into small thin rotis. Cut each roti into half. Dab some water on the ends so that it doesn’t open while frying. Place stuffing and seal into the shape of a samosa.

Tip: 1 spoonful of aloo mixture is enough. The stuffing should not be too much or too less. Also, leave the rolled and shaped samosas out in the open for some time before frying.

6. Fry the samosas till crispy brown.

Tip: Fry on medium flame so that samosas cook well to the core and turn out crispy. 
And your perfect samosas are ready!

Also Read: How To Make Pav Bhaji In A Pressure Cooker

Watch the complete recipe video of street-style samosa here:
 

Featured Video Of The Day

Bread Pizza Recipe | How To Make Bread Pizza

Cooking Rice Noodles Like A Pro Is Easy With These Tips

Cooking Rice Noodles Like A Pro Is Easy With These Tips

Rice noodles are becoming a favorite because of to their gluten-no cost character. A staple component in Asian delicacies, rice noodles have to have precise expertise to cook them. Like pasta, they arrive in a variety of shapes and dimensions that need varying cooking occasions. If you’re new to making Asian recipes with rice noodles, cooking it can be scary. These noodles need several cooking approaches. On the other hand, with a few handy ideas, you can ace the process

Over the earlier couple of decades, gluten-cost-free diet plans have attained much reputation. If you are a fan of noodles, then take into consideration rice noodles. The use of noodles made from rice might be traced again hundreds of many years in several Asian areas. These are delightful and absolutely free of charge of gluten. If you have not sampled them nonetheless,  the most straightforward way to devour them is at an eatery. But practically nothing beats a perfect handmade meal. Rice noodles can be a true bear for newbie cooks attempting to make this delicacy for the 1st time at property. Inexperienced cooks frequently discover rice noodles disappointing due to the fact they immediately become inedible mush if they usually are not properly organized. Frequent dilemmas contain regardless of whether or not to use sizzling h2o and whether or not to soak the rice noodles to start with. Oh, do not be concerned. In this article are a number of tips of the trade for making perfect rice noodles, just like a skilled Asian chef.

Right before you begin, you must know that rice noodles, like pasta, arrive in different styles and dimensions. So, firstly, discover the form you are utilizing. The three frequent varieties are vermicelli, fresh new rice noodles, flat rice noodles and bigger, wide flat noodles. 

Soaking vermicelli rice noodles

Common Vietnamese and Thai dishes aspect them frequently. Use these ultra-skinny rice noodles in salads, stir-fries, and soups. This variant has a rough texture. Pour area-temperature water into a huge bowl. Drop the vermicelli into the drinking water, and allow it sit for a few minutes until eventually it turns opaque. Pull the noodles aside with your fingers to individual them. Get the noodles drained. When generating noodle soup, carry the broth to a boil, blend in the noodles, and right away take out from warmth. Make confident to provide right away.

Draining the h2o from noodles, Image Resource: Unsplash

Recommendations to prepare dinner flat rice noodles

To start, fill a bowl with drinking water at place temperature. Insert pad thai or flat rice noodles. Go away in the h2o for at minimum 10 minutes. Toss the noodles in a strainer and operate your fingers via them to take away excessive h2o and reduce them from sticking. Coat the noodles in neutral oil, these as rice bran oil, if you is not going to be cooking them right away. When planning a recipe for stir-fries, flat rice noodles must not be boiled. They are inclined to change into a mushy mess when thrown into a wok. Introducing a bit of drinking water to your pan halfway by cooking will permit the noodles to steam cook dinner with no overheating.

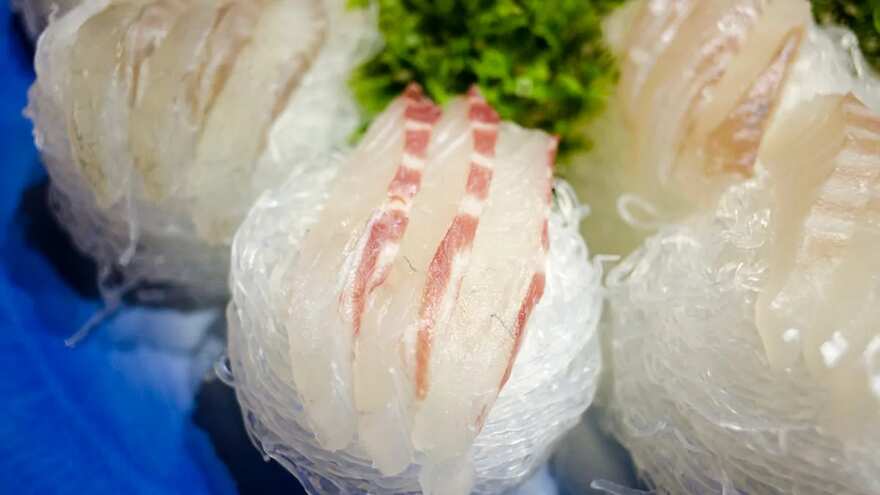
Korean dish with rice noodles and raw fish, Graphic Source: Pexels

On the other hand, new rice noodles are significantly extra delicate than their dried counterparts. These come pre-oiled for sale most of the time. You can usually discover them in your neighborhood supermarket’s refrigerated section or a speciality retailer. Cooks want to work out caution to avoid ruining a batch of clean rice noodles. This variation is fantastic for ending off any meal. You can even convert off the warmth to avoid overcooking refreshing rice noodles. To protect against overmixing, gently toss the noodles with a spatula.

A resolution to the sticking dilemma

Sticky rice noodles are a standard culinary blunder. A fall or two of rice bran oil will reduce cooked noodles from sticking alongside one another as they sit. Drizzle some oil in excess of the noodles and toss them gently to evenly unfold the oil. This must aid in preserving them from clumping alongside one another.